How to Prepare for a Thru-Hike
You’ve seen all the videos on YouTube about thru-hiking on long-distance trails. You want to prepare for a thru-hike of your own. The scenery is epic. The people look happy outside exploring.
And you want in.
But how do you prepare to take 6 months off work and actually start hiking?
I’ve been thru-hiking for 15 years and in this post, I’ll detail how I prepare for a thru-hike on a long-distance trail. Over the years, I’ve started thru-hikes straight from the couch and I’ve prepared extensively. I’ve come to a middle option that I find works best!
These tips can be applied to any thru-hike, but I’ll use the Continental Divide Trail (CDT) as my primary example. If you’re looking to hike the Appalachian Trail (AT) or the Pacific Crest Trail (PCT), these tips will help there, too!
This post contains affiliate links. I have used every product mentioned, and if you purchase one of these products, I can make a small commission at no cost to you.
List of Contents
Preparing for a Long-Distance Thru-Hike

Whether you’ve thru-hiked before or not, it’s always good to prepare. Thru-hikers who have already hiked thousands of miles still need to do some research before they hike. If you’ve never thru-hiked before, you might need to do a little more research.
Start with these tips below to set you up for success as you prepare for a thru-hike.
You’ll want to:
- 💰 Save money ahead of your hike
- 🎒 Buy your backpacking gear
- ⛺️ Test your gear ahead of time
- 🌯 Have a resupply plan
- 📲 Download maps
- 🏷️ Get permits if needed
- ✌️ Quit your job!
Save Money Ahead of Your Thru-hike
A thru-hike on the CDT, AT, or PCT can cost between $3,000-10,000 depending on several factors:
- If you already have your gear or not
- How many zeros you take (days off in town)
- The number of restaurant meals you eat
- How much gear you need to replace on trail
- The type of food you pack out with you
- Normal bills that you need to upkeep while on trail (phone, auto insurance, rent, mortgage, student loans etc)
That being said, a first-time thru-hiker inevitably spends more on their hike those on their 2nd or later thru-hikes. There’s nothing wrong with that. Also, it will often take a first-time thru-hiker time to adjust to trail life.
💰 The time it takes you to save money for a thru-hike depends on your personal financial situation. I’ve found that most people can save enough for a thru-hike in 6 months to 1 year.
If you’re serious about thru-hiking ASAP, then it’s time to double down on your spending.
📊 Take a good, hard look at where your money is going. Start to see every purchase as: if I DON’T buy this, how many town stops will it pay for on my thru-hike?
For example: the average cost of a drink at Starbucks is $2.75. ☕️
If you have 1 Starbucks per day Monday-Friday that means you’re spending $13.75/week.
Over the course of 1 month, you’re spending $55 on coffee.
Over a 6-month saving period, that’s $330. 🤯
You’d probably spend $30 on ground coffee at your house, meaning you now saved $300.
➡️ That $300 is enough for one fancy town stop on trail or two budget town stops on trail.
Buy Your Backpacking Gear (Less is More!)

While you’re saving money and before you quit your job, buy your backpacking gear. ⛺️
📝 There are 100 different articles about gear lists.
Why?
Because everyone has different bodies and therefore different preferences about what is comfortable and what is not.
There are no one-size-fits-all setups.
Likewise, everyone will draw different lines of where they can save weight and suffer.
⛺️ Buy gear with intention and DO NOT get some sales rep to oversell you on a boatload of gear. Less is More!
While you’re looking at gear, it is important to balance weight and affordability. Make a gear budget and then buy the lightest equipment you can on that budget.
Test Your Thru-Hiking Gear Setup

I cannot stress this step enough!
➡️ Pro-Tip: Once you have your gear set up, take it out on an overnighter. Literally, walk three miles away from your car and sleep for a night. This will tell you SO MUCH about what you need and don’t need.
Obviously, you can do a much longer trip to prepare for a thru-hike, but if you can’t swing it, do what you can.
On your test, you can:
- 🎒 Adjust your backpack
- 🤔 Try packing your backpack in different ways
- ⛺️ Learn how to set up your shelter
- 🍳 Try cooking a meal you’d eat on trail
- 👟 See if your shoes really fit correctly
- 👗 Try out different clothing options
Since we often try new gear or switch layering systems, Karma and I always make sure to take a test hike.
Before the CDT in 2022, we went into the Superstition Mountains in Arizona for a test overnighter. We wanted to go out in a storm to see how the Haven Tent did in the wind and rain. From the hike, we learned it works quite well! We wanted to take the dry net tent out from under the tarp while it was raining. I’m happy to say that it was quite easy to do.
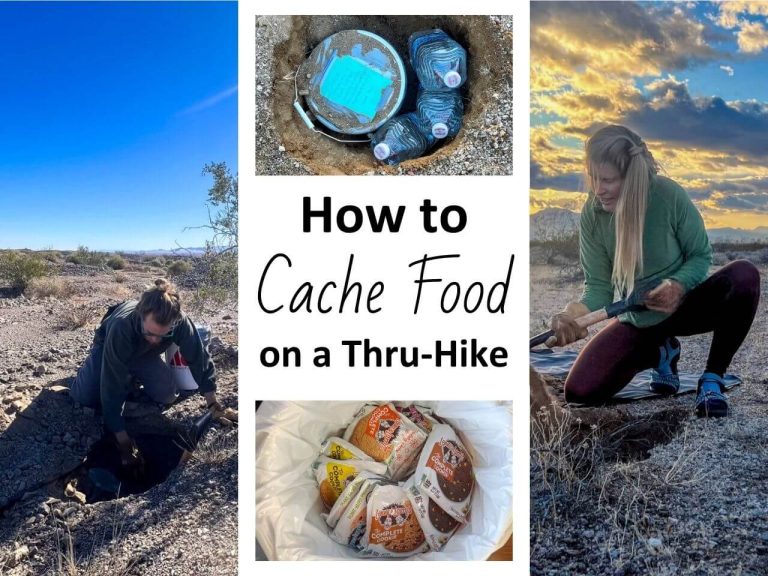
Prepare for Your Thru-Hike with Packages for Someone to Mail to You
⚠️ On trails like the Continental Divide Trail (CDT), there are several towns where you must send yourself food in the mail, ESPECIALLY if you have dietary restrictions. 🥕
This is less necessary on trails like the AT or PCT, however, each has a few towns without any good options.
⛽️ While some people can run on junk food from gas stations for hundreds of miles, I am not one of them. I can supplement junk food in, but I find it very hard to do a full resupply from a gas station. AND, some towns don’t even have a gas station.
📦 Thus, it’s important that you know where these towns are and prepare your packages ahead of time.
On some long trails, you might also need different gear throughout a trail. For example, on the CDT going northbound (nobo), you will need bear spray in South Pass City/Lander 🐻. You can hitch to Lander and buy it OR you can mail it to yourself via ground shipping to South Pass City.
➡️ The point being: you should have any gear that you might want or need on trail ready and labeled for someone to send it to you easily.
The same holds true on other remote trails like the Grand Enchantment Trail, the Hayduke Trail, the Pacific Northwest Trail, and many others.
Dehydrate Food

📖 If you really want to step up your trail food game, get a dehydrator and this book. If you’re going to dehydrate even some food for yourself…think ahead!
It will take some time to determine how to use the dehydrator and what works best for you.
I’m lucky enough to have a retired Mom who loves to cook and has learned how to dehydrate delicious food.
🥦 As someone who is mostly vegan (I eat happy chicken eggs), this helps me stay much healthier while thru-hiking.
What to Do if You Don’t Have Someone Who Can Mail You Packages
What if you don’t conveniently have a retired parent who wants to help you on your thru-hike?
Option 1️⃣: You can always do the fewest possible packages and leave them with a responsible friend along with some cash to mail them for you at given times.
Option 2️⃣: If you need boxes at the beginning of the trail, send them out right as you leave. Then, find big towns a few towns before towns with nothing, and make a box in your motel room to send to yourself on trail.
For example, going northbound on the CDT, you could send a box to Lordsburg and Doc Campbell’s right before you start hiking. Then, once you get to Silver City, NM, you can go to Albertson’s or Walmart and make a box to send to Pie Town, NM, and a second box to Ghost Ranch.
Likewise, from Grants, NM, you can send yourself a package to Chama, NM.
Basically, with a little forethought, you can send yourself boxes AS YOU GO while on trail.
Download Maps and GPS Information


With more and more phone-based navigation occurring on trail, it’s helpful to get everything you need first.
Tip: Download as much as your phone can hold ahead of time because trail town wifi can be very hit or miss.
I use both Far Out Guides (formerly Guthook) and Gaia GPS. Here are the 5 best GPS Hiking Apps.
For sure, get all the maps and GPS data downloaded to your phone for at least the first state. This is one less thing to worry about in town once you’re on trail. It’s a huge thing that I do as I prepare for a thru-hike.
Personally, I make sure I have as much phone storage as possible to download all the maps ahead of time.
If you are using Far Out, I also suggest downloading the waypoint photos. Sometimes when you’re looking for an obscure water source, it’s helpful to know what it looks like while you’re searching for it.
After you finish a state, you can delete the GPS information and maps to make room for more photos and videos.
Get Permits
📝 Make sure you look at any permits you’d need ahead of time. Some you need to get before you start hiking (like the dreaded PCT permit) and others you can get on the go.
⚠️ Important ones to note on the CDT as you get closer are Yellowstone and Glacier National Parks. Glacier has a relatively easy walk-up permit system, but Yellowstone’s can be a little trickier.
Whichever way you decide to get permits for the National Parks, remember that the backcountry rangers are human. They are busy and dealing with people all day. A little kindness and respect go a long way. Your hike is just a very small portion of their day.
Move Your Legs (Preferably with Your Backpack on)

The physical aspect of a thru-hike should not be overlooked. It is incredibly helpful to prepare for a thru-hike to have some level of fitness before you start hiking, especially any endurance training.
You *can* get off the couch and start a thru-hike. However, you’re much more likely to get injured this way.
What’s the best physical training to prepare for a thru-hike?
Backpacking! ⛰️
As much as you can, go backpacking. Do multiple test hikes.
🏋️ If you live somewhere where this is not easy, get a gym membership. Load up your backpack with either your setup or other equivalent weight. Get on the ellipticals and treadmills. I guarantee people with either a) think you’re a total badass and get a little intimidated or b) come make friends with you because you look awesome.
⛷️ If that is not an option, jogging, running, biking, or hard skiing with up your endurance. While they use different muscles, your body will become accustomed to movement, and that will still help you for your thru-hike.
Quit Your Job
This is probably the #1 thing to do to prepare for a thru-hike, even though it will be one of the last things.
After you save money and buy your gear, it’s time to quit your job.
I know it’s scary. 🙈 But, you can do it. 💪
If you hate your job, it will feel pretty good.
If you like your job, there is always the option to ask your boss for 6 months off. You’d be surprised how many bosses like seeing their employees take charge of their dreams. 🤷♀️
Thru-hiking can give you the push you need to change employers or even switch careers. The hike will give you plenty of time to think about where you want to go in the future. Although sometimes you will finish with more questions than when you started.
You can always get a ski season job after thru-hiking, or if you have a van, you could head to the Sugar Beet Harvest (apply before April)!
Do a Little Research on the Terrain Ahead of Time
I recommend doing a little research on what terrain you’ll go through before you get out there. For example, you want to know the areas where it might get colder or warmer than average. Or, you might want to know where you need to send snow gear.
Some trails need a lot more prior research than others. I believe the CDT is one of them.
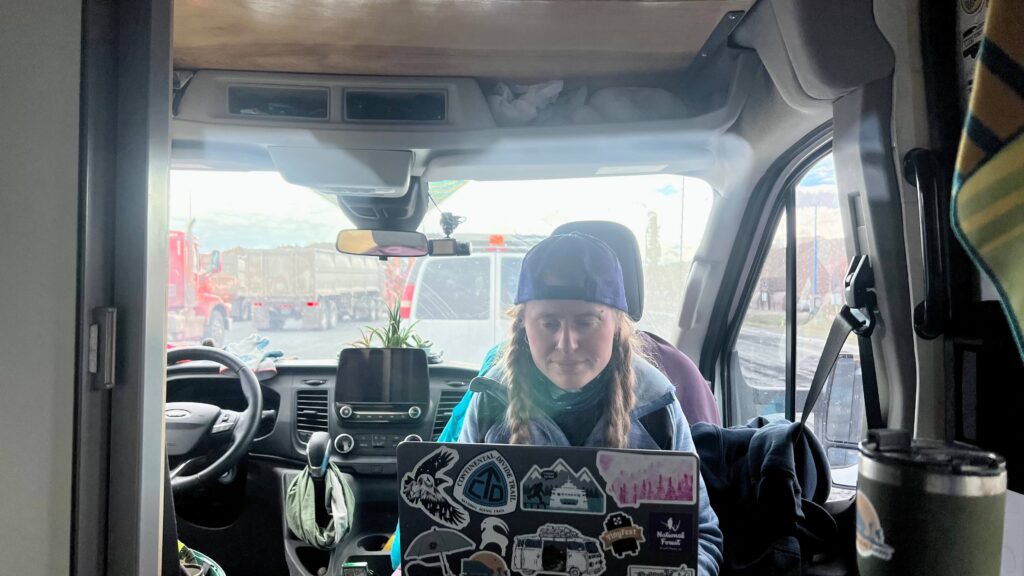
I always research in the off-season while working…like above on my break at the Sugar Beet Harvest.
CDT Specific Research
I wrote a series on the major areas of the CDT that will help you.
In New Mexico, you’ll be confronted with a few things, not on other major trails. For instance, the heat of the first 150 miles is next level. New Mexico also has road walks. They’re not the best, however, I wrote a whole post on How to Have Fun on Road Walks.
Colorado offers some of the best views but is likely the most challenging state for most people. You might call this the crux of the CDT. Colorado on the CDT is one to plan ahead for!
Once you escape the difficulty of Colorado, you dive right into the Continental Divide Basin in Wyoming. There is more than meets the eye here, and tune your eyes into pronghorn!
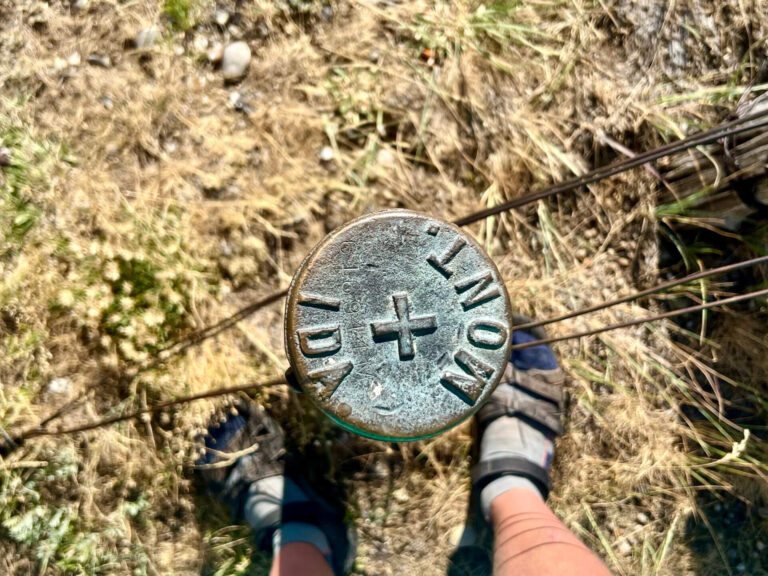
If you hiked the AT and remember the roller coaster in Virginia…it’s got nothing on the Idaho/Montana Border of the CDT.
Between the middle of Wyoming after the basin until the Canadian Border, you’ll need to pay attention to grizzly bears. Here are 9 Hacks to Thru-Hike in Grizzly Country to help you and the grizzlies stay safe. We use these hacks consistently, and from them, we have positive, safe encounters with grizzly bears.
Conclusion: Do Prepare for a Thru-Hike, But Don’t Overprepare

There are no one-size-fits-all preparation techniques. This is what I prepare for a thru-hike after 15 years of thru-hiking and backpacking.
I find it important to be both physically prepared and mentally prepared by knowing some of the challenges coming my way.
🧘♀️ Knowing that I have good, healthy food coming my way helps me mentally.
📲 Knowing that I have all my navigation options set and ready to go puts my mind at ease.
⛺️ And knowing that I’ve tested my gear ahead of time, I’ve shaken out some of those pre-hike jitters.
Let me know in the comments if you do something different or if this post helped you 🙂