The Super Simple Guide to Choosing the Perfect Van Fridge
This post will detail many van fridge options for your camper van conversion.
We love our refrigerated veggies out on the road.
Who doesn’t?
But, how much fridge space do two people really need in a van?
And, once you determine the fridge size, how the heck do you build it into a van?
There’s nothing worse than trying to make do with a cooler. You have to get ice. Then, the ice melts. To keep it cold you can’t open it often. Then, you discover that your key ingredient is all the way at the bottom of your carefully packed cooler.
Here is my vanlife guide to picking a van fridge that is perfect for you. I’ll also include full instructions on how we installed ours.
Van Fridge: AC or DC (120v or 12v)
Before you dive into fridges for Vans, RVs and boats, this is the most important decision you make. That is, what type of power will you run it on? 120v AC power or 12v DC Power are the two main choices for van lifers.
The main difference between AC and DC power in a van is that DC power is far more efficient.
To run a 120v van fridge, you would need an inverter to be on and constantly converting your 12v DC power into 120v AC power.
Having an inverter turned on simply takes power without anything plugged into it. Having the inverter convert power takes a lot of power (depending on the device).
If you depend on the inverter for your fridge, you may run out of power more often when it’s cloudy or you’re not driving a lot.
So what are the biggest pros and cons of each?
If you go with a DC fridge, it costs more up front. However, you can probably get by with a smaller battery bank.
If you go with an AC fridge, it costs less up front. But, you may need an extra battery to compensate.
We opted for a DC van fridge. Partly because we never wanted to worry about using up our power or food going bad.
Upright Fridge or Top Loading Fridge/Freezer
Another big decision to think about is if you want an upright fridge (like your house), or a top loading fridge (like a cooler). There are advantages and disadvantages to both.
Personally, I prefer upright fridges because I like seeing what’s in them. I lose less things in the fridge when it’s upright.
In coolers, I forget items and they end up going bad on the bottom. I also like having a door to separate condiments and oat milk from the rest of the items.
However, top loading fridges have advantages, too. They are often more energy efficient.
Many of them also allow you to have half of it a fridge and half a freezer. Those also allow you to switch it to having both sides as a fridge or both sides as a freezer. If you have a lot of freezer food, you may want to look more into these.
Sizing the Fridge and Purchasing It
Sizing your van fridge is relatively easy to do. One person in a van could use a smaller fridge, while two people may need more space.
Look at the fridge you are using in your house or apartment. Then ask these questions:
- How much space do you use?
- Could you try using only one shelf or two shelves for a little bit?
- Do you really need all those condiments that add up?
- How often do you go grocery shopping?
- Do you need a lot of freezer space? Then, do you need all that freezer food if you don’t have a micromave?
- How many fresh vegetables do you normally have?
Based on what you currently use, estimate how much space you’d need in the van.
For example, Karma and I have shared many fridges in apartments with roommates. We knew that with careful stacking, we could fit onto one shelf in an average fridge with one produce drawer.
Knowing that, we purchased a large fridge, but not the absolute biggest.
We ended up picking the Nova Kool r4500. This met our van fridge needs and it had enough of a freezer to work with.
Our freezer can hold six one-pound bags of frozen berries, two boxes of veggie burgers, and three bags of other fake meat products. Not too shabby.
While we like having a freezer, we don’t often eat many frozen foods. A large freezer is just not a necessity for us.

Building a Fridge Box
Below is a description of how we installed the Nova Kool r4500.
Even if you pick a different fridge than us, you may find some of the tips we add helpful.
Fridge Box Directions
The Nova Kool r4500 gave very clear dimensions for a box to house the fridge. It included very specific amounts of ventilation to add as well. Other than that, it did not give many other directions.
Since we built multiple boxes already for the water system, the propane system, and the electrical system, we knew boxes.
We found the appropriate box dimensions on this spec sheet for Nova Kool fridges. These dimensions allowed for the ventilation that the direction booklet specified.
The Stove Complication
Of course, we complicated the box by making the stove compartment above it. The Furrion stove we purchased also have very specific box dimensions.
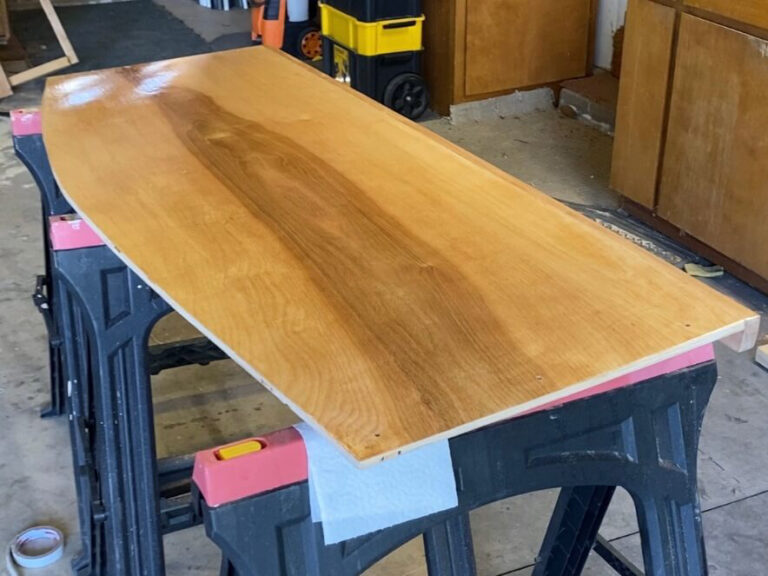
At this point, we also needed to determine what we wanted as a countertop material.
Why?
Because the height of the stove portion of the fridge box depended on the thickness of the countertop.
Our first choice of countertop was a bamboo one from Ikea. However, due to the pandemic, it was sold out. We ended up choosing a 1” thick bamboo Work Bench Pro top.
Knowing that the countertop would have a 1” thickness, we could then build the fridge box accordingly.
Cutting the Van Fridge Box
With clear measurements, we pulled out a sheet of 1/2” birch plywood. We determined how to cut out each piece to waste as little wood as possible.
Then, we set about cutting all the pieces out. We used a circular saw with a large straight edge metal rod and two 6” ratchet clamps. Out of the plywood, we made three sides and a bottom.
Karma cut Kreg Jig holes into the box pieces. Then, we screwed and glued it. We added some large clamps and let the glue dry overnight.
In the morning, we cut the piece between the fridge and the stove. We had a sheet of 3/4” Baltic birch plywood to cut for it.
After a lot of measuring, we screwed that in place from the outside of the box into the sides of the 3/4” piece.
Then, we tested the fridge and the stove in their perspective places. Magically, they fit!

Adding the Required Ventilation
The Nova Kool r4500 was specific about its ventilation needs. That included 30 square inches on the top and 30 square inches on the bottom. The fridge sucks in air on the bottom and vents it out the top.
Most fridges need some sort of ventilation. It is important to note this when building.
Each of those 30 inches of ventilation is divided in two areas. The air intake is divided between the underside of the fridge and the left back bottom of the box. The air outtake is divided between the top portion of the box and the left back upper side of the box.
The side areas would vent into the sink cabinet and were easy to make. We made a 3” x 5” rectangular hole in the upper left wall and a 4” x 5” rectangular hole on the lower left wall. These we covered with some wire mesh.
In the back bottom of the box, we added 1 3/4” holes in a line. We did the same thing into the 3/4” Baltic birch top. Since the stove required its own ventilation in the same area, it worked out. We also covered these with wire mesh. Karma spray painted the upper holes and back of the cabinet black. I was hesitant, but it turned out well. Because our stove was black, if you looked through the ventilation holes, now you only see black, not plywood.


Including a Toe Kick Under Your Van Fridge
We knew we wanted to include a toe kick under the fridge. With the fridge under the countertop, there’s nothing worse than having awkward foot placement as you try to get a snack.
If you have any upright fridge, I recommend including a toe kick in your design.
At this point, we had the shower installed (mostly) and we had a wall made the wall dividing the bed from the kitchen.
That left us with our kitchen space in the middle.
Instead of making regular cabinetry, we added three 2x3s with 1 3/4” holes in them. These holes occurred on the fridge side, not the sink side. Then, we screwed the 2x3s to the floor with L-brackets.
The fridge and stove box would sit on top of the 2x3s.

Wiring Your Van Fridge
Previously, we had run a wire from the electrical area to the fridge location. Based on our Fridge’s power needs and the distance the wire would travel, we used 14/2 wire.
This will vary depending on which fridge you choose and the length of wire needed.
Just because you order the same fridge does not mean you need the same size wire. This depends on the distance of your fridge to your electrical system.
At the end of the wire, we added quick disconnects so if something ever happens to the fridge, we can disconnect the wires without severing them completely. Likewise, on the fridge itself, we added quick disconnects.
Finally, when we had everything in place to install the fridge, we connected the wires and pushed the fridge into the box. From there, we added the four required screws on the sides and covered them.
Flick the power on and listen to the sweet low hum of a refrigerator! Voila!
To learn for about wiring specifics and our electrical system, try these posts:
Conclusion
Before you buy your van fridge:
- Choose either an AC or DC powered fridge. This will be based on the size of your electrical system and your budget.
- Pick either an UPRIGHT fridge or a TOP LOADING fridge. This is mostly a matter of preference and dependence (or lack thereof) on freezer space.
- SIZE the fridge based on your current use of your fridge at home.
Once you pick your fridge out:
- Account for VENTILIATION by reading or skimming the instructions.
- Add a TOE KICK if you pick an upright fridge.
- Use a wire calculator to properly SIZE your electrical wire.
And, as always, feel free to drop a comment if you have questions 🙂