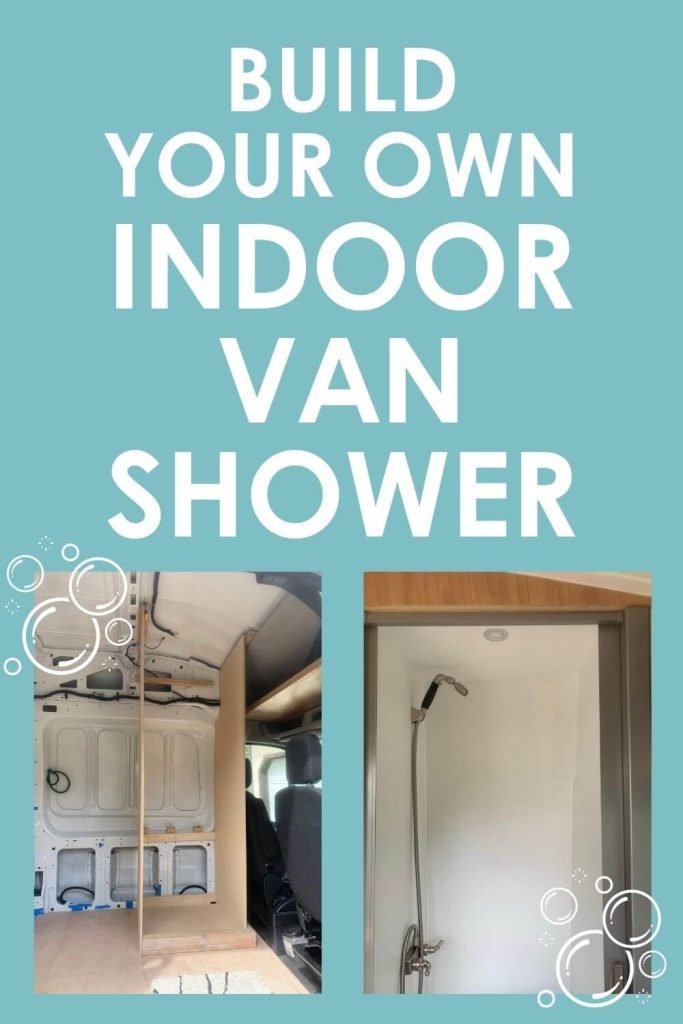
Van Shower: The KEY to Full Time Van Life
Having a van shower inside is a GAME CHANGER. It will revolutionize full-time van life for you. Trust me…it changed the whole way we thought about van life after 4 years without one.
Imagine finding the perfect, sought-after, free, level campsite with a beautiful view. Imagine having to leave that spot to shower in town, knowing someone else will be there when you come back. If you had an indoor van shower, you wouldn’t have to leave.
But what about outdoor solar showers? While several types of solar showers are on the market, portable outdoor solar showers are not quite the same. From my experience of 7 years of van life, if you want to make it last long-term, build yourself an indoor shower.
In this post, I’ll show you how we built our indoor van shower from start to finish. You can see itemized lists of campervan shower components and tools we used. Also included, you’ll find what we learned along the way and why we built what we did.
This post contains affiliate links. I have used every product mentioned, and if you purchase one of these products, I can make a small commission at no cost to you.
List of Contents
Build Your Own Van Shower: Indoor VS Outdoor Options
Before I dive into how to build your own indoor van shower, here are the main options to consider. As you read this, envision yourself using each option. Which would work better with your lifestyle and habits?
I’ve had both an outdoor solar shower (our old van) and an indoor van shower (our current van). Each has pros and cons, so I hope this helps you decide which you need based on your lifestyle.
Please note that there is ALWAYS some setup time, whether your shower is indoor or outdoor. You won’t see that on the list because it can vary drastically and be seen as a pro or a con.
Indoor Van Shower Pros and Cons
Pros:
- You can shower anywhere, including parking lots.
- No one can spy on you.
- It’s warmer inside without wind.
- Your feet stay cleaner.
- All your clothes are near.
- It warms the van.
Cons:
- You need an under-mounted gray tank.
- You need moisture control.
Outdoor Van Shower Pros and Cons
Pros:
- You keep extra moisture out of the van.
- You can fill some with river water.
- (Usually) Less power consumption.
Cons:
- You must be choosy about where you shower outside.
- Easy to get too much water under or near your van.
- Inevitably, your feet get dirty.
- You’ll want a portable privacy tent, or people watch you.
- Solar shower bags take hours to heat up in the sun.
- Even the slightest wind makes it cold.
If you opt for an outdoor shower, we used this Nemo Solar shower paired with a pop-up tent in our old van. It worked well enough and works excellent for part-timers who want to open more space inside their van. We also found it helpful to rinse the salt water off our paddleboards between uses.
An honorable mention is the Geyser Systems Portable Shower. We bought one a few years ago, hoping it would be warmer than our Nemo option, but it did not have enough water for my long hair. If you have short hair, this could be an ideal middle-ground option!
Major Considerations Before Building an Indoor Van Shower
Indoor van showers have come a LONG way in design and ideation in the last 5 years. There are a few options to consider before you build the same shower as we have.
My biggest piece of advice is to create your layout with cardboard boxes, the rough size of your design, and step into those spaces. You’ll know quickly if something just feels wrong. That’s a sign to switch your layout.
Here are a few major considerations before you build an indoor van shower.
Fixed Van Shower VS Convertible Shower
Just like the dilemma of a fixed bed vs a convertible bed, you have the same with a shower!
Fixed van showers take up more space but have less setup time.
They have easy-to-wipe-down walls, but those walls make the space less multifunctional. Of course, you can always have a wet bath. Or, you can have your composting toilet in your fixed shower and simply remove it like we do.
A fixed shower is awesome for any full-timer who needs to shower at least twice a week.
On the other hand, a convertible van shower is better for part-timers or for those who keep a gym membership. Maybe you only want the option to shower, but it’s not your main go-to.
Convertible van showers always take a bit more time to set up, but they can be made into an easy routine. They almost always use shower curtains, which take time to dry. However, they usually offer more counter space when they’re put away, making an area multi-functional.
The KEY here is to think about how often you want to shower in your van and how much effort you’re willing to put in to do it.
Van Shower Location: In Front VS Back Doors
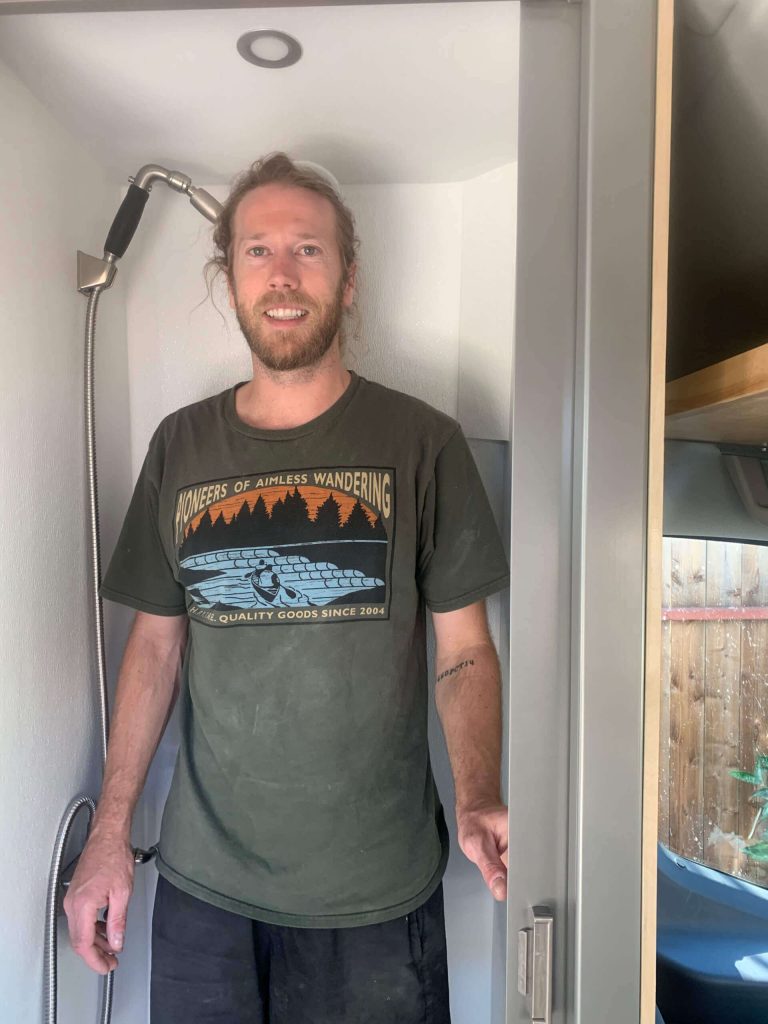
Placement of a van shower has two main areas: toward the front near the driver’s seat (like us) or sectioning off about 2.5 feet from the back doors. Of course, people have placed them in other areas, but those are the main two options.
We opted for the area behind the driver’s seat because it fit best for our “must haves” in our van’s layout (the fixed bed with an actual mattress).
This spot is excellent because:
- This location had the best area between two of the van’s support metal pillars for us to bolt into.
- It provides a half divider wall between the cab and the back for easier privacy when city stealth camping.
- It had space for an under-mounted gray tank.
The only downside is that it is one of the first things people see when entering our van.
In contrast, those with extended vans often opt to create more of a “bathroom” from the back doors. This allows for 2-2.5 feet of space to create a shower, toilet, and hanging mirror option.
However, it not only works better with extended vans, but also with those who create convertible bed-to-couch spaces.
Water Capacity Considerations
Before you build an indoor van shower, make sure you have enough water to support it.
Even with a low-flow shower head and pausing flow whenever possible, we each use roughly 2-3 gallons of fresh water. Thus, if both of us shower that’s 4-6 gallons of water.
Your water capacity needs depend on your lifestyle. For example, how often will you go to town to refill your water? Do you need to work in coffee shops and therefore pass water fill up opportunities often? Or do you like to stay out for a week at a time like us?
We opted for a 40-gallon water tank. For the two of us, this lasts about 7-8 days with two showers each, all drinking water, and cooking/dishes water. If we want to stay out longer, we have stretched this to 12 days with only one shower each.
Basically, if you’re going to build an indoor shower, I would not go with less than a 30-gallon capacity. If you do, you’ll find you’re not using your van shower because you’ll be conserving water.
Itemized Components to the Indoor Van Life Shower
After weighing the pros and cons as well as living with only a solar shower, we opted to build a fixed indoor van shower. This components list will provide you with the basis that you need to build your own.
Please remember that your van might have different dimensions and angles. Everything you build inside your van will affect the next thing you build in it. Therefore, no two DIY van builds will ever be totally the same.
Full disclosure: we built ours with the smallest footprint possible which works because we’re 5’2” and 5’9”. You can easily expand the footprint by picking a larger shower pan base, although these work better with extended length vans.
This is the list that I wish I had before my partner and I built our indoor van shower!
- Shower Pan
- Low Flow Shower Head *This one works AWESOME and has good pressure!
- Shower Water Mixer
- Nautius Retractable Shower Door
- Under-Mounted Gray Water Tank
- 3.5 Hardboard 8’ x 4’ sheets (for templates)
- 3.5 Baltic Birch ½” 8’ x 4’ plywood sheets
- 3 FRP sheets 8’ x 4’
- 1 8ft 2×4
- Furring Strips (depends on where you place your shower)
- 1 gallon Vermont Natural Coatings Penetrating Waterproofer
- 1 gallon Caliwel Mold and Mildew Prevention
- Many tubes of Loctite Marine Adhesive
- 1 Watertight Marine Hatch 6”
- Butyl Tape (approx. 16 inches)
- 1 LED Puck Light
- Assorted Riv Nut Set + accompanying bolts and nuts
- Shower Drain
- Shower tailpipe
- 1 roll Aqua Tape
- 1 gallon Liquid Nails FRP Glue
- 2 Kitchen and Bath Silicone Caulk Tubes
- 2 metal by the piece 1/8 inch thick
- 1 spray can Rustoleum
- ½ inch thick rubber floor mat
- 1 Can Big Gap Filler
- 1.5” p-trap *with cleaning hole at bottom
- 1 PVC 1.5” 45 degree angle
- 1 PVC 1.5” to 1.5” NPT (pipe threaded) adapter
- Extra 1.5” PVC pipe
- PVC Pipe Primer & Cement
- Not the cheapest Pipe Tape (the cheapest always leaks…get one level up)
- 1 Galvanized nipple ½” and 1.5” long
- 1 Galvanized cap ½” (drill holes for a vent)
- 1 Plastic ½”, 1.5” long nipple
- 1 Brass ½” pipe threaded elbow
- 1 Galvanized 3” nipple
- US Solid Motorized Ball Value, Brass, ½”, 2 wire Auto Return
- Wiring needed for ball value and Nature’s Head Composting Toilet fan
- PEX pipes and shark bite fittings according to your van layout
- Water system in a separate blog post!
Tools We Used to Build Our Van Shower
As you build a van, you begin to acquire tools. Many of these we used consistently on van projects and found them overall very helpful.
I listed them in the order that we used them in hopes of making it easier for you to follow along below.
- Chop saw
- Kreg Jig
- Paint brushes
- Jig Saw
- Clamps in varying sizes
- Caulking gun
- Drill
- Impact Screw Driver
- Hole Saw bits, varying sizes
- Riv Nut Tool
- Wire Crimpers
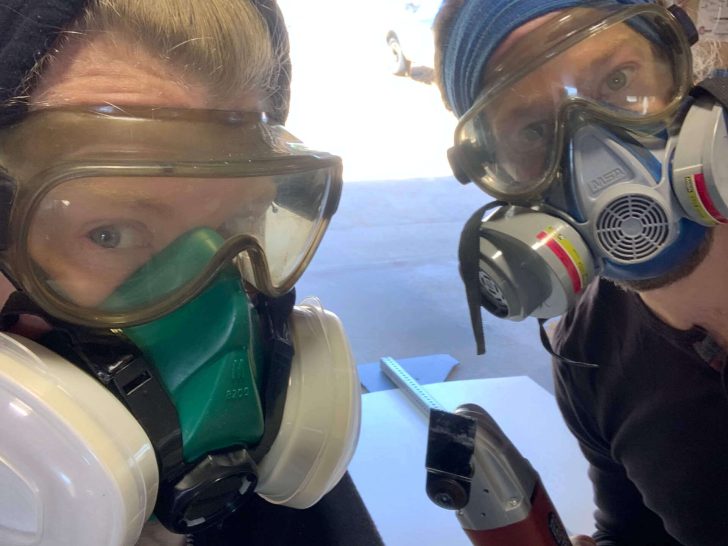
- Half mask respirator
- Safety googles
- Oscillating Multi Tool (AKA the “Oh Shit” tool)
- Trowel specified on FRP glue instructions
How to Build an Indoor Van Shower (Step-by-step Instructions from Our Van Build)
Without further adieu, this is how we actually built our indoor van shower!
Please note that I am showing the process rather than complete specifics because that way, you can use the process. Because every decision in a van build affects another, it is unlikely that you will want to recreate ours in every detail.
Step 1: Indoor Van Shower Placement, Starting with Your Shower Base Dimensions
The easiest way to start building your own van shower is to purchase an RV shower base.
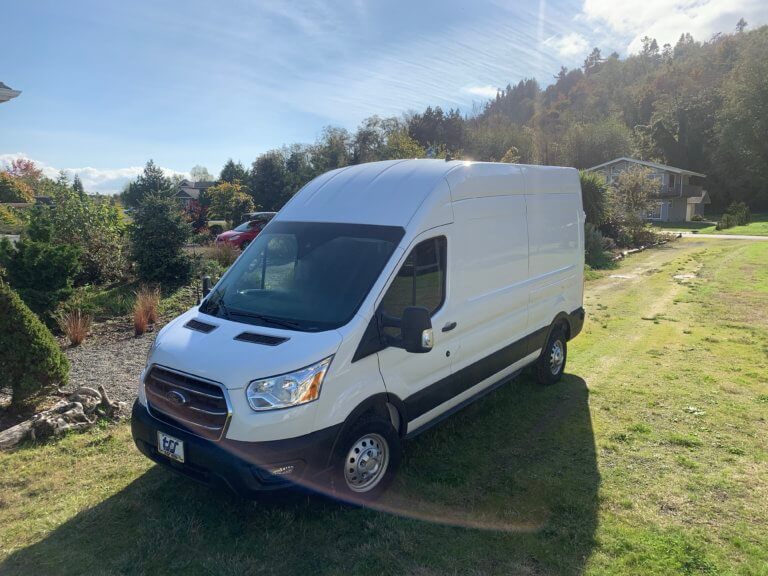
Since we have the high roof and mid-length (not extended) Ford Transit, we opted for a small shower base footprint. Thus, we chose an RV shower pan that measured 24 x 27 inches.
If you have an extended van (or want to close the door when you use the toilet, I recommend looking at shower pans in the 27 x 32 inch range.
The pre-made shower pans have a small angle to funnel water toward the drain.
Place your RV shower pan where you want to build your indoor van shower, and make sure you can drill the drain hole in that location.
If you place your shower behind the driver’s seat like us, have the tallest partner adjust the seat to their driving position, plus a little more. That’s the farthest forward you can build your shower wall.
Important: make sure you run any wires behind the shower before you build it as it will get exponentially harder later!
Step 2: Create a Shower Base Structure to Support the Shower Pan
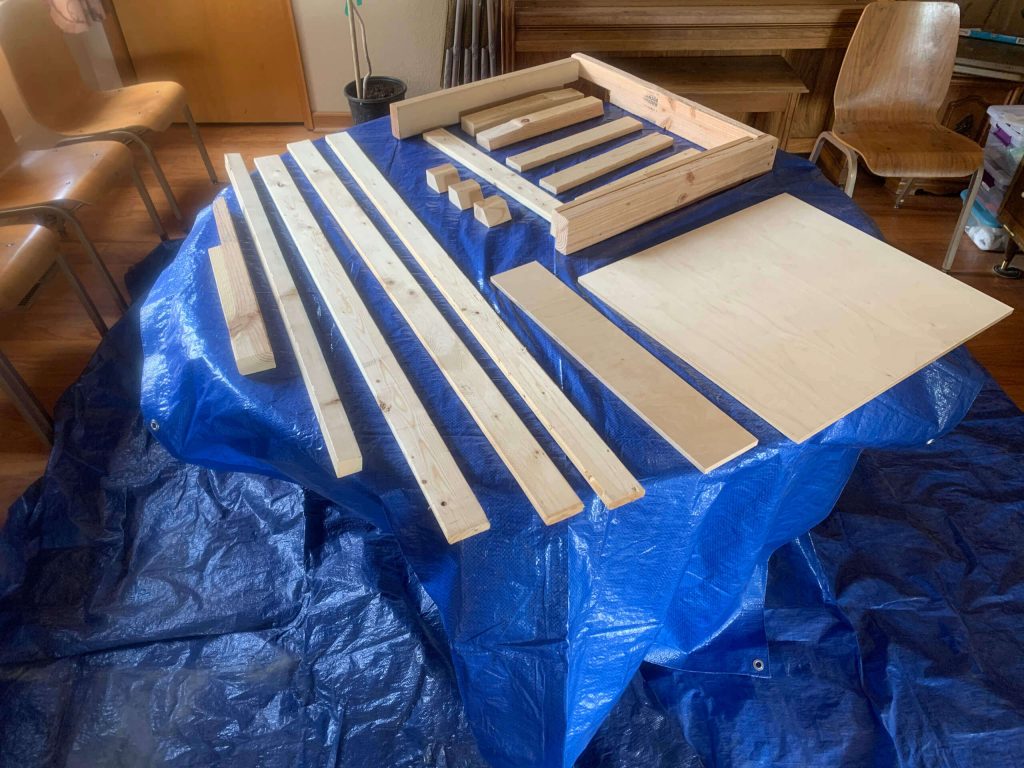
Using the RV shower pan, we created a structural base with 2 x 4s and some spare eucalyptus bed slats we found in the garage. This firmly supported the shower pan and gave the bottom some structure.
In essence, we created a 3-sided frame with a extra ½” base to protect our subfloor.
We screwed and glued it all together and coated the entire thing with Vermont Natural Coatings, a penetrating waterproofer. Then, we added Caliwel Mold and Mildew Prevention to all wood facing the inside of the shower.
We used a Kreg Jig to make pocket holes for this to screw into our subfloor when we had the exact positioning later.
Lastly, we added silicone to all the edges.
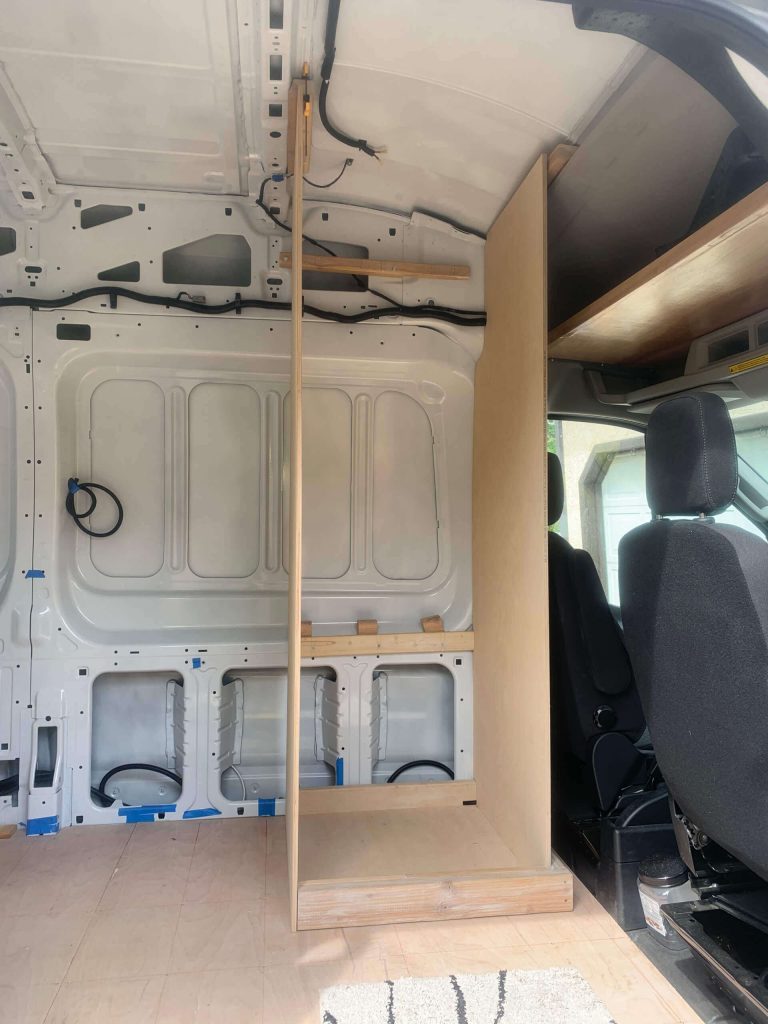
Step 3: Making Your Van Shower Walls

Most van builds sacrifice a lot of space by making all their side walls first. Opting not to build the side walls first provides significant extra space; however, it also creates many more headaches.
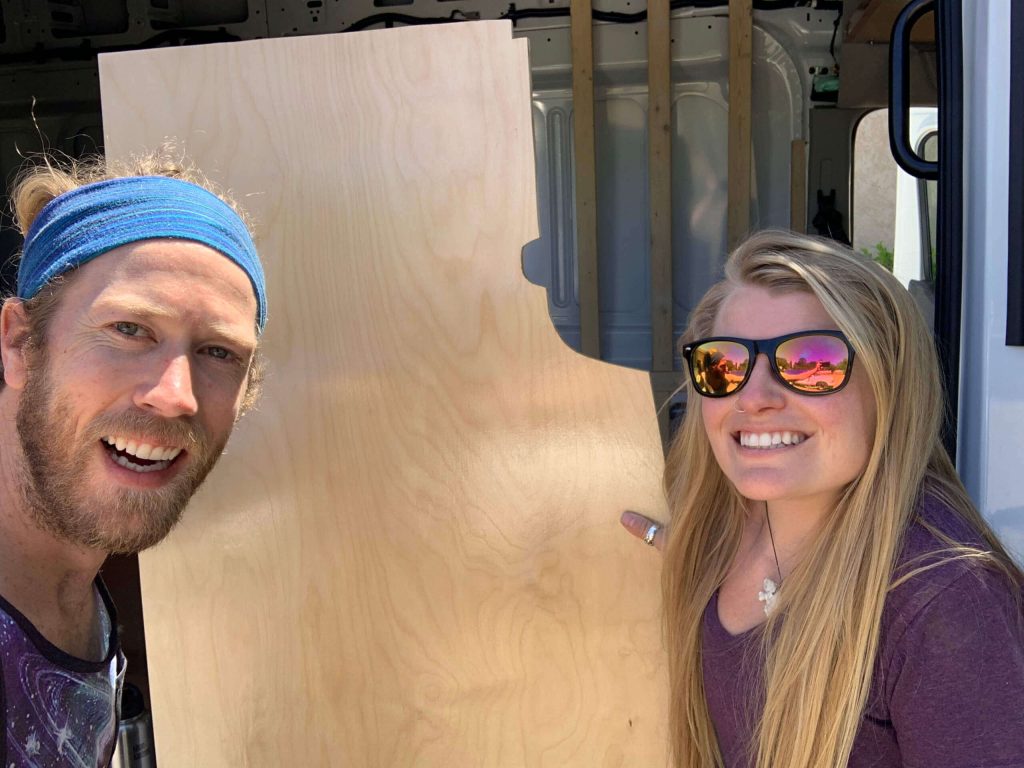
Before you cut into your good Baltic Birch plywood, I strongly suggest using hardboard to create your wall templates.
Your van’s metal walls (at least on the Ford Transit) are curved in two directions. Getting an exact template will give you better structural integrity for long-term use.
While I listed three sheets of hardboard in the list above, we did manage to use only one by making the largest wall template first.
I suggest you start with the largest wall first. While making templates is a pain in the ass and often involves significant cursing, it makes the actual wall cutting seem easy. We spent about one day per wall template tinkering, checking, and re-checking.
Once we were satisfied with the template, we laid it out on a piece of ½-inch Baltic Birch plywood and traced it. Since it had many curves, we used the trusty jigsaw to cut it out carefully. We built this van shower during the pandemic, so the wood shortages shot up prices on plywood, and thus, we became extra careful when cutting into them.
This process was repeated for each of the two shower walls perpendicular to the van’s side wall.
For the shower’s back wall, we took advantage of as much space as possible so the back wall would have a slant partway up inward to the top.
To make matters complicated, we had to build a funky triangular piece to allow room for the van’s wiring harness. You know, because the van had odd angles everywhere!
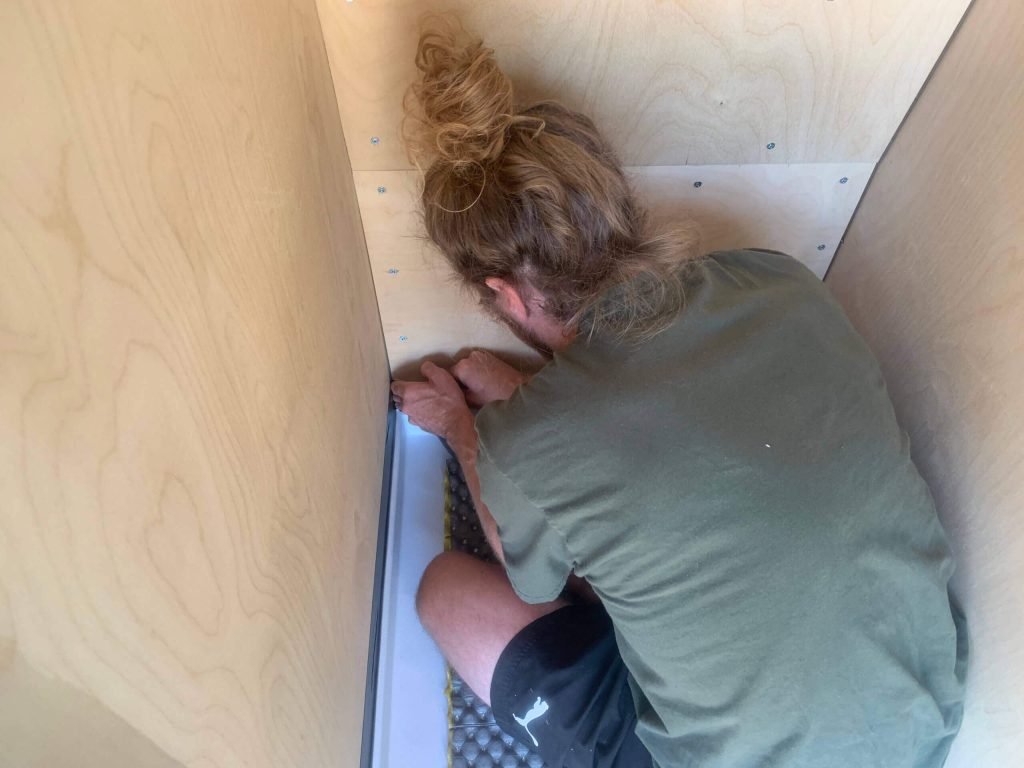
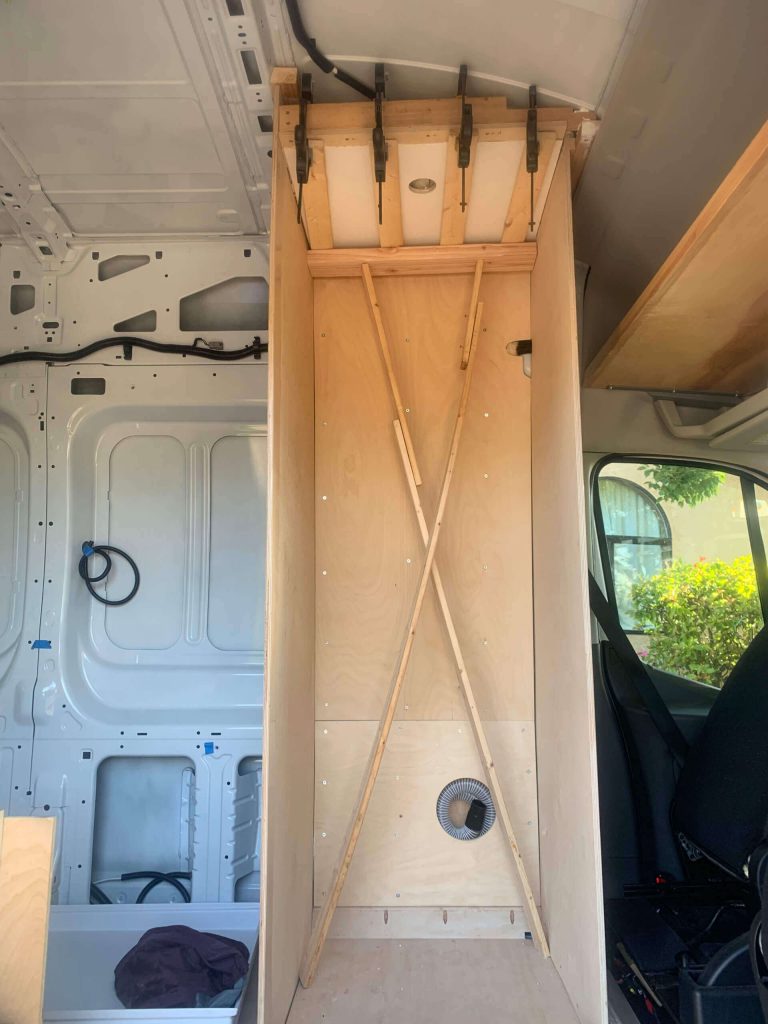
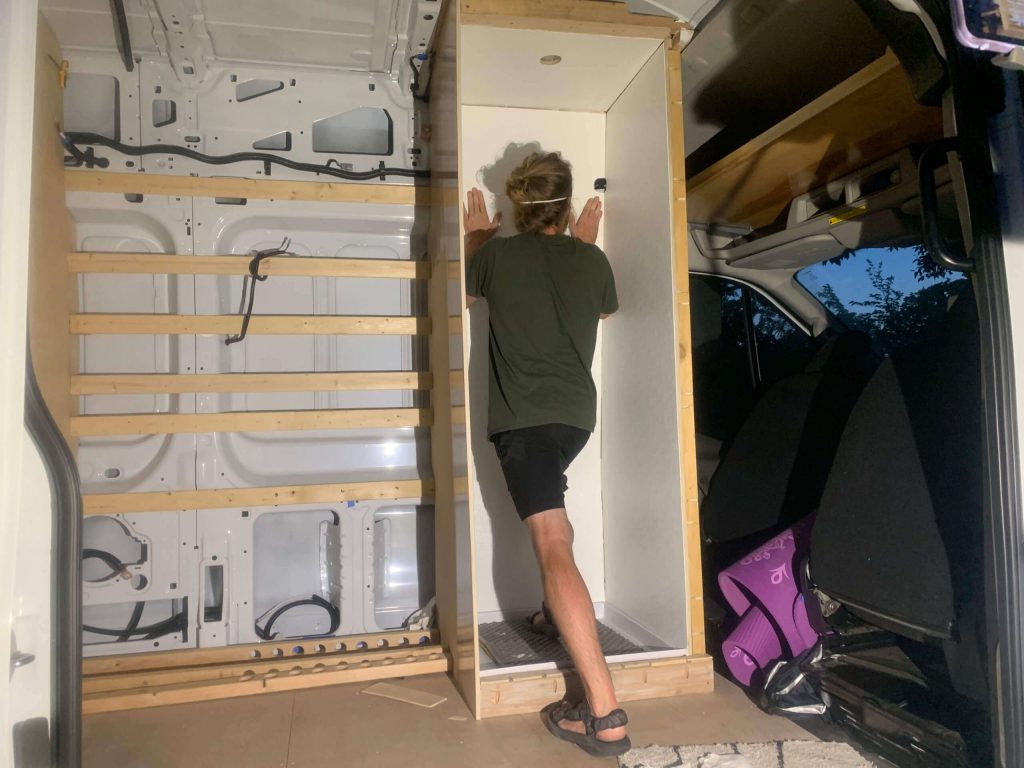
Step 4: Securing the Shower Walls to the Van
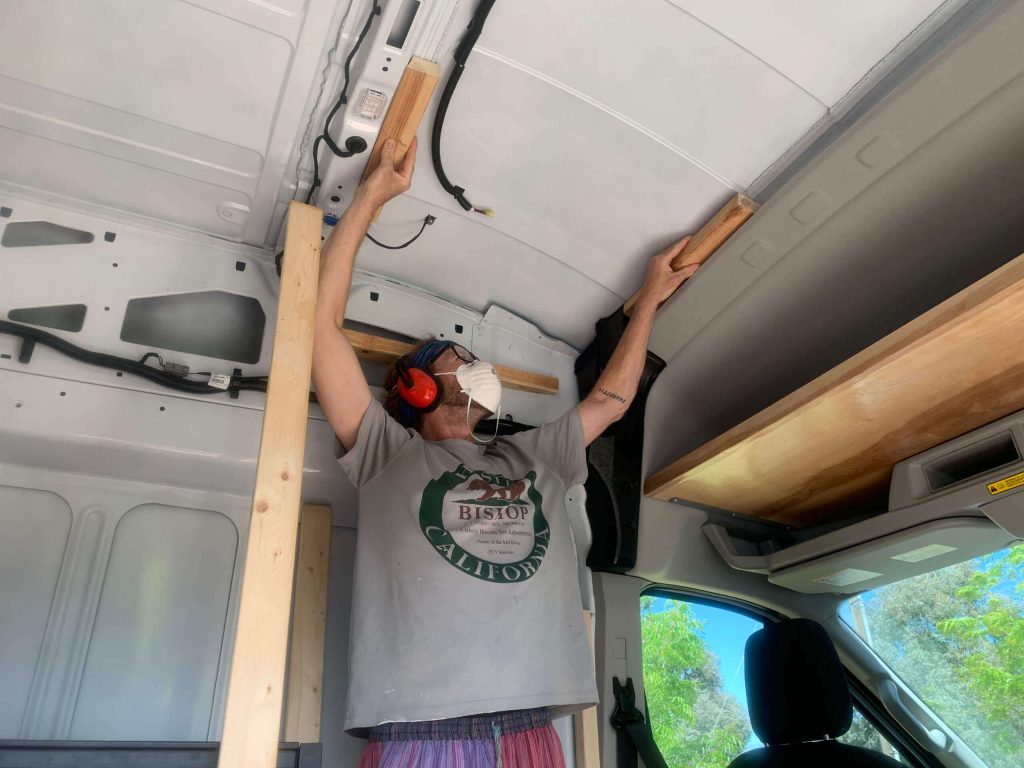
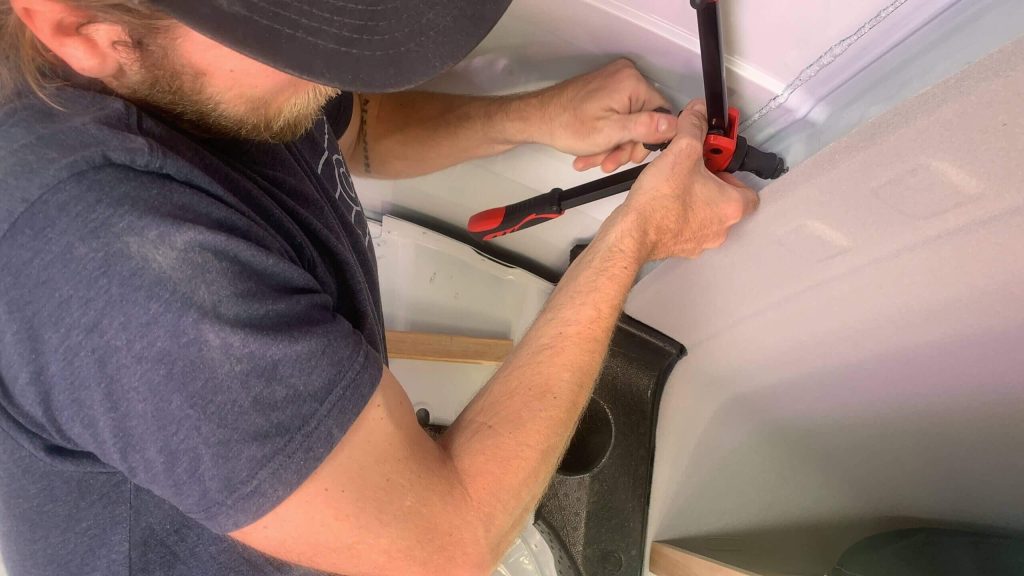
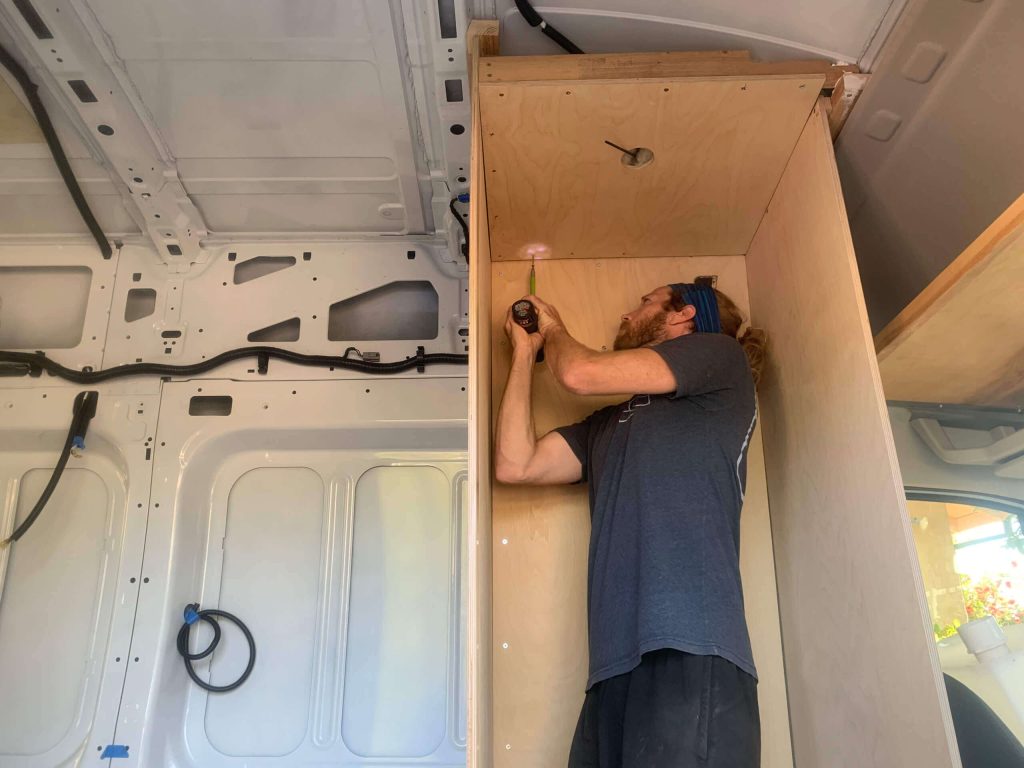
Both van shower walls that sit perpendicular to the van’s metal wall need to be in one piece AND secured to the roof and floor.
In our shower placement, we chose behind the driver’s seat because of the structural metal pillars on the roof. These provided excellent bolting opportunities with the use of riv nuts.
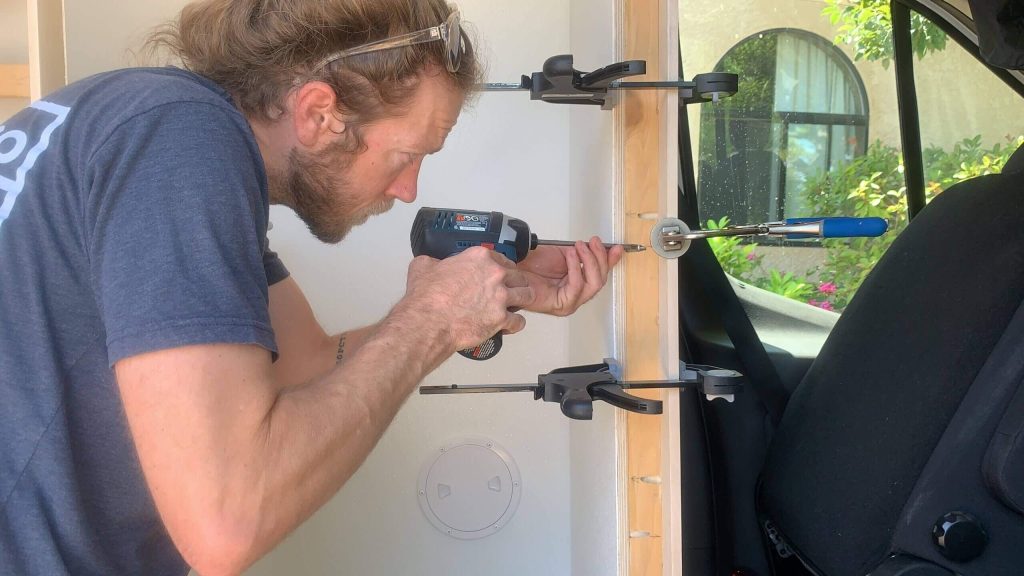
On the cab side, we use the pillar just behind the edge of the headliner. There were no pre-drilled holes, so we drilled some, hit them with Rustoleum, then used the riv nut tool to add nutserts.
Then, we carefully shaped a 2×3 to the curve of the Ford Transit roof and bolted it into the van’s structural pillar. On the other side, we used the existing holes, again used the riv nut tool, and added nutserts. After bolting another carefully shaped 2×3 there, we screwed in the side walls.
Step 5: Build and Install an Inner Wall Hatch for Composting Toilet Vent and Electrical
Everything in a van build should be as multi-purpose as possible.
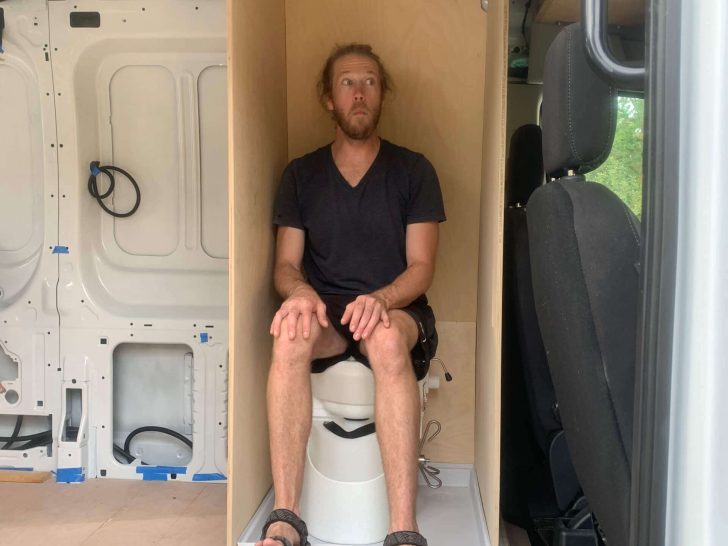
That includes having a toilet in the shower when you’re not showering!
When we built our van in 2021, far fewer composting toilet options were available. Therefore, we bought (and still use) a Nature’s Head Composting Toilet.
However, the Nature Head Composting Toilet does need a hose to vent it and a wire run to it for a fan. Thus, we needed a way for that hose and electrical wire to enter our van shower.
As you can imagine, you can’t just shower with a live electrical wire, so we drew inspiration from this Mather’s on the Map video to create a waterproof hatch. We modified their design to fit our space but used their main component: a 6-inch waterproof hatch meant for boats.
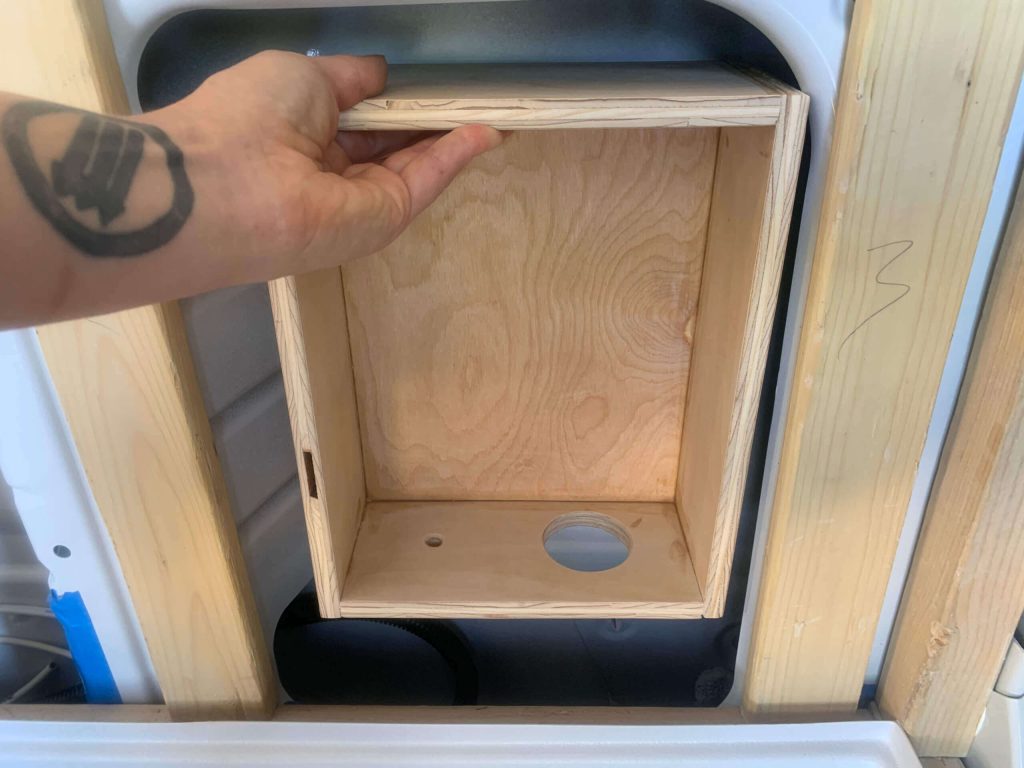
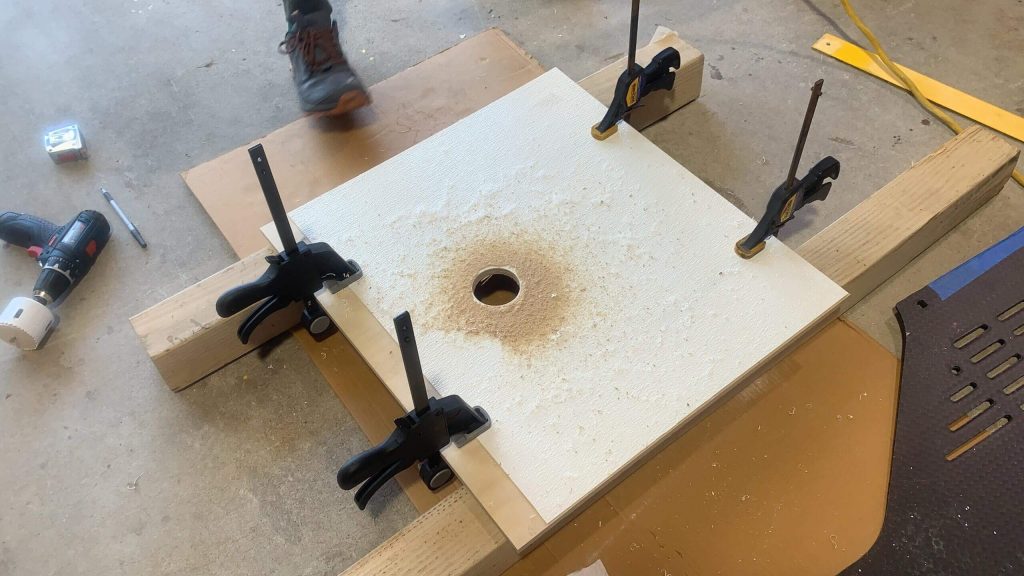
Basically, we built a small cubby inside the back wall of the shower to store the toilet hose, and it’s small electrical wire when we shower!
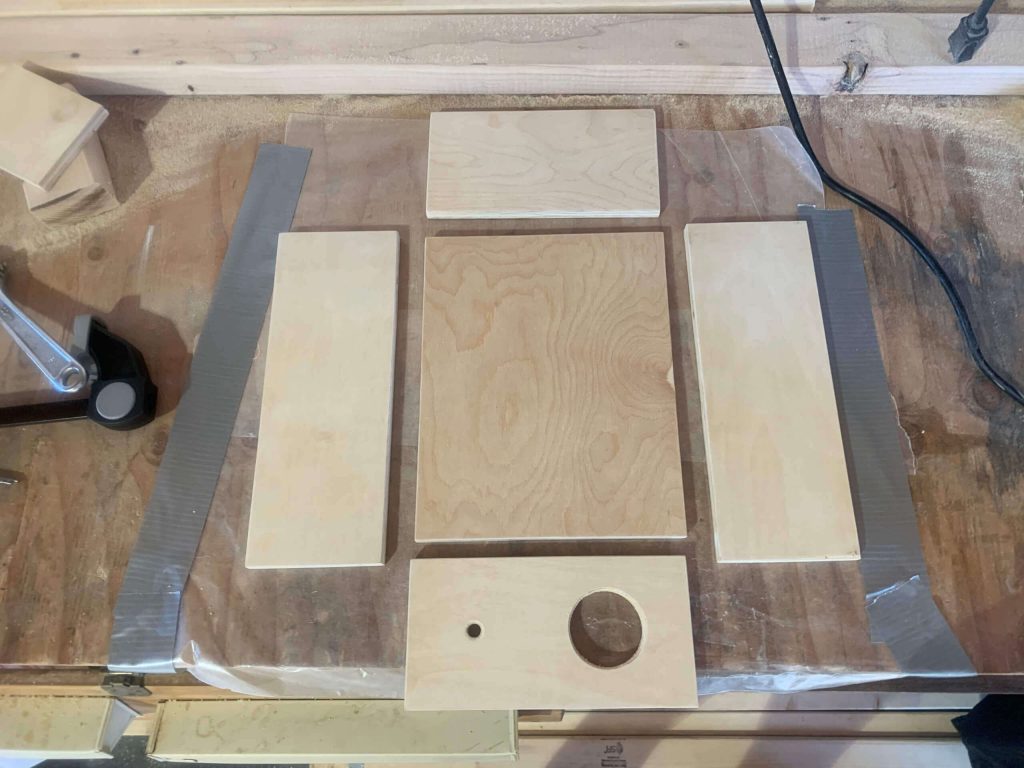
We used the space in the wall to make a box 4 inches deep, 8 inches wide, and 10 inches tall, including the ½-inch wood.
At the bottom, we drilled a 1.75-inch hole to fit the 1.5-inch Nature’s Head vent pipe. We also drilled a hole big enough for the electrical wire as well.
This cubby would get glued to the back of the van shower wall during installation.
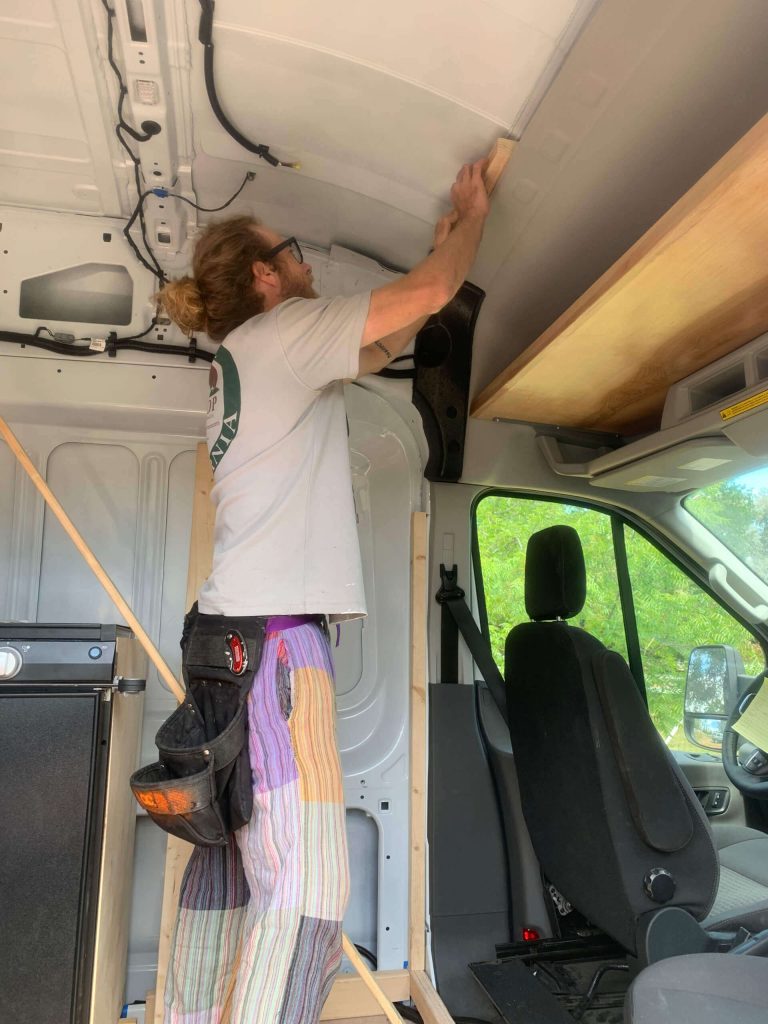
Step 6: Building the Van Shower Ceiling

Now that we had the side walls in and had the back bottom cut, we needed to determine the ceiling height before cutting the back upper wall.
Because the Ford Transit has such a crazy downward angle toward the cab, the shower ceiling was complicated.
We opted to make the ceiling flat and parallel to the floor to allow for an overhead puck light.
Pro Tip: We made the puck light center forward as opposed to full center. Thus, when we’re sitting on the toilet, the light would not be behind our heads!
When trying to do this, use the bolted 2 x 3s from the previous section to make a structure for the ceiling to screw into.
Step 7: Adding the Back Wall and Cubby
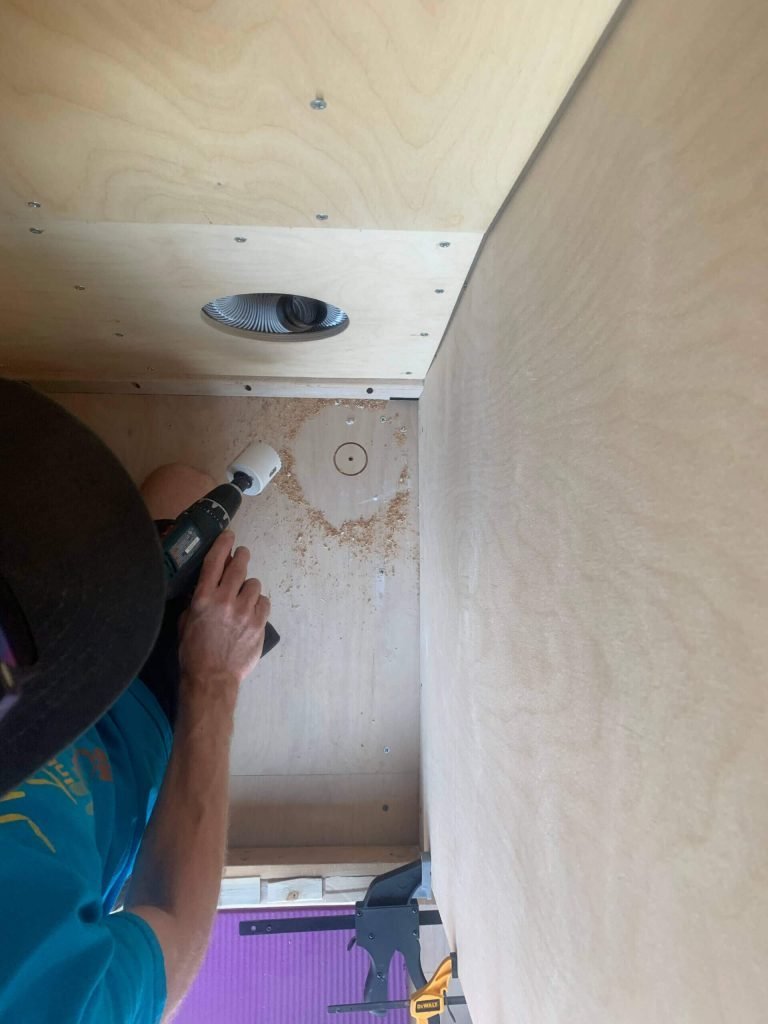
Once the side walls and ceiling were attached, the back walls went in easily.
The only slightly tricky part was adding the cubby to the back and getting a 6-inch hole saw to drill through the back wall.
That lower section, we drilled the hatch hole and connected the cubby before installing the wall.
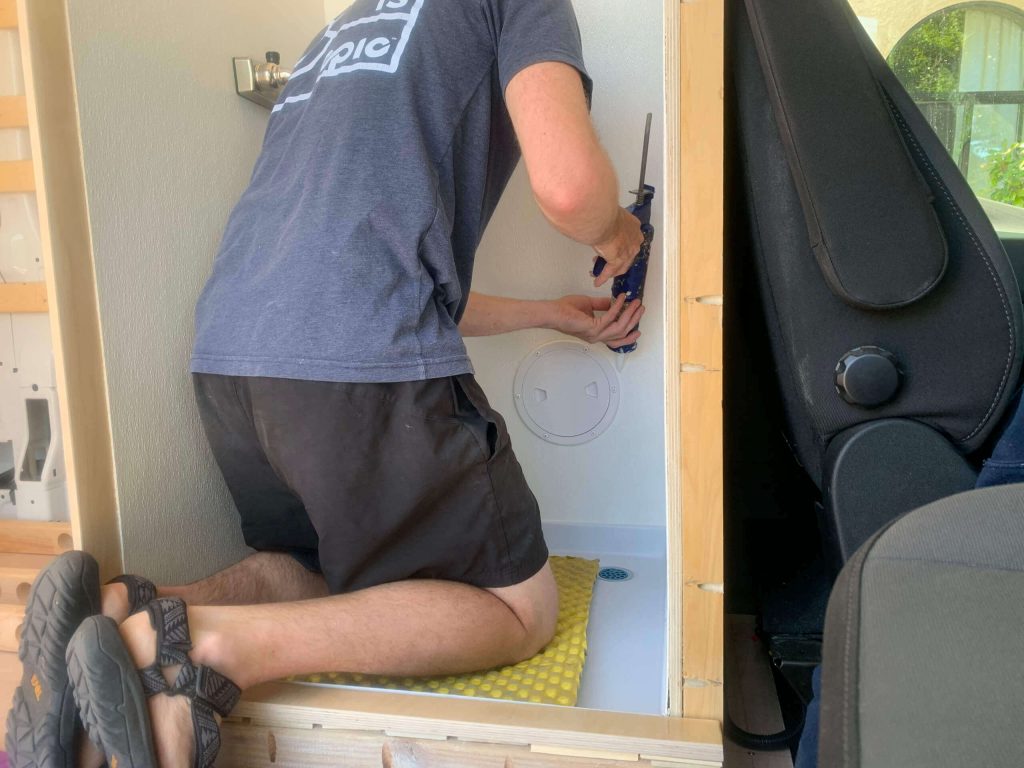
Step 8: Van Shower Pan and Drain Installation
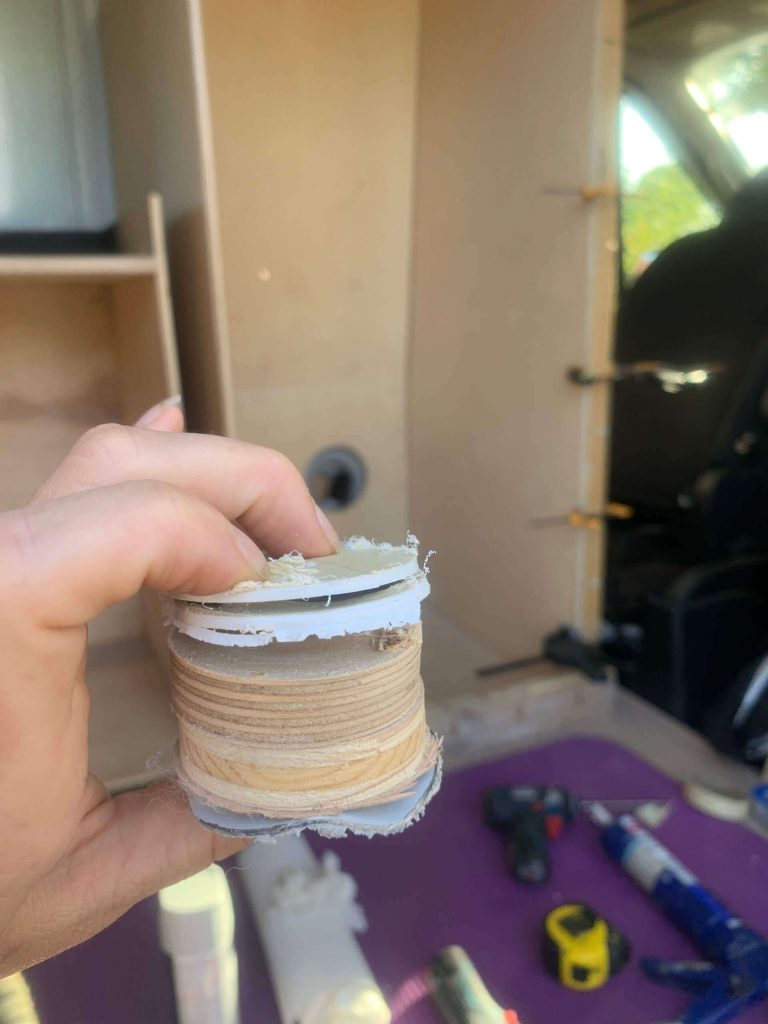
Before adding the shower pan itself, use dry fit it into the shower base and drilled through the drain hole. Then, drill just enough to know where to drill, remove the shower pan and continue drilling all the way through the bottom of the van!
The drilled-through layers looked like some weird wood sandwich!
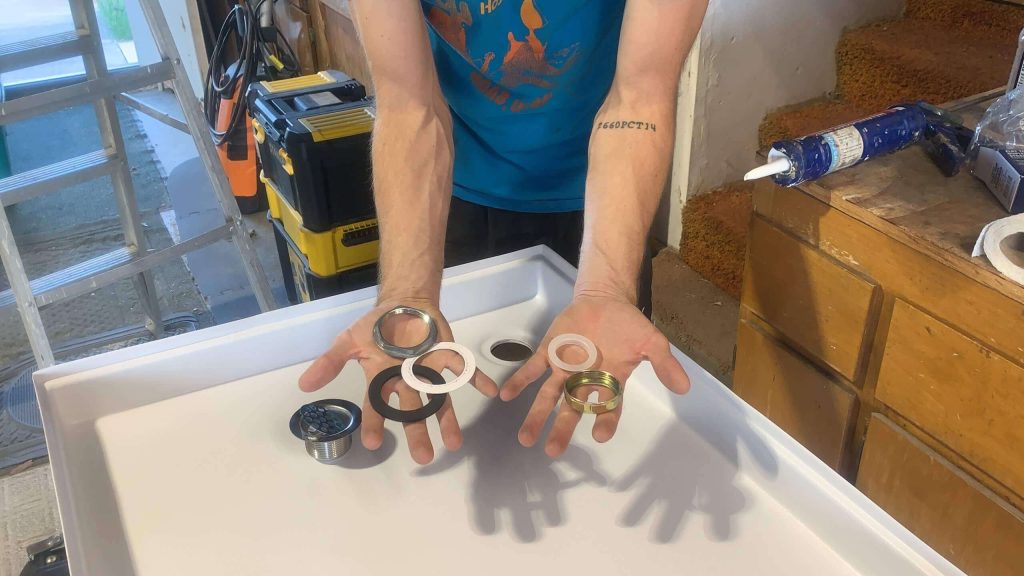
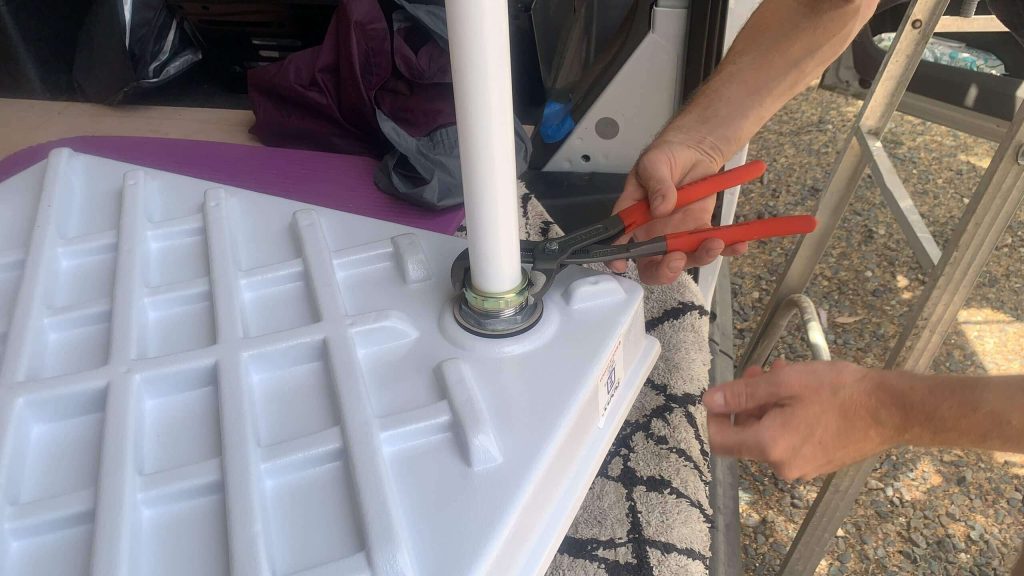
Next, the plumbing starts. You’ll want to attach the shower drain to the shower pan and include a long tailpipe.
Your van shower drain needs to get through more space than a normal shower to make space underneath the van for a p-trap (smell prevention).
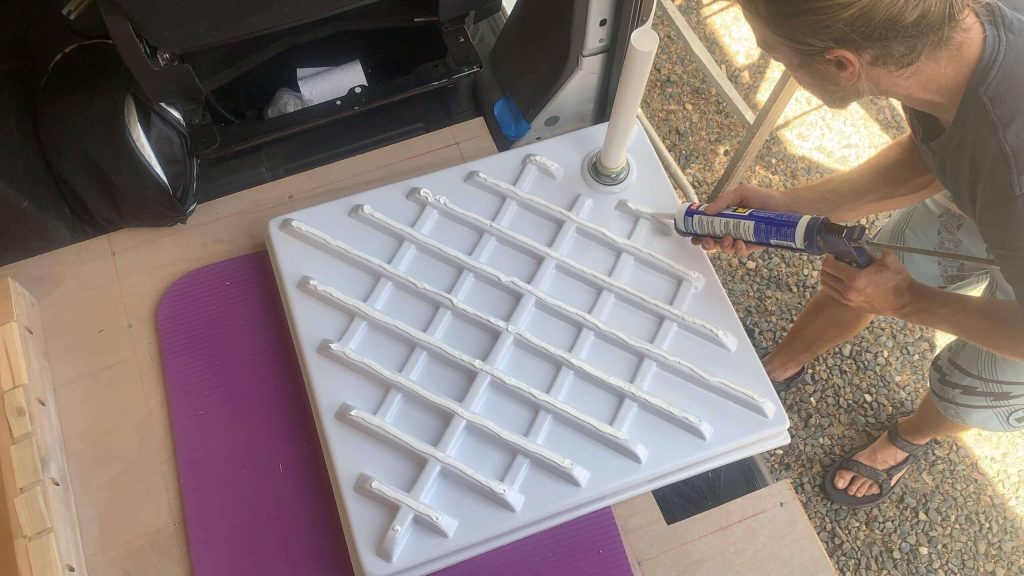
With a fully drilled drain hole and your drain attached to your shower pan, you can finally glue the pan to the wood base.
We used Loctite Marine Adhesive here because it is a strong, flexible glue. This was glue, then plug and play!
Step 9: Waterproofing Your Van Shower Base with Aqua Tape
Remember that we previously treated all this wood with a penetrating waterproofer and a mold and mildew prevention layer.
Now, we wanted to give a behind-the-scenes seal between the walls and shower pan.
You can attach and seal the line of the shower pan lip to the wood walls with Aqua Tape.
Basically, if the top silicone caulking ever fails, this is a backup waterproofing method in our van shower.
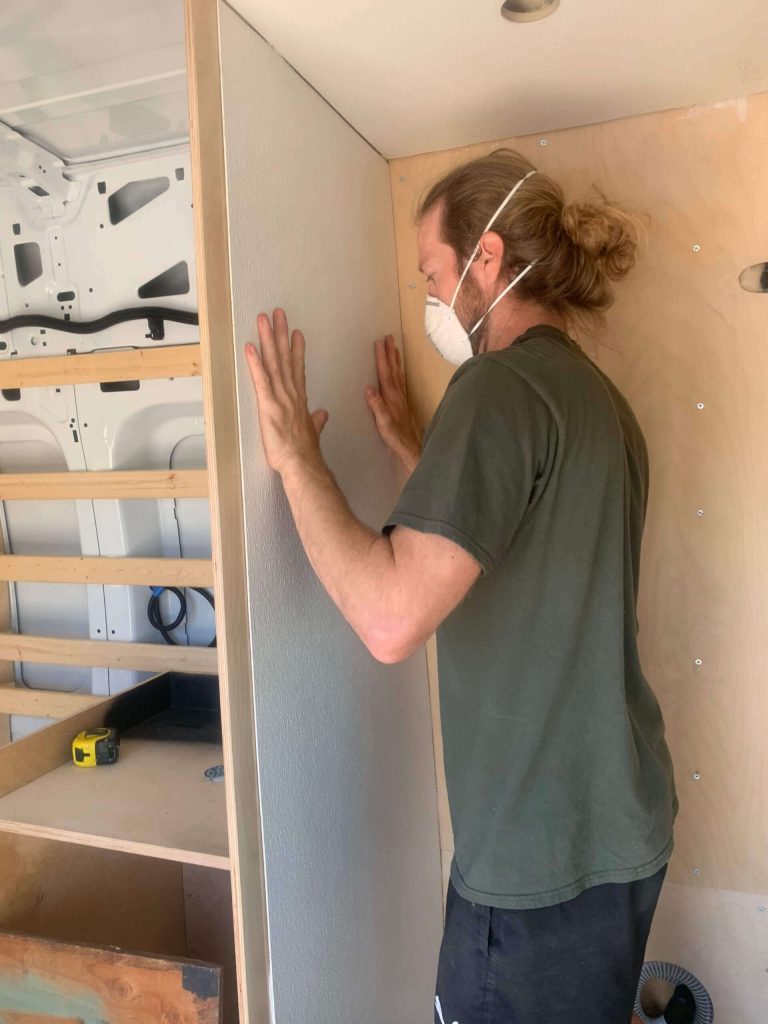
Step 10: FRP Board as Waterproof Van Shower Walls

In my research, I determined that FRP board would be one of the lightest ways to make waterproof van shower walls.
We didn’t like the idea of tile because they’re super heavy, and we thought grout in a van the way we drive would likely not last well long-term. Likewise, we didn’t like the idea of the vinyl squares because they’re also heavy, and we found them not to be as waterproof as a van floor on our old van.
Is it the best stuff to work with? No. Is it the most environmentally friendly? No. Does it last? Yes. We’ve been using our van shower for 3 solid years, and it has held up fantastically.
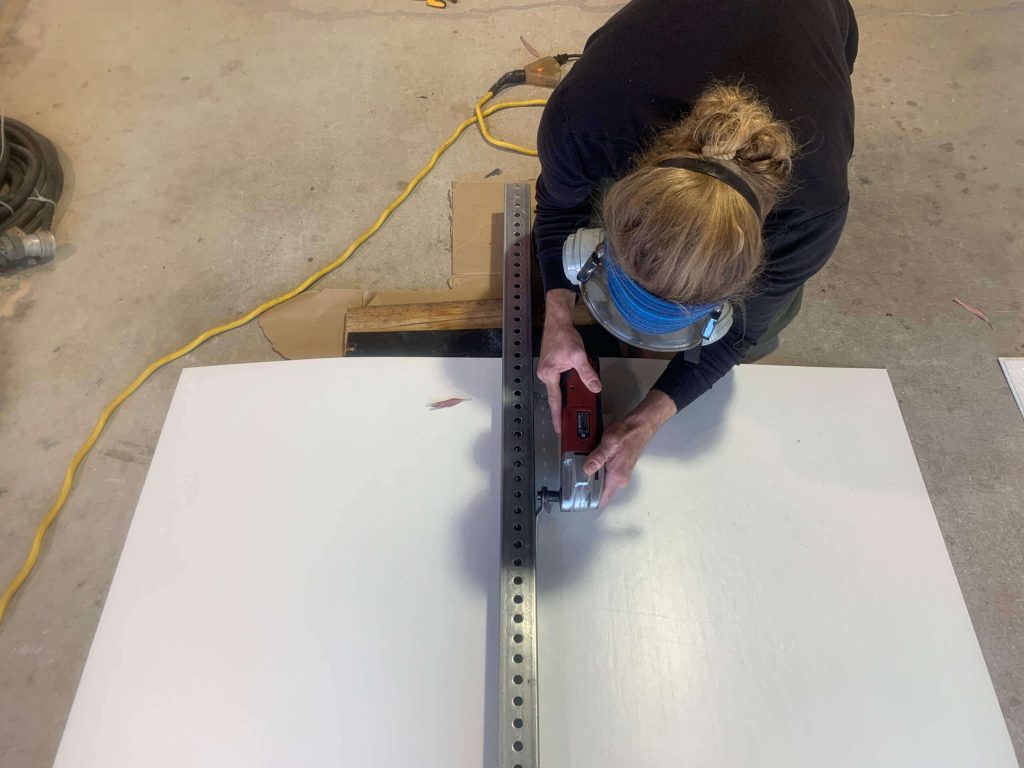
Important: To cut the FRP, use all the precautions. We pulled out the respirators and the intense goggles for this shit. You do not want FRP dust in your lungs…it is fiberglass.
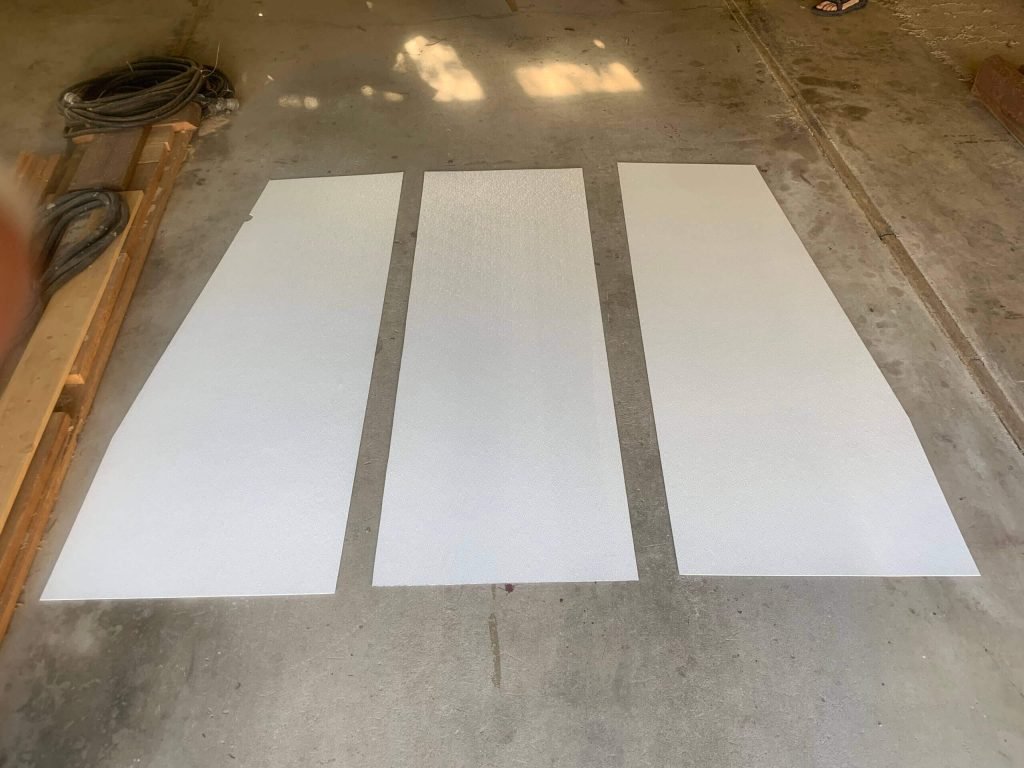
You’ll need three 4×8 foot sheets of FRP board to cover the walls and ceiling of your van shower.
To begin cutting, we recommend that you lay down scrap plywood. We also laid the black inner wall panels that came with the van.
Then, we drew our template onto the back side of the FRP, making sure it went in the correct direction. Since the front side has bumps, it does not take a Sharpie mark very well.
Pro Tip: Use an Oscillating Multi-Tool with a carbide-tipped blade to cut FRP! Jigsaws and circular saws both shot FRP dust everywhere, especially up at your face. Meanwhile, the oscillating tool shot dust side to side on the ground and eas easily cleaned with a shop vac.
Cutting FRP board was definitely one of our least favorite parts about the van build.
Step 11: Gluing FRP Board into Your Van Shower
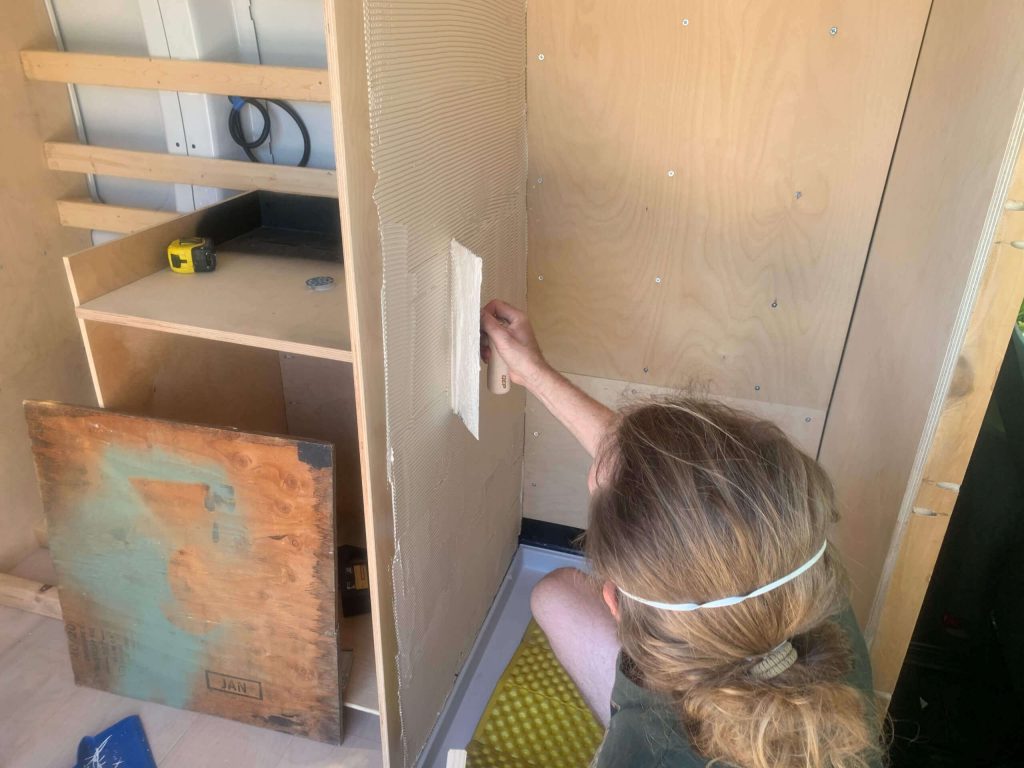
There are two main ways you can mess up gluing FRP board.
First, you can spread not enough glue or too little glue. Solution: You need to buy the spreading trowel listed on the back of the FRP glue that you choose.
Second, if you glue outside the recommended temperature range, it won’t cure properly. Solution: Read the back of the FRP glue for the application temperature range and glue within those temps.
We opted for Liquid Nails FRP glue, which provided a trowel size and suggested gluing between 50-90 degrees Fahrenheit. Keep in mind that you want it to stay at that temperature range for at least an hour after you glue.
Pro-Tip: Get a second person for this job. One person can lob the glue on, and the other can spread it evenly across the surface of the van’s shower walls.
We had to strategically glue because we built the van in late California spring. Sometimes, we had to put work lights up and work in the evenings to get it done.
Step 12: Install the Waterproof Hatch, Your Shower Mixer, and Your Shower Head
You’ll want some good butyl tape to install the waterproof hatch. We had some leftover from installing our Maxxair Fan and we used that. If you’re buying new…don’t get the cheapest one…go one up from that.
Simply add it to the hatch frame edge, stick it in place, then screw it in.
Then, install your shower mixer on one wall. I do not recommend placing your pipes against the back van metal walls because they’re more likely to freeze there! Instead, keep them further inside.
Each shower mixer has slightly different needs and will come with its own instructions. Most include using a hole saw to drill two holes: one for the hot water and one for the cold water.
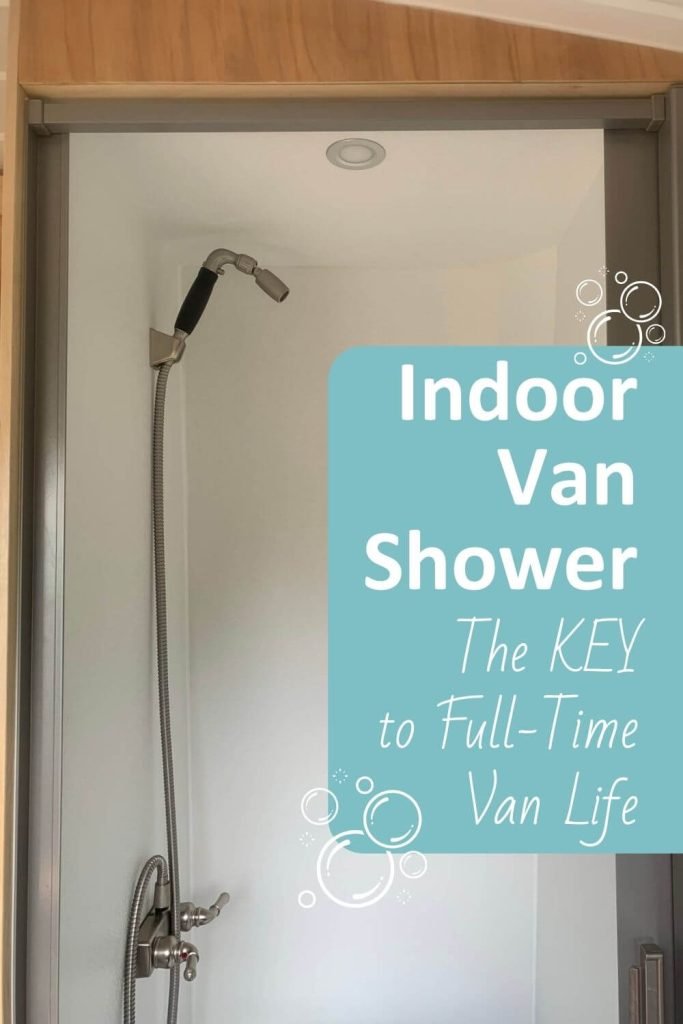
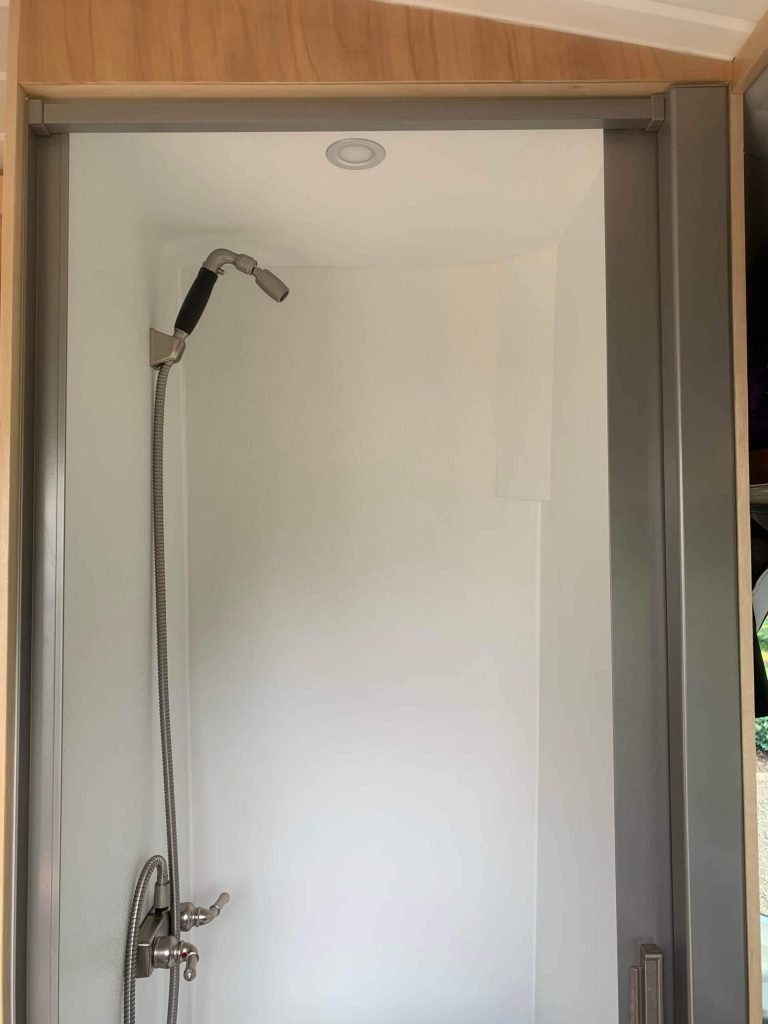
The same goes for your shower head. We opted for the High Sierra Low-Flow shower head attached to the mixer on the shower side instead of behind the walls.
First, we wanted a movable showerhead to clean ourselves adequately in a small space.
Second, the upper half of our shower wall doubled as our kitchen wall, and we didn’t want any pipes running there.
Step 13: Adding the Nautilus Shower Door (As Opposed to a Shower Curtain)
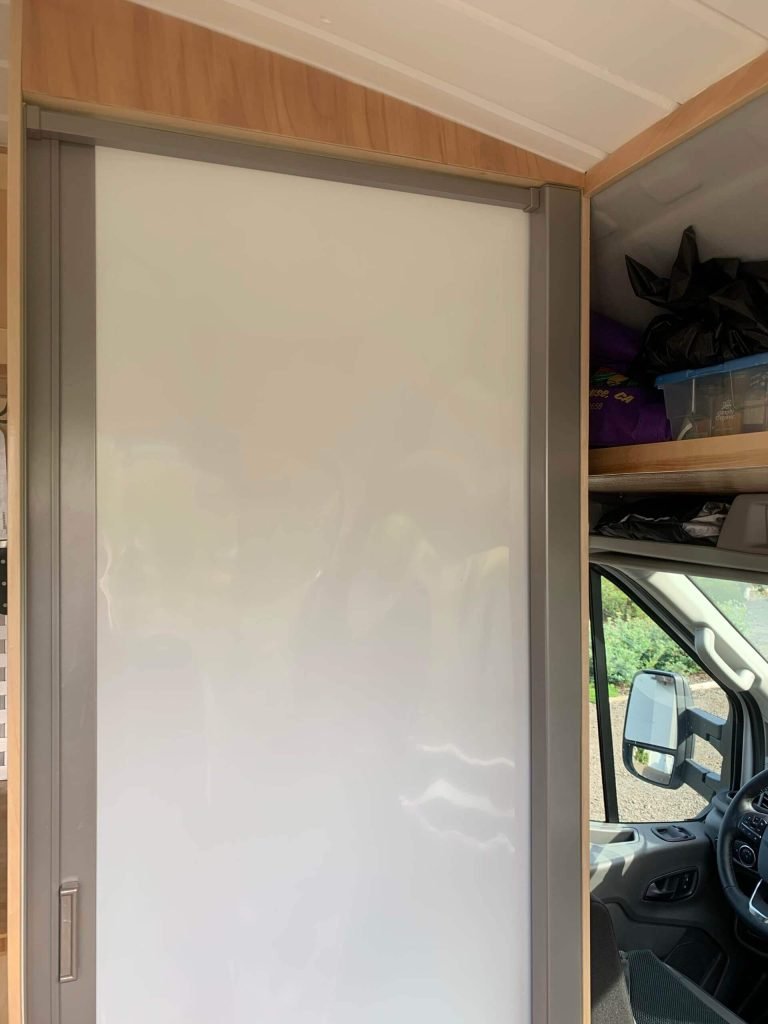
The Nautilus self-cleaning shower door is a worthy investment.
First, it looks much nicer than a shower curtain. Because our shower is front and center to the sliding door, when we close it, it looks sleek.
Second, shower curtains take longer to dry and mold more easily.
After three years, it has held up fantastically!
However, think about this ahead of time when building your van shower. We had a small “oh shit” moment when we realized we would only have 1 inch of wiggle room to pull the composting toilet in and out.
Therefore, we had to add an extra casing on the side that the door would slide into. Essentially, we made an extra 2.5 inches of space just for the Nautilus shower door. We used some extra Baltic Birch plywood and the Kreg Jig for the job.
When installing the door, follow their instructions closely and make the bottom and top as even as possible!
Step 14: Silicone Caulking throughout the Van Shower
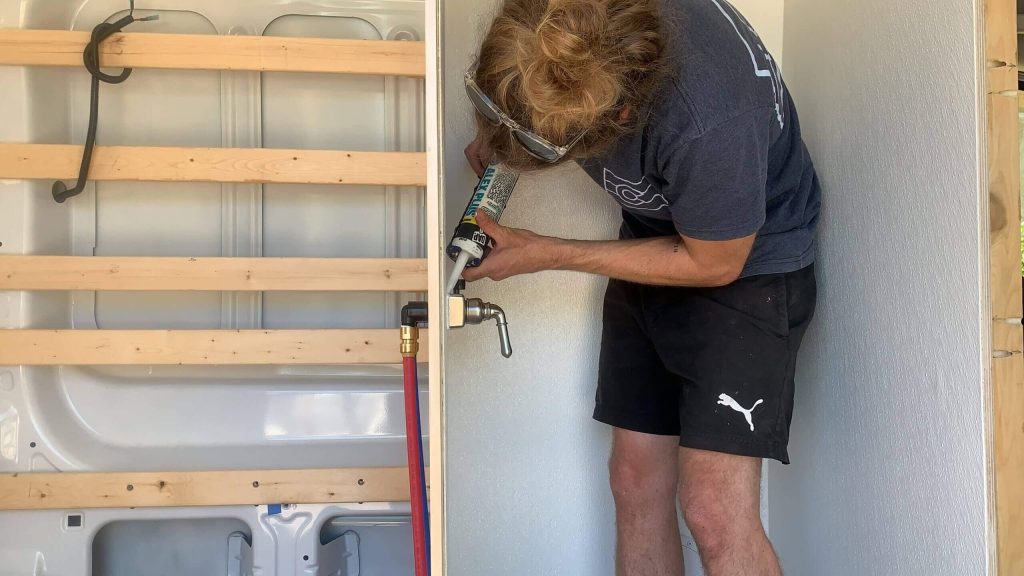
After all the FRP glue sets, it’s time to caulk every crack with silicone!
This process is fairly straightforward. Grab some silicone caulk that fits your aesthetic and give each crack a few layers.
Make sure to silicone around the waterproof hatch, your shower mixer, and your showerhead!
We do re-caulk this about once per year to ensure it stays sealed.
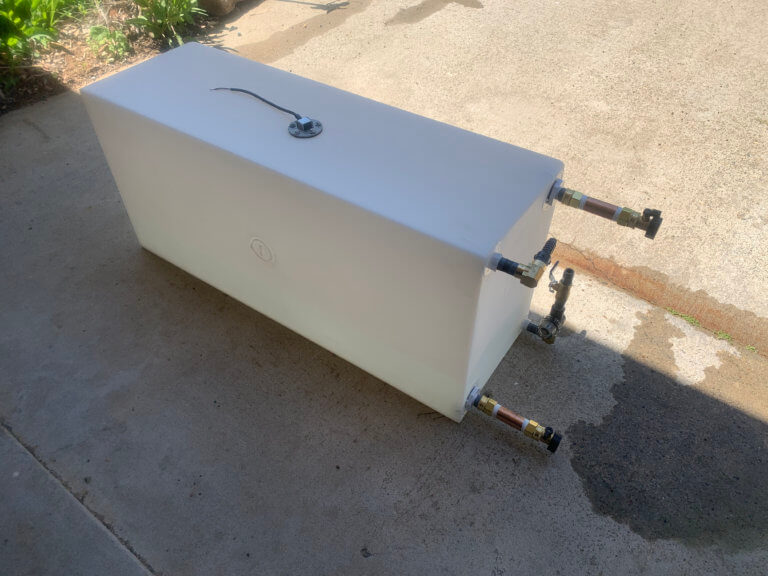
Step 15: Under-Mount Your Gray Tank
Why do you need a Gray Tank for your Van Shower?
You should never let your shower just drain straight underneath your van!
Instead, under-mount a gray tank to collect your dirty, soapy water and dump it properly.
If you’re going to stay in one spot for a week or two, you can hold this water instead of drenching your campsite.
We opted for a 10-gallon under-mounted gray tank because it can hold 4 showers’ worth of water for us (2 showers each). This coincides with how much water capacity we have overall. By the time we’d need to dump our shower water, we would also need to fill our fresh water tank.
How to Under-Mount a Gray Tank on Your Van
To under-mount our gray tank, we mostly followed this YouTube video.
We grabbed some 1/8 inch thick metal by the piece at Lowe’s for homemade brackets to mount it. Basically, we placed each metal piece in a vice and smashed it with a mallet into the shape we wanted. The method was crude, but oddly effective.
With a drill, we made bolt holes exactly where we wanted them in our homemade brackets. Only one pre-existing hole worked under the van to mount our gray tank. Better than none!
For the other three holes, we carefully made sure we wouldn’t drill into anything important and drilled three holes. In those and one pre-existing hole, we sprayed some Rustoleum and added riv nutserts. These allowed us to bolt the tank into the van’s metal frame securely.
Like all van projects, we had one complication. We had a little extra wiggle room in the bottom of the brackets. For a solution, we found a ½-inch thick rubber floor mat that we cut to size on the tank bottom. Grabbing the trusty Loctite Marine adhesive, we glued it to the bottom of the tank.
This ended up serving two purposes. First, it filled the wiggle room in the brackets to make a perfect fit. Second, it kept the metal brackets from rubbing on the plastic tank. This prevents future break down of the tank.
Now, the gray tank is securely bolted to the van’s frame.
Step 16: Gray Tank Plumbing Connections
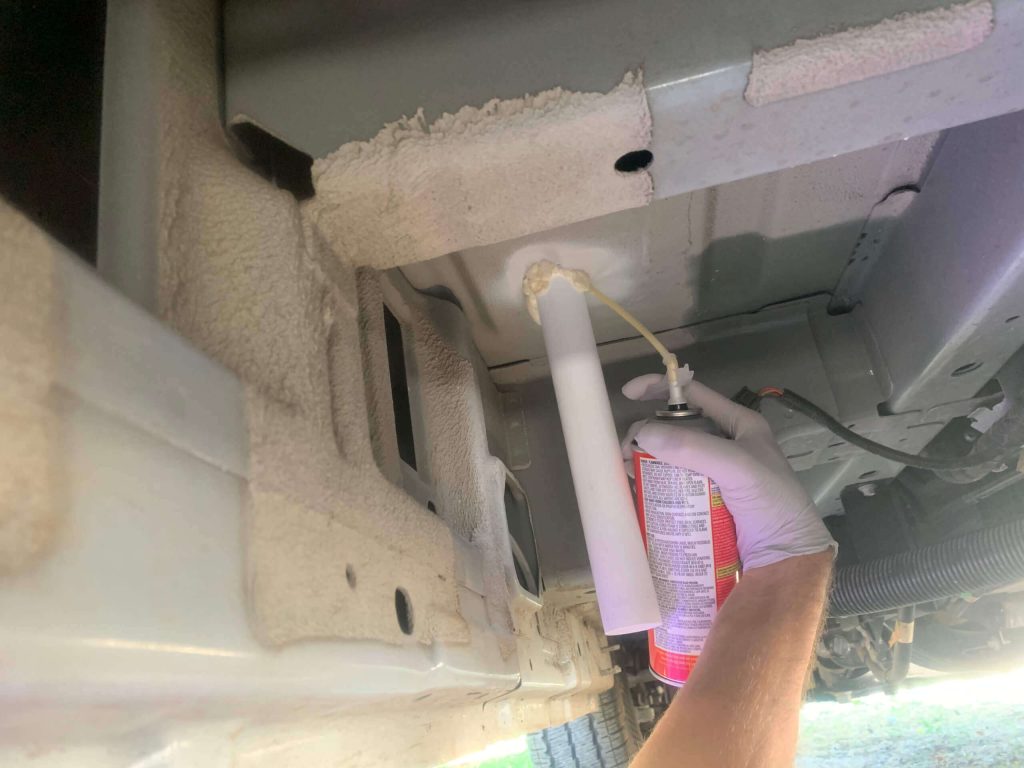
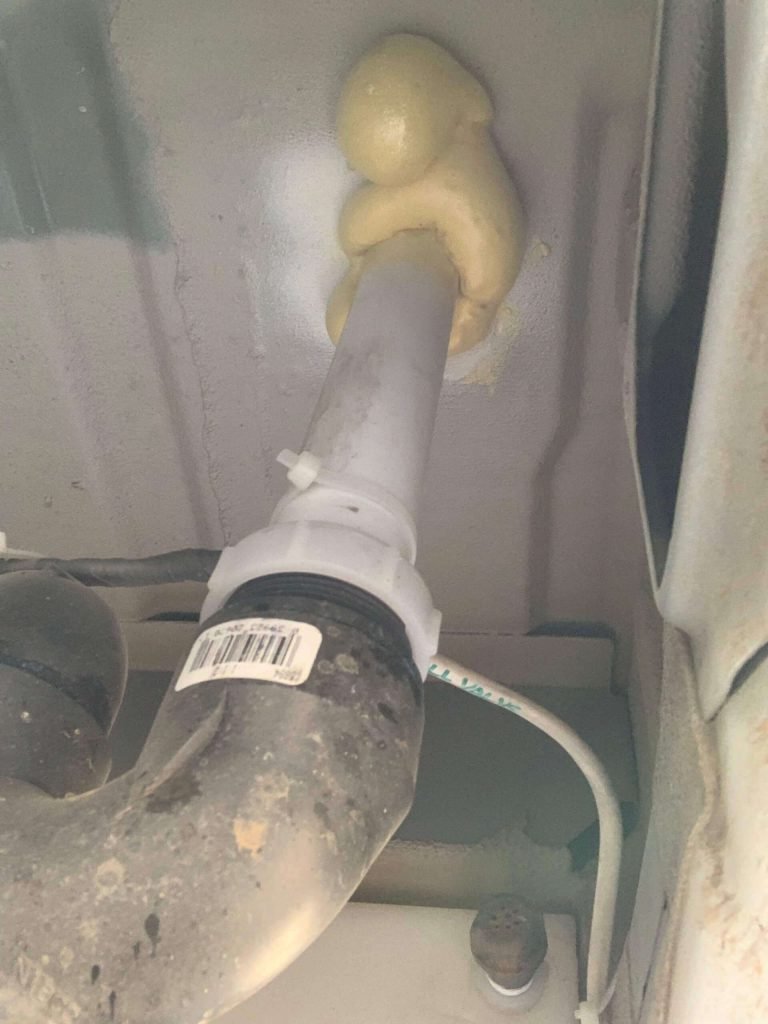
Start your under-the-van plumbing by sealing the extra space around your drain tailpipe. We added some “Big Gap Filler” by “Great Stuff.” It was indeed “great stuff!”
Now, we needed to get that tailpipe connected to the gray tank. We drew heavy inspiration from this Dare’s Drives Plumbing video on YouTube. However, his tank had 1.25-inch entry points, and the tank we got had 1.5-inch ones.
The under-mounted gray tank had four entry and exit points to account for. Since this is a lot of specific information, here are the lists:
For the gray tank intake we added several connections from the tailpipe to the tank:
- A 1.5 inch p-trap to keep the smells down. This also has a cleaning hole in the bottom to bypass the gray tank if needed.
- Small piece of 1.5 inch PVC pipe (measured to size)
- 45 degree 1.5 inch PVC angle
- Small piece of 1.5 inch PVC pipe (measured to size)
- 1.5 inch PVC to 1.5 inch NPT (Pipe threaded) adapter.
Between the PVC pipe connections, we used PVC Pipe Primer and Cement. On the pipe threaded connections, we used pipe tape.
On the other upper 1/2 inch opening, we added a 1.5-inch long ½-inch nipple. Then, we added a cap to which we drilled several holes to make a vent. As water flows into the gray tank, this allows the air to adjust.
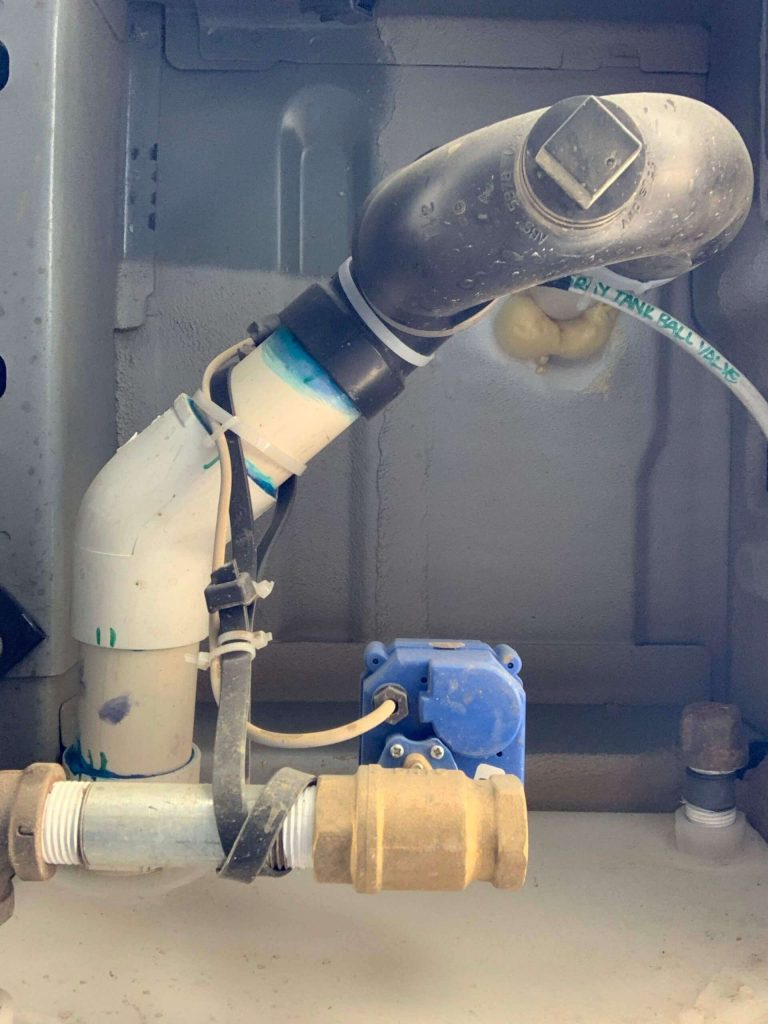
On the ½-inch bottom opening, we added:
- Plastic 1/2 inch, 1.5 inch long nipple
- Brass 1/2-inch Pipe Threaded Elbow
- Galvanized Steel 3-inch nipple (not for potable water, so galvanized is ok and cheaper)
- US Solid Motorized Ball Valve, Brass, 1/2 inch, 2-wire Auto Return
A Complete Van Shower & Final Thoughts
Building an indoor van shower was one of the more complicated portions of our van build. However, it’s also one of the best elements in our van for full-time van life.
Over the past three years, our shower has held up wonderfully. We re-caulk the silicone once yearly to ensure it is watertight. That’s been our only maintenance aside from regular cleaning.
If you want to live in a van full-time, an indoor van shower will make that dream a reality. You can still shower elsewhere, but sometimes you just don’t want to pay $17 for a truckstop shower.
You can read about the rest of our water system here and check out our other van build posts here.
Happy building, and drop any questions below.