Off-Grid Van Life: A Summary of Options
You know that feeling right before you jump off a cliff into water where your stomach drops? That’s how I felt a few months ago when we first decided to build our own off-grid electrical system. And, to tell you the truth, that feeling has come back up at several moments.
Having an off-grid van home allows for a huge amount of exploration. Most off-grid systems rely mostly on solar power. However, it can sometimes be more difficult to navigate than just mounting solar panels on the roof. In this post I’ll give you the basic breakdown of the main options and explain what we chose to do.
This post contains affiliate links. If you purchase anything, I can make a small commission at no cost to you.
List of Contents
3 Main Off-Grid Solar Power Options
First, you can get a Goal Zero Power Station or Jackery Power Station. A lot of people look at building their own solar electrical systems and pick this easy, but expensive option. These are large boxes that make life simple. They give you a more “plug and play” electrical system. From everything that I’ve heard, they work great, but they’re not as customizable.
Second, you could get a kit from a company like NewPowa or Renogy. This is going a step further from a Yeti or a Jackery. These kits, depending on which one you get, will give you the main parts of your electrical system and tell you how to do it. However, you will still have to figure out all of your 12v appliances separately.
Third, you can build your own system from the ground up. Daunting as it sounds, we chose this option. Even more intimidating, neither of us had taken a math class since high school. Who knew you could get through both an undergrad and a grad degree without a single math course?!
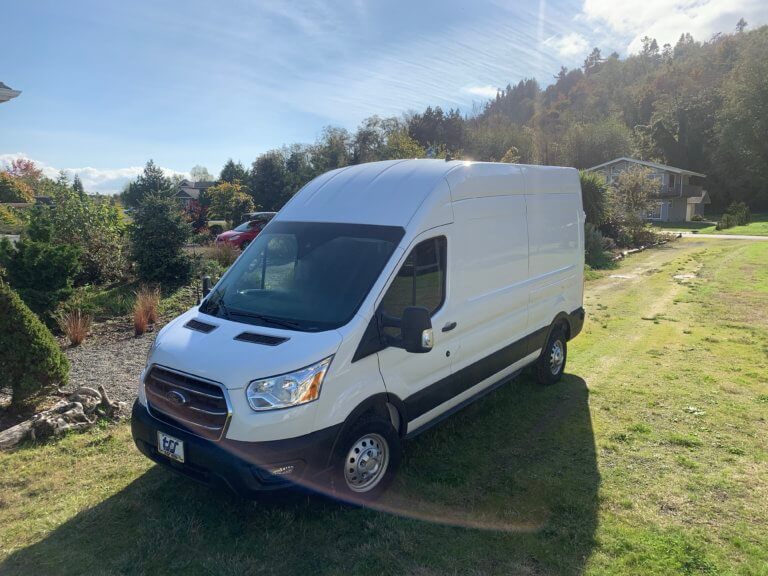
Thus, this post will start you off with our process to get an off-grid solar power setup for Polysprout the Van.
Where do we even start?
We opted to purchase the standard wiring diagram and tutorial from Far Out Ride to start. It had a few drop-down menus to customize the diagram. Importantly, as you shifted the drop-down menus, the wire gauges and fuses would change with them. They included the 12v setup they had which you could use as a reference as you created your own.
In a van off-grid system, there are two types of power: 12v and 110v. The 12v is like the cigarette lighter in your car that hasn’t lit a cigarette in decades. The 110v is the everyday plugs you have in your house.
The power that will come in from the NewPowa Solar Panels that we purchased will come in and go out of the batteries at 12v. To transform it into 110v, it needs to go through an inverter. Inverters take a lot of power. Therefore, the more appliances and electronics that will work on 12v power, the more efficient your van’s electrical system will be.
Off-Grid System Immediate Decisions
We started by determining basically how much power we anticipated needing on the road. This proved more difficult than it sounds.
Every system in the van build leads into or is determined by another system.
Right off the bat, we had to make decisions about: the fridge, the stove, the fan, electrical sockets, and water pump. While we could relatively easily estimate our electronics, the fridge and stove could wildly change which solar panels and batteries that we needed.
As we learned from the cheap fridge we got for our last van, fridges can suck A LOT of power. While the 110v RV fridges are significantly less expensive, we would need more house battery power and solar panels to compensate. We determined it was better to get a 12v fridge and be more efficient.
Secondly, the stove had to be partially determined. What does that even mean? We had to decide to get propane in the van or to go induction. Induction seems like a great idea to avoid propane, but every review we saw demonstrated the immense amount of power that they needed. To cap that argument off, I asked my buddy Harry who had just converted a van about his stove. He said he bought an induction stove and a watt reader. After a few tests, he sent the induction stove back. Not worth it to him power-wise. As a person who loves cooking and hot drinks, not good. Hence why we installed propane in the safest way possible.
Off-grid Electrical System Main Components
It’s a damn good thing I like research. However, even for me, this research process was extensive and difficult. In fact, it is ongoing!

Solar Panels
Way back in our second conversion log entry, we determined how much solar power we could fit on the roof. We worked around the front curve down to the windshield and our fan. Using graph paper and a measuring tape, we drew out our roof objects theoretically.
When we actually had those pieces, we loosely put the roof rack together in the living room. We added the fan and placed the solar panels on the rack to view all of the options.
Purposely, we did this in the morning to allow the sun through the windows to give us an idea of potential shading. That means the bars of the rack rise up and could lay a shadow over the edges of the solar panels. To prevent shading, we had to keep about 6 inches of space between the bars and the panels.
Shading can decrease the efficiency of the entire panel, so it’s better to have less power overall and no shading.
After reading countless reviews, we opted for NewPowa solar panels. We looked for panel efficiency, warranty, and customer service. One key point that came up again and again was that the customer service was better when people bought straight from the company. After reading horror stories about Amazon shipping broken panels, we opted to go straight through NewPowa and we had zero problems. The specific panels we got were two NewPowa 210W 12V Monocrystalline Solar Panels. We were amused that we would have 420 watts of solar and it was the highest wattage we could fit in the space we allotted.

House Batteries
Next on the big-ticket items: batteries! We knew from the beginning that we wanted to go with Battle Born and get two of their 100 Ah LiFePO4 heated batteries. We’ve watched a lot of YouTube videos, read many blogs, and seen heaps of Instagram Stories. No one had anything bad to say about them. AGM Batteries were significantly larger, not as efficient, and took more maintenance. To us, this was an easy decision.
Charge Controller
All house batteries have an ideal “charging profile.” This means that they each like to be charged in a specific way. While the solar power that comes in through the panels is close to the charge profile, they’re not exact. That’s where the charge controller comes into play. The charge controller takes the power from the panels and puts it into the batteries how they like it. All systems should have a charge controller.
We chose the Victron Smart Solar MPPT Charge Controller with Bluetooth. These come in varying sizes based on how much incoming solar power you choose. We looked a chart and went with the 100|30 because we had 420W of solar. The 100|30 can work in a watt range of 291-440W. Since the charge controller lives under the bed, Bluetooth was key for easy monitoring. The charge controller can Bluetooth to an app on my phone. I find the Victron app interface easy to use and understand. When you’re off-grid, monitoring your solar intake is important.
Battery Monitor
It made sense to us to stick with Victron for the battery monitor since we used it for the charge controller. Therefore, went with the Victron BMV-712 Battery Monitor with Bluetooth. Because our electrical system lives underneath the bed, I wanted to have a bluetooth system. Yes, it comes with a circular monitor with an incredibly long cord. However, it connects to the same app as the charge controller. So, with one app open, I can monitor how much power we’re taking in and using at the same time. This makes off–grid living easier. It’s incredibly handy.
Inverter
I held off on getting the inverter for quite some time in the electrical planning. Knowing that most of what we needed had DC options, I struggled in deciding on the inverter. Since the inverter itself takes power to run, I wanted to have the smallest possibly inverter while being able to run everything we wanted.
This worked out well in the end because the item that needed the most power is the hot water heater. The hot water heater uses between 1420-1440W of power. Therefore, we went with a 1500W inverter BECAUSE we had no other objects that had to be on at the same time. For example, if you have an AC powered fridge that will be on at the same time, you need a larger inverter.
Specifically, we went with the Samlex PST-1500-12 along with its accompanying control panel. This means we got a 1500W inverter that coverts 12V to 110V.
Cloudy Weather Components
Let’s face it. Solar power is amazing when it’s sunny or partly sunny. It’s better in the summer with longer days. What about stretches of cloudy days or when we want to park in the shade?
Its always good to have a back-up plan. There are two decent power back-ups that van lifers use: a battery-to-battery charger/isolator or shore power. Some van lifers have both including solar power.
Battery-to-Battery Charger
While a battery-to-battery charger does not rely on solar power, it does compensate on cloudy days. When connected, as you drive the van, the van will charge your house batteries. There are several options here, but we went with the Sterling 60 Amp 12v in and 12v out.
Because the Ford Transit 2020 put two easy customer connection points (CCP 1&2) on the side of the driver’s seat, installation was easy. We used CCP2 since it was rated up to 175 Amps. For once, Ford did something really convenient there!
The only downside to this option is the need to drive for the charge to occur. If you plan on sitting in one place during the cloudy stretch, this will not help. In that case, I would strategically consume less power. This would include having our portable power packs charged up during the sunny stretch and using those for the smaller electronics. If we knew cloudy days were coming, we would also opt not to use the shower until we knew the battery power could recharge easily.
Shore Power
It is worth mentioning shore power as an option to add in, despite it having nothing to do with off-grid solar power.
We chose not to add shore power. There are several reasons for this. First, shore power comes in handy at paid campgrounds. Since we hardly ever stay at paid campgrounds, we did not think it necessary. Second, we wanted a true off-grid solar power system and shore power plugs into the grid. Third, we did not want any holes cut into the side of the van. This way, we could blend in with the construction and delivery vans just a little bit more.
However, if you like to stay at paid campgrounds in the shade for extended lengths of time, shore power is a good option. If your campsite sits in the shade and you do not drive the van much, then plugging in would be your best bet.
Building the Off-Grid Solar Power System
I hope that break down helped explain the major components of the off-grid solar power system we used in our van. For me, it took a lot of reading and YouTube videos before my mind wrapped itself around all the concepts.
In the next electrical system post, I will explain the scariest part of all…creating the thick battery wires and wiring the whole system together.