Water System: How to Stay Out for a Week
Water will bring you out of the woods faster than electricity and food. That’s why we maximized our water system in the van.
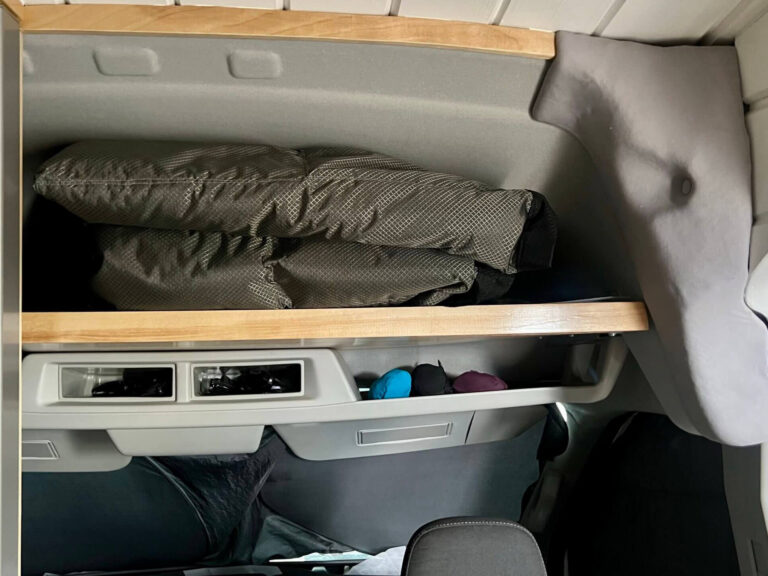
We had to balance weight with space under the bed. While we wanted a large water tank, we also need room to store two inflatable SUPs and two backpacking setups.
If you’d like to jump to the specific parts and pieces we used, feel free to use the table of contents to jump to “From Entry to Exit.”
List of Contents
How We Sized the Water System
To size our water tank, we combined our personal experience in our last van with YouTube University. For just having drinking water in our last van, we could stay out a week on about 15 gallons.
While we watched YouTube van build videos, we noted the water capacity of those with showers. The general consensus seemed to have a water system with at least 25 gallons. However, most van lifers who had 25-30 gallons always wished they had more.
In our last van we had a portable, pressurized solar shower from Nemo. This held 5 gallons of water. Karma and I could both shower with this and we usually had a little leftover. Therefore, we figured if each time both of us showered, we would use those 5 gallons.
This aligned with a 25-gallon minimum. For one week that would mean 15 gallons for drinking water and dishes, leaving 10 gallons for two showers each.
But, our goal is always to stay out a long time. A week is a minimum for us.
So, we purchased this 40-gallon tank from Class A Customs.
Hint: All the tanks are usually cheaper on the Class A Customs website over Amazon. The company’s website does free shipping where Amazon will not even with Prime.
Water System Big Ticket Items
After we picked out the size of the tank, the other components were easy to grab.
First, water will enter the van through a port on the under-bed water box into the water tank. At the bottom of the tank it exits through a small sediment filter. After passing through the filter, it goes into the Shurflo 12v Water Pump. (While you can mount this in any position, it does have a set flow direction marked by hard to see arrows.) The pump pressurizes the whole water system.
From the water pump, water flows through a Shurflo Accumulator. The accumulator acts as a silencer to make the noise of the pump much quieter.
After the accumulator, water splits and flows into a Cuzn Water Filter and the Bosch hot water heater. The Cuzn water filter purifies the water and makes it taste much better. Since water reaches very hot temperatures in the water heater, we saw no need for it to go through the Cuzn filter as well.
From the water filter, the cold water line leaves the water box and runs to a t-fitting into the sink and further to the shower.
From the hot water heater, the hot water line runs out of the box paralleling but not touching the cold line. It stretches over to the sink and further to the shower as well. While we do not think we will use it much in the sink, it made sense to run it there anyway in case we ever do. The major downside to the hot water heater is that it runs on AC power. This means we must run it off our inverter and it uses a hefty amount of power.
How Much Power Does the Hot Water Heater Actually Use??
Once we got the electrical system up and running, we did multiple tests of the shower.
First, the Bosch hot water heater takes between 1420-1440 W. This means that you need a minimum of a 1500W inverter. Also, that means that basically nothing else can run at the same time as the hot water heater or the inverter will overload. For example, if you have an AC fridge, you could not run both the fridge and the hot water heater at the same time. We have very few items that use AC power, so we can get by with the 1500W inverter. It is very important to calculate your AC power needs before purchasing an inverter.
Second, if we are parked in the shade with no solar coming in, it takes roughly 20% of our 200Ah battery system for one shower. That means it will take about 40% for two showers. If we park in the sun, it takes about 15% per shower. With 420W of maximum solar, it will offset the draw partially, but nowhere near totally.
Third, given the above information, we shifted when we take showers. Now, we take van showers in the morning when we know the sun will fill the battery bank up. Or, we take them in the afternoon sun. We avoid taking showers in the evening when the sun cannot make up the power difference. Furthermore, we do not take showers when we see a forecast of multiple overcast days.
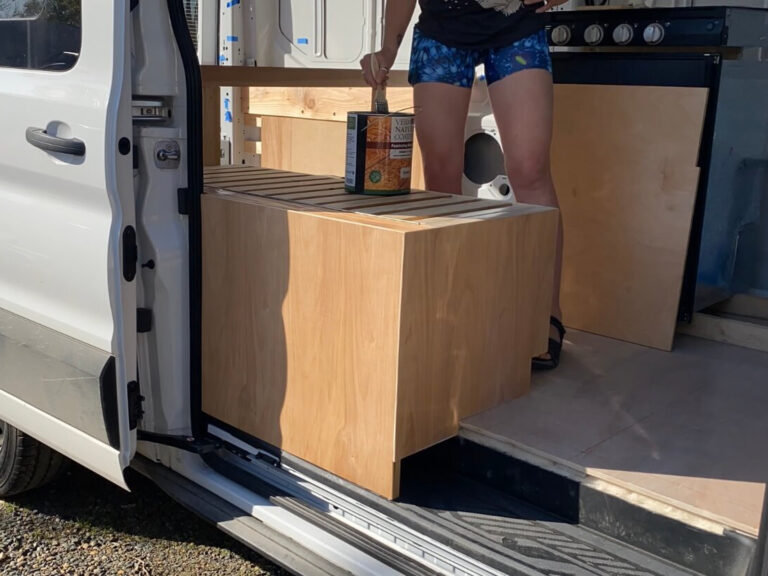
Making the Water System Box & Wall Hatch
We created a box using the under-the-bed-garage-wall to keep the water system contained. This box, unlike our propane system box, would not be removable.
In order to size this box correctly, we placed the big ticket items into the area we planned to use. Karma was adamant that we try to make the box as small as possible. That way, we could wrestle as many inches as possible of under-the-bed storage. In a small space like a van, inches matter.
Our large 40 gallon water tank became the item that we built the box around. When we found a layout that worked for us, we measured about five thousand times.
Before we screwed in the garage wall underneath the bed, we noticed three switches in the wall of the van. We were not quite sure what they did. However, we knew it would be extremely difficult to remove the water system box to access them unless we made an access point.
Cue: 6 inch marine hatch. We heard about these from a Mather’s on the Map YouTube video. These 6 inch hatches provide a water tight easy access. We drilled a 6 inch hole and added the hatch in with some leftover butyl tape from the Maxxair fan. Thus, now with a simple twist, we can access those switches that do something. Let me know in the comments if you know what they do!

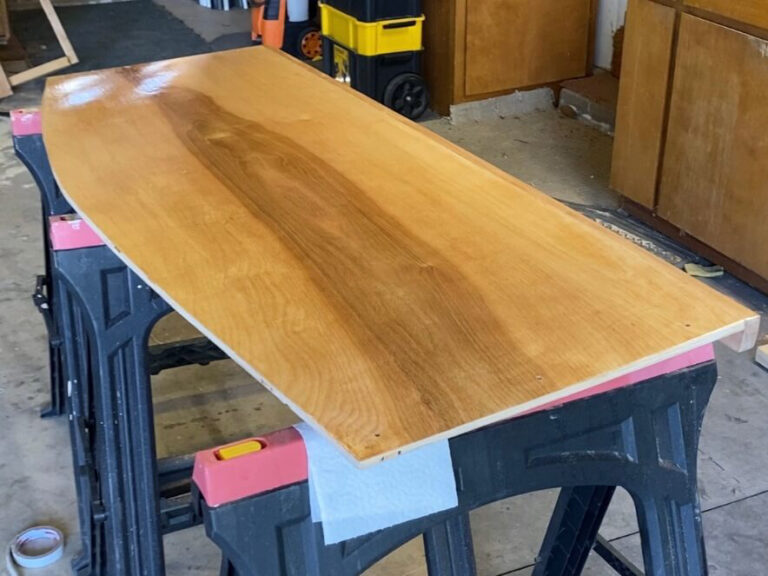
We used a 4×8 foot sheet of plywood. Employing the trusty circular saw, we cut nice straight lines for the water system box. Despite adequate measuring, we made a minor mistake on the lid. We accidentally cut it 3/8″ short. We remedied it by using a large piece of 1.5″ x 1.5″ perforated-slotted angle zinc plated steel. It sounds fancy, but it’s not. You can get it in varying sizes at Lowe’s in the metal-by-the-piece section. The rest of the box, we treated with Vermont Natural Coatings.
In case of leaks, we added thick layers of silicone in all of our screw holes and edges.

How to Make Connections in and out of your Van’s Water System
Neither Karma nor I had done any plumbing beyond plunging a toilet and tightening a faucet. Let’s just say this whole process had a steep learning curve for us.
Plumbing Shit Basics for Your Water System
In van plumbing you might use:
- national pipe thread fittings (NPT)
- garden hose fittings (GHT)
- compression fittings
- barbed fittings
- SharkBite fittings (two types depending on your tool preference: Push-to-Connect and barbed)
All these fittings have MALE and FEMALE parts. Cue all the dirty jokes. For example, an NPT fitting will have FNPT and MNPT.
For drinking water, it is safest to use brass fittings. They are pricier than you would think. While galvanized steel pieces are technically “safe” for drinking water, they are not recommended and have in the past caused lots of health issues.
In van water systems, you will also encounter plastic and brass (metal) fittings. You never want to put a brass male fitting into a plastic female fitting. Because the metal is harder than the plastic, it can crack the plastic. Cracked plastic means leaks. No one wants leaks. However, you can put a plastic male piece into a brass female piece.
HUGE NOTE: 3/4 inch NPT fittings are NOT the same as 3/4 inch garden hose fittings. While they look like they would thread together, the number of threads is different. You will strip the threads and probably have a leak if you force it.
Furthermore, all the above-mentioned fittings have adapter fittings so they can work together. For example, most faucets (and the Cuzn water filter) use compression fittings. To connect them you will need a compression to NPT (pipe threaded) fitting. A 1/2 inch compression fitting is not the same size as a 1/2 inch NPT fitting.
Lastly, not all plumbing tape is the same. The cheap white tape is not very good. Yes, you can get 5 of them for $5. However, the gray pipe tape that costs $5 for one is significantly better. In our tests, we had to replace almost all of the white tape due to small leaks.

From Entry to Exit of the Water Tank
We followed this video by Seven O Savage on YouTube. Occasionally we used a different, but similar part, but otherwise it is the same. His water system seemed incredibly efficient and well thought out. The biggest thing we modified was increasing the tank capacity.
Our water tank came with four fitting options on one end. This included two 1.5 inch female pipe threaded locations and two 3/4 inch female pipe threaded locations. We needed to use a hole saw to remove plastic on both of the 1.5 inch locations. I list below all the plumbing pieces we used for each tank location.

Top Right: Water Intake
From the garden hose we have a filter that came with the Shurflo Pump and Accumulator to catch bigger debris. Then water flows into a:
- Heavy Duty Brass Garden Hose (GHT) Connector with pressure washer
- 3/4 inch Female Garden Hose (GHT) to 3/4 inch Female Pipe Threaded (FIP) Brass Adapter
- Brass 3.5 in long nipple, 3/4 in Pipe Threaded
- 3/4 inch Female Pipe Threaded (FIP) to 3/4 inch Garden Hose (GHT) Female Brass Adapter
- Plastic Male Garden Hose 3/4 inch (GHT) to 1.5 inch Male Pipe Threaded (MIP) Reducer (Technically for sump pumps)
The reducer takes the water into the tank on the upper right side.

Top Left: Tank Air Vent
On the upper left side, we have the air vent. This travels from the 3/4 inch Pipe Threaded Female tank hole to the outside of the van. It goes:
- Into a plastic 1.5 inch nipple, 3/4 in Pipe Threaded
- Brass Female Pipe Threaded 3/4 in elbow (both sides female)
- Plastic 3/4 inch Pipe Threaded to 1/2 inch barbed (the Whitish Clear ones, not the dark gray ones)
- 1/2 inch inner diameter (ID) braided vinyl tubing
- Plastic 1/2 inch barbed T-Fitting where all three sides are 1/2 inch barbed
- 1/2 inch inner diameter (ID) braided vinyl tubing
The T-Fitting joins the water tank vent with the hot water heater’s overflow protection. Basically, the water heater’s “oh shit” release. I’ll add more on that later.
However, for the water tank vent, the braided vinyl tubing exits the wood wall of the water box. Then, it runs into the inner wall of the van. Seven O Savage mentioned that Sprinter vans have several holes on the bottom frame that are closed off with tape. After we inspected the bottom of the Ford Transit, we found several as well.
Now, getting the 1/2 in ID braided vinyl tubing through the 1/2 in outer diameter hole was another story. This took the view of us about 45 minutes of cursing and fiddling.
I ended up on my back underneath the van using a paint can opener and a pair of needle nosed pliers. Meanwhile, Karma sat in the van and threaded the tubing up and down as I missed it or lost it. Eventually, we managed to pull it through the hole and add some wire mesh.
Bottom Left: Emergency Drain Option
On the bottom left, we have the slow “drain the system” option. This is the same as the main water entry. It goes from the tank:
- Plastic 1.5 inch Male Pipe Threaded (MIP) Reducer to a 3/4 in Male Garden Hose GHT
- 3/4 inch Female Garden Hose (GHT) to 3/4 inch Female Pipe Threaded (FIP) Brass Adapter
- 3.5 in long nipple, 3/4 in Pipe Threaded, Brass
- 3/4 inch Female Garden Hose (GHT) to 3/4 inch Female Pipe Threaded (FIP) Brass adapter
- Heavy Duty Brass Garden Hose (GHT) Connector with pressure washer
This exists for when we need to sanitize the water system or drain it for storage.
Bottom Right: From the Water Tank into the Water system
On the bottom right side of the water tank, the water exits through the 3/4 in Female Pipe Threaded hole. It travels from there into:
- Plastic 1.5 in long nipple, 3/4 in pipe threaded
- Brass Female Pipe Threaded 3/4 in elbow (both sides female)
- Shurflo Water filter
- Plastic 1.5 in long nipple, 3/4 in pipe threaded
- Brass 3/4 in manual ball valve (for emergency shut off purposes)
- Nipple provided in Shurflo Accumulator Kit
- Silencer tubing (came with Shurflo Accumulator)
- Shurflo 12v Water Pump *
- Silencer tubing (came with Shurflo Accumulator)
- Shurflo Accumulator
- Brass 1/2 in T-Fitting (Female on all three sides)
From the brass 1/2 in T-Fitting water goes two different ways. For all cold water, it goes from the T-Fitting to:
- Brass 1/2 in nipple, 1 inch long
- Brass 1/2 in Female Pipe Threaded to 3/8 in Male Compression Adapter
- 3/8 Compression tubing that came with the Cuzn Water Filter
- Cuzn Water Filter intake
- Cuzn Water Filter water out 3/8 Compression tubing to 1/2 in Female Pipe Threaded
- 1/2 Male Pipe Threaded Elbow to 1/2 Push-to-Connect Pex
Then, the Pex piping travels to the sink and shower. That will be in separate posts on the kitchen area and shower.
*A note on the Shurflo water pump: It says it can be mounted in any position. This is true. However, there is a flow direction. The directions do not mention that part. A black arrow on the black portion of the pump indicates the necessary water flow direction. We did not see that and had to switch it later.
Hot Water Heater Connections
Back to the brass 1/2 in T-Fitting, water also goes directly into the Bosch 2.5-gallon hot water heater. From the T-Fitting water travels through a:
- Plastic 1/2 in Male Pipe Threaded to 1/2 in barbed fitting
- Braided vinyl tubing with a hose clamp on either end
- Plastic 1/2 in Male Pipe Threaded to 1/2 in barbed fitting
- Brass 1/2 in Female Pipe Threaded elbow to 1/2 in Female Pipe Threaded
The brass elbow brings cold, unfiltered water into the Bosch 2.5-gallon hot water heater. We keep this set to “ideal.” In reality, “ideal” is quite ideal. It might even be slightly too hot at times. As Seven O Savage mentioned in his video, if the water heats up that much, it does not need to go through the third filter as well. After the hot water heater heats the water, it exits through a:
- Brass 1/2 in Female Pipe Threaded Elbow to 1/2 in Push-to-Connect Pex
- RED Pex gets deburred and inserted into the Push-to-Connect Fitting and exits toward the Kitchen Area and the Shower.
Finally, a third exit exists from the Bosch 2.5-gallon hot water heater. We call this the “oh shit” exit. In actuality, it acts as a safety to realize water for any number of reasons. This exit already had a brass fitting attached which ended in 3/4 in Female Pipe Threaded. Thus, we added:
- Brass 3/4 in Male Pipe Threaded to 1/2 in barbed fitting
- Braided vinyl tubing with a hose clamp on their end
- Into the Plastic 1/2 barbed fitting that goes outside through the van walls that also acts as the water tank vent.
We used a brass pipe threaded to barbed fitting here because of the pressure at that location.

Installing the Kus Water Tank Sensor
Because we placed our water tank in a water box underneath our fixed bed, we needed a sensor. We wanted to know how much water we had without opening the back doors, then opening the box, then looking. A sensor would increase the efficiency of our water system.
Enter: Kus Water Sensor and dial.
The KEY in buying the Kus Water Sensor is buying it one inch LESS than the height of your tank. For example, our tank had an 18 inch height. Therefore, we bought a 17 inch sensor.
This seemed like a relatively simple way to monitor our water usage and tank level. In reality, it wasn’t the most complicated van project.
Installing the sensor itself went relatively smoothly. Electrifying it boggled our minds a bit.
For installing the sensor, we followed this YouTube video which explained it well when combined with the so-so directions.
As far as tools go, we only needed to grab a “step down bit” which the video called a Christmas Tree bit. It did indeed resemble an upside-down Christmas Tree.
We chose a location in the middle of the tank and made a hole per the instructions. The sensor has five screw points roughly in the shape of a star. They only align ONE WAY.
Besides the screws only aligning one way, the second biggest tip is to NOT OVERTIGHTEN the screws. That will render the seal less effective.
We wired the sensor to the dial far later when we made a panel for monitors.