How to Install 420W of Solar Panels on a Van (Without Any Experience)
I had never installed or worked with solar power in my life. Then I installed 420W of solar panels on my van.
It was intimidating.
I was scared.
What if I got it wrong?
I started by doing a ton of research. For months.
Let me save you the trouble. Below is the summary of what I learned about installing solar power on my campervan. Armed with this information, you can bring your rig into the future of solar power.
Also, this post contains affiliate links.
Introduction to Solar Panels
Critical to an off-grid electrical system are the solar panels. We spent an absurd amount of time researching solar panels by size, wattage, and absorption rates. When we planned our van life roof real estate, we tried every layout we could think of to maximize our solar power.
While planning out our solar panels was one of the first things we did, we did not install it until about half way through the build.
Why?
Because the solar panels determined where we could put our fan, what style roof rack we would get, and how much we could run on our electrical system.

NewPowa Solar Panels
Like everything in the van build, we did a crazy amount of research.
We concluded that we wanted to buy and use New Powa Solar Panels.
From reading reviews, we also wanted to buy them directly from New Powa instead of a third party. Because solar panels could easily get broken in the shipping process, we wanted to have the option to go directly to New Powa’s customer service if needed.
When we bought the panels, the pandemic had made shipping a little nuttier than usual and we did not know what to expect.
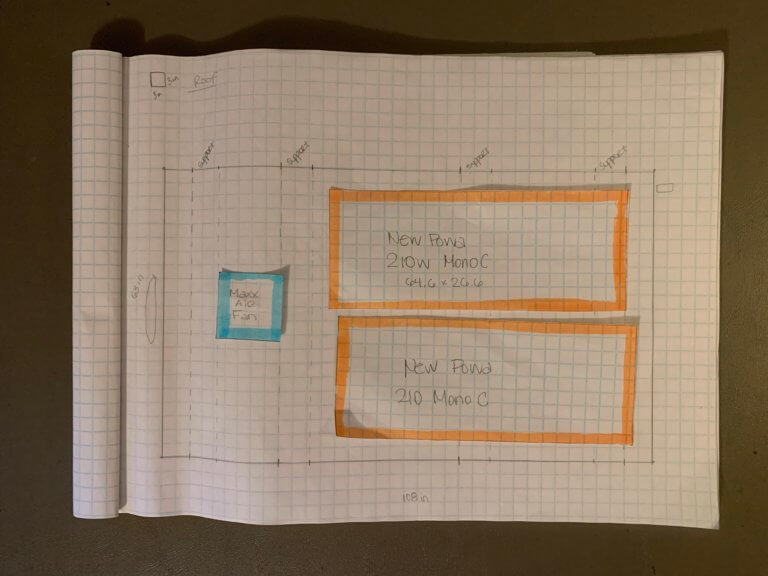
Next, as we planned out which panels to purchase, we wrote the dimensions down of panels that interested us. We made a graph paper model of the space on the roof rack and to scale models of the panels. I’m sure you can do this on computer programs, but I still like physically manipulating the shapes.
After we moved around dozens of model solar panels, we decided to use two 210W 12V Monocrystalline Solar Panels. Thus, we would have a maximum of 420W of solar power.
While we could physically fit three 210W panels on the roof rack, the edges would become shaded by the side rails. By centering two panels, we take greater advantage of the morning and evening sun rays.
Therefore, in having less power that is never shaded, we actually get more power.
I also believe they are the best solar panels for a van conversion.
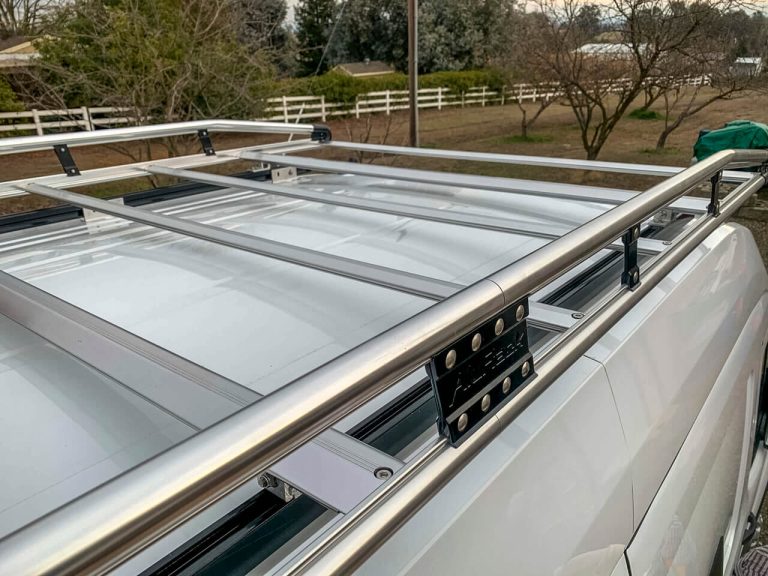
Taking the Roof Rack Off
Adding the Prime Design Alurack roof rack was one of our first projects. However, in order to securely bolt the New Powa solar panels to it, we have to take it off.
The Alurack is designed to make this easy. We unbolted the channel mounting brackets and carefully lifted it up and off the van onto scaffolding on the side of the van. Then, we brought it to the ground and into the garage.
We had four sawhorses ready to hold the rack up off the ground. Thus, we could work easily on top and underneath the rack.
Karma and I did manage to get the rack off with just the two of us. It weighed about 60 pounds or so with nothing extra on it. However, extra hands are always helpful in dealing with roof racks.


Bolting the NewPowa Solar Panels to the Roof Rack
Bolting to the Roof Rack VS Directly into the Roof
We knew we wanted to bolt the panels to the roof rack instead of the van’s roof for several reasons.
First, technology changes. If we decide to upgrade our solar panels in the future and the dimensions are different, we don’t have a lot of holes to plug in the van’s roof.
Second, if something like a tree branch falls on them and one or both breaks, we can replace them more easily. If we bolt them to the roof, then we would have to remove the van’s interior ceiling to get to the bolts.
Third, the roof rack crossbars are replaceable. At any time, I can call up a Prime Design distributor and order more or replacement crossbars.
Bolting the Solar Panels to the Roof Rack
While bolting the solar panels to the roof rack makes them more susceptible to possible theft, it would still pose great difficulty in doing so.
With the roof rack bolted to the van, one could conceivably remove the outer bolts with difficulty, but not be able to remove the inner bolts.
ALSO, by not adding a permanent ladder to the roof, one would have to bring their own ladder to get up to the van’s roof. This makes crimes of convenience not convenient.
On the New Powa Solar Panels themselves, we used some of their already drilled holes and pre-drilled a few more. We carefully used a drill bit stopper AND a piece of wood underneath to drill precise holes.
To bolt the panels in, we adjusted the crossbars of the prime design rack to more suit our needs.
We made sure a heavy-duty crossbar at the front and back of the panels. Then, we used a sharpie to mark where the holes were.
As we placed the panels on, we taped cardboard over the top of the panels. We did not want them taking in sunlight and making the wires coming from them live. Throughout the whole attachment phase, the cardboard stayed on top.
It took quite a bit of time to pre-drill the holes into the Alurack crossbars, and we broke two drill bits in doing so. We first used a small bit, then sized up to the bolt size that we needed. Then, we vacuumed every angle of each hole to get the aluminum shards out. Lastly, we added bolts, washers, locking washers, and nylon locking nuts to bolt the solar panels to the rack.


Re-Attaching the Roof Rack with Solar Panels
While taking the rack off worked ok with only two people, re-attaching the rack took four.
Each New Powa 210W panel weighs about 27.5 pounds. With the rack and the panels, it weighed about 120 pounds.
We grabbed Karma’s Dad and Brother-in-Law to assist us. Karma and I stood on the scaffolding while they were on the ground. We brought it up to the scaffolding, then transferred two people to ladders on the other side of the van. Carefully lifting the rack up and over the MaxxAir Fan, we placed it back on the van.
As this portion occurred in direct sunlight, we kept the cardboard tapped to the top of the panels.
While we had the rack off, we also made a few key modifications to the roof rack. I’ll write about that in an upcoming post about the rooftop deck!
Installing the Entry Gland for the Solar Panels
With the solar panels bolted to the rack and the rack bolted to the van, we had to drill two small holes in the roof to get the power inside the van.
Unlike the house batteries, we wired the solar panels in a series. The New Powa 210W solar panels came with 3ft positive and negative cables which ended in MC4 connectors. These act as a “quick connect/disconnect.”
We took the positive cable from one panel and the negative from another and connected them together underneath the panels.
Then we drilled two holes into the roof of the van where we wanted wires to go to the electrical system. We filed, sprayed with rustoleum, and added grommets to the holes to protect the bare metal and the wires.
From the solar panels, we connected a positive wire with an MC4 connector to the leftover positive cable and a negative with the negative. Then, we threaded each through a cable entry gland and then through the grommeted holes in the van’s roof.
Since we had plenty of butyl tape leftover from installing the MaxxAir Fan, we cleaned the roof area under the gland and butyl taped it to the roof.
We also added a hefty amount of lap sealant around the edge in three layers to keep the gland waterproof.


Connecting the Solar Panels to the Electrical System
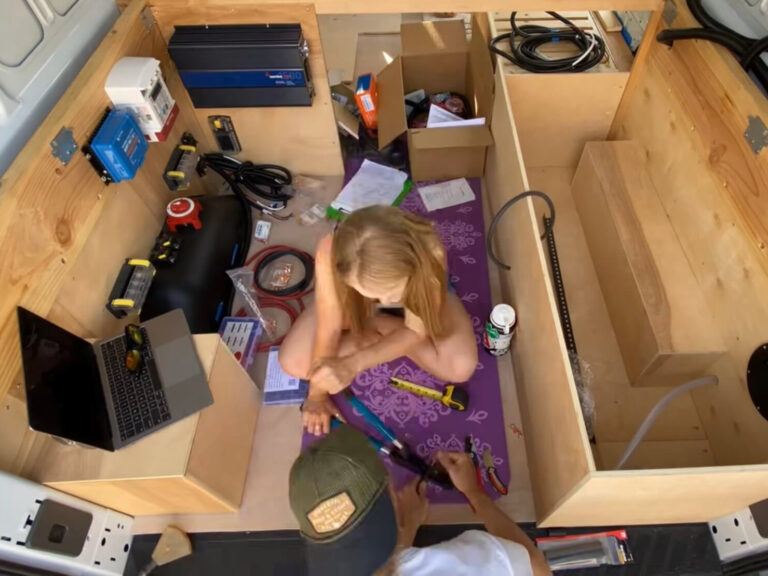
At this point, we had solar panels covered in cardboard and wires dangling from the roof inside the van.
To work on the electrical system, we flipped the main switch off and tripped the breakers, so everything was off.
We connected the Victron charge controller to the batteries with a circuit breaker in the positive line.
Then we connected the panels to the charge controller, also with a circuit breaker in the positive line. You could add fuses here, but I like the ability to cut power to various points of the system.
I recommend circuit breakers throughout the system because of the versatility it allows. Working on the system is a lot easier when you can turn off parts of the system as well as the whole.
Once we quadruple checked the connections, we climbed up and took the cardboard off the solar panels. Then, we flipped all the breakers and turned the system on.
Watching on the battery monitor screen and on the Victron App, we could see the panels taking in solar power and the battery filling! We sighed in relief and watched the numbers in fascination.
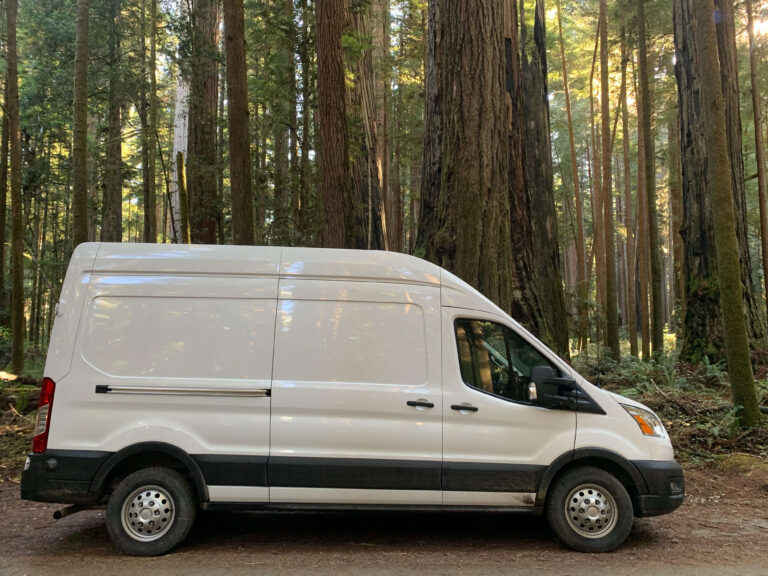
Our van now harnessed the power of the sun.

Conclusion
Having never worked with solar power in my life, this portion went relatively smooth.
We picked out the NewPowa solar panels based on the space we had on the roof.
Then, we did the work to set up the main portion of the electrical system. I do recommend if you have the time, making your own system INSTEAD of a kit. You’ll understand it much better after you do and troubleshooting will be much easier.
By the time we put the solar panels on, it was only a matter of connecting them!