
Propane System: Is It Safe In A Van?
Where are we in the Van Build?
In the last conversion post, we ran, crimped, and heat shrank all of our 12v appliance wires. This felt like a HUGE step for us. Electrical has held us up in the van build. I think it’s the ultimate crux of van building. However, when we went to begin on the bigger parts of the electrical (batteries, inverter, charge controller, etc.) we realized we had to pause. Why? Because those locations depended on the van’s propane system.
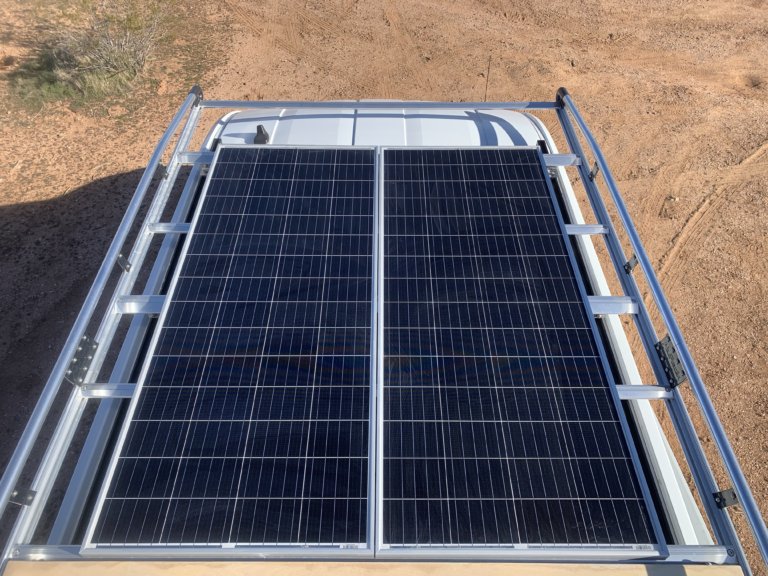
Like any good van build project, one system is somehow inextricably tied into the placement of another. In this case, our garage under the bed will house not only the electrical system, but the water system and our propane system. Since we have a massive water system, the electrical and propane systems both need to reside on the same garage side.
Ultimately, this means that the propane system determines how much room on the back wall the electrical can take up.
So, we paused our electrical system to create our propane system. But, like any good van project, that won’t be complete until the kitchen galley gets built later on in this conversion series.
Our Old Van Propane System
We did the propane Coleman stove in our last van. It was cheap and conveniently moved outside when we wanted to cook and watch the sunset. However, it was inconvenient in having to set it up and break it down so often. When we had long driving days and I wanted extra cup of tea, we had a long process in making it. Frequently, I wouldn’t make it because I had to pull the whole stove out and put it all back. It did not seem worth it.
The Coleman stoves work mostly on the 1 lb propane canisters that you can find literally anywhere. We loved this convenience of finding them, but hated the waste they created. Now, they do make refillable ones. If you get five of them, you can usually fill them up at propane filling stations (they often have a minimum of 5 lbs).
While using it inside the van, we made sure to have either the back doors or the side doors open. At the very minimum, we had the two front windows open. This seems convenient, but if it’s super windy or raining, not so much.
The Coleman system did work, but it just got tiresome.

Our New Van Propane System (Now)
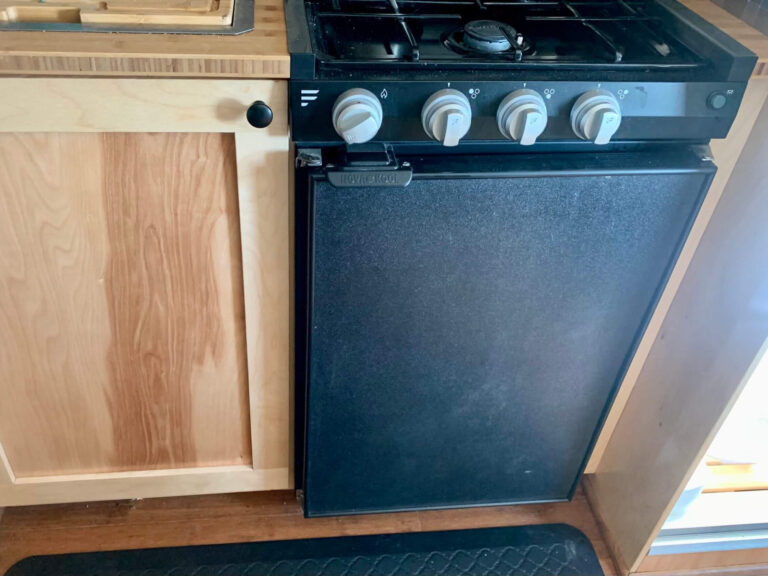
For this van build, we purchased a 12v RV cooktop that runs on propane. It has three burners and looks mighty pretty!
It has a location for a fixed propane line to enter at the back and will be hooked to a propane tank in the garage.
This is where it got complicated. When you make one choice in a van build, it affects many other choices.
Because we chose to have a thick, real mattress, our garage space is a little less than if we stuck with memory foam.
After a lot of measuring and testing, we determined the height of the bed frame by the space we would have between our heads and the ceiling when sitting up. Neither of us wanted to duck sitting up on the bed after having that issue in the last van. That shit just gets uncomfortable. For real.
With a few inches of space between our heads and the ceiling, we maximized our garage space as best we could. That gave us about 26 inches from the floor to the bed frame.
Now, you would think 26 inches is pretty dang good. And, it really is. Except for a normal 20 lb propane tank also known as the BBQ tank.
Because propane is a heavy gas, if it leaks, it sinks. Therefore, for a safe propane system, the vented propane locker must be top loading. This is also per ABYC standards for boat propane systems. Generally speaking, if it’s safe for a boat, it is also safe for a van.
Propane Tanks
As I mentioned above, our setup would not work with a regular 20 lb BBQ tank. Why? They are 18 inches tall. If we have 26 inches of height, we cannot physically remove the tank under our bed frame.
After a lot of deliberation, we determined that overcomplicating a propane locker to be top loading with the top third being removable did not sound like fun. This project was supposed to be easy!
We returned our 20 lb propane tank that we purchased to check all the possibilities and went back to the drawing board.
After some good old fashioned internet research and a few phone calls, we found our solution.
We found the dimensions of an 11 lb propane tank would fit with just enough clearance. Ace Hardware had the 11 lb Manchester propane cylinder that had a height of 12.4 inches. To pull it completely out of the locker, we then had about an inch of spare space. Perfect!
Because we wanted to work right then, we called a few Ace Hardware Stores to find one in stock. Once we did, we ran right over to get it.

The Vented Propane System Locker
Here’s where another blog post helped us out significantly. Although they did not get into how to make the locker box with a lot of detail, it had all the regulations marked and all the parts. FarOutRide created a fairly easy to follow post about their 20 lb vented propane locker.
Using that blog post as a base, we created our own for our cute little 11 lb propane tank.
Between the back support pillar and the wheel well, we had 13.5 inches of space for the locker. Since the 11 lb propane tank has a diameter of 12.2 inches, this gave us just enough space for ½ plywood walls.
We started by making a base for the propane to sit on with ½ inch birch formaldehyde free plywood. This base was 12.5 inches x 12.5 inches. This provided just the smallest amount of wiggle room.
Next, we made two boards for the sides 13.5 inches wide by 14 inches tall. We made the other two side boards 12.5 wide inches by 14 inches tall.

Then, it was just putting the pieces together like a puzzle with some wood glue. As we set them, we used 12.5 inch spacers to hold the opening to the right dimensions. To hold it together, we used ratchet straps. Although, 24 inch clamps would work as well (we only had one at the time).

The following day, we made the lid. This, we made 13.5 x 13.5 inches. On the underside, we glued some small strips of wood in a square ½ inch from the edge. This would create the eventual seal. From there, we added some neoprene on the edge to create a tight seal for the lid.


But, What About the Propane System Vent?
This part got a little more complicated. In theory, drilling a hole in the floor of the van is pretty easy. In reality, it takes a lot of measuring.
Drilling the Hole in the Van Floor
You know that adage of “measure twice, cut once?” When drilling a hole in the van, it’s more like measure 5,000 times and cut once.
After about an hour of measuring the same few spots, we did decide on a location. Part of it is that you don’t want to hit the support beams underneath. Another part is that it’s hard to find the same locations to measure above and below.
We got a hole saw set that could drill through both wood and metal. This is important since we had to drill through our subfloor as well as the van’s sheet metal floor.
PVC Pipes We Used and How We Used Them
Taking a deep breath, we drilled a 1 ¾ hole through our subfloor, a furring strip, and the van’s sheet metal. And, it worked! We drilled the hole exactly where we intended.


We grabbed the propane locker box and drew up from underneath the van onto the bottom of the box. This allowed us to know the precise location to drill a smaller hole in the locker.


In the hole in the van, we placed a piece of 1 ¼” PVC pipe which actually has an outside diameter of 1 5/8. We grabbed the trusty Loctite Marine Adhesive and glued it tight. The top of the pipe stayed flush with the top of the subfloor by a tower of random things supporting it from the ground. We added a 90 degree PVC angle to the bottom with wire mesh glued on as soon as it dried.
While the marine adhesive set there, we grabbed a 1 ¼ hole saw and drilled inside the circle on the bottom of the propane locker. This left a perfect hole for 1” PVC pipe. With silicone (the lowest VOC we could find at the store), we attached the 1 inch pre cut PVC pipe. The top of the PVC pipe sat flush with the inside bottom of the box. We also siliconed in some wire mesh in hopes of preventing critters.


So, How Does the Propane System Locker Attach?
After letting the marine adhesive and silicone dry for 24 hours, we tested the fit. The propane locker fit exactly into the 13.5” x 13.5” space with the 1” pipe dropping perfectly into the 1 ¼” pipe. (We did make sure the pipes fit inside each other beforehand. That’s where we discovered that ¾” pipe does NOT fit into 1” pipe as FarOutRide said.)
We drilled a hole for the 3/8” bulkhead union flare which would connect the propane in the box to the copper pipe that will run to the stove. This, we added two rubber washers around, one on each side.
Finally, we drilled a hole just big enough for the wire to the Solenoid Valve. This will allow us to turn the propane on and off from the kitchen with a switch.
The box stayed really well in place because of the pipe and the tight fit of the wheel well. However, we did add two screws high up on the propane locker wall that touched the garage wall. That held it securely in place.
Lastly, we added silicone around every edge inside the propane system box. This included around the wire and over the two screws.


Is the Propane System Finished?
Having any van project finished is sometimes laughable. Usually there are at least five large projects working simultaneously.
What IS Done:
- The vented propane system locker is firmly in place and is protected and ready for when we need it to run the copper pipe.
- The 11 lb propane tank that we built the box around is in our possession for so we can fill it when needed.
- We have all the other parts of the propane system that go inside the box and have them loosely together awaiting installment.
- We have the copper pipe and the tools to bend it.
- The vent is in place and protected from critters.
What STILL Needs to Be Done:
- Install the box latches after we make the electrical box.
- Build and install the kitchen galley which will house the stove.
- Install the copper pipe and run it to the precise location of the stove.
- Finish the electrical system to attach the on/off switch in the kitchen and wire the solenoid valve to the 12v fuse block.


“Neither of us wanted to duck sitting up on the bed after having that issue in the last van.” Well, your careers in professional basketball may have never panned out, but I think we can safely add “#VanLife” to the short list of activities such as “avoiding being noticed in a crowd” and “using an airplane bathroom” where being vertically challenged is an absolute advantage. Keep on inspiring.
hahahaha Thanks, Wazi!