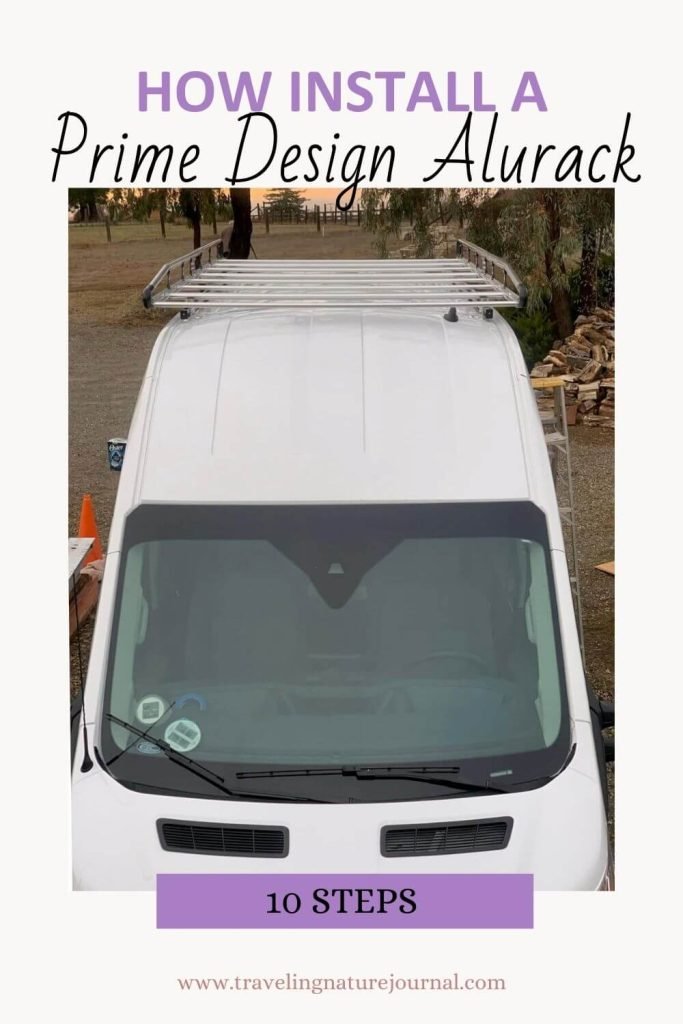
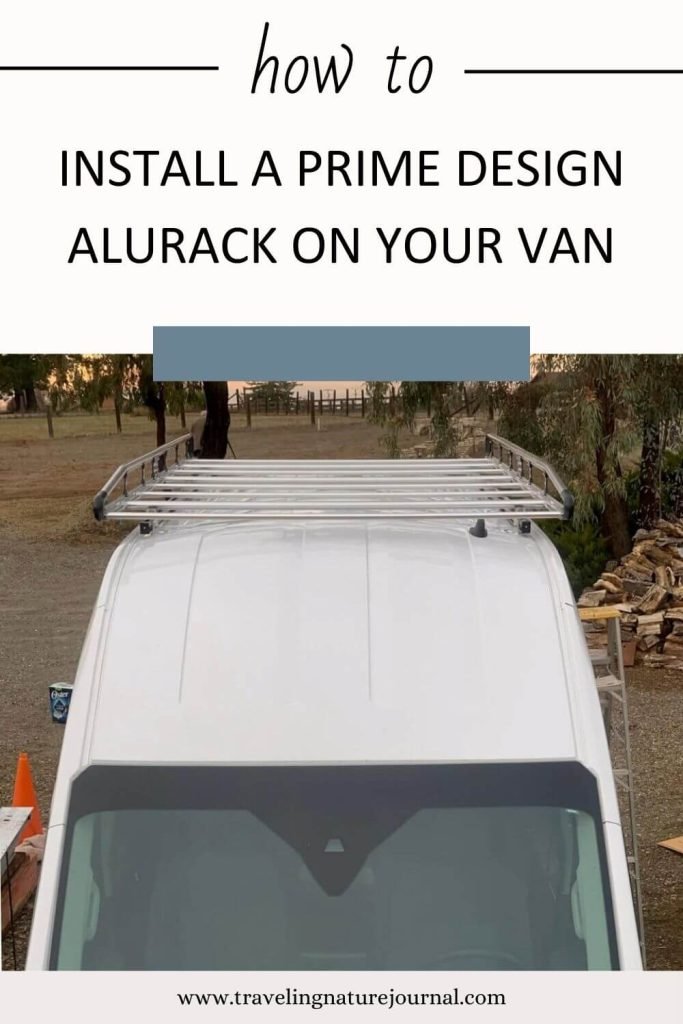
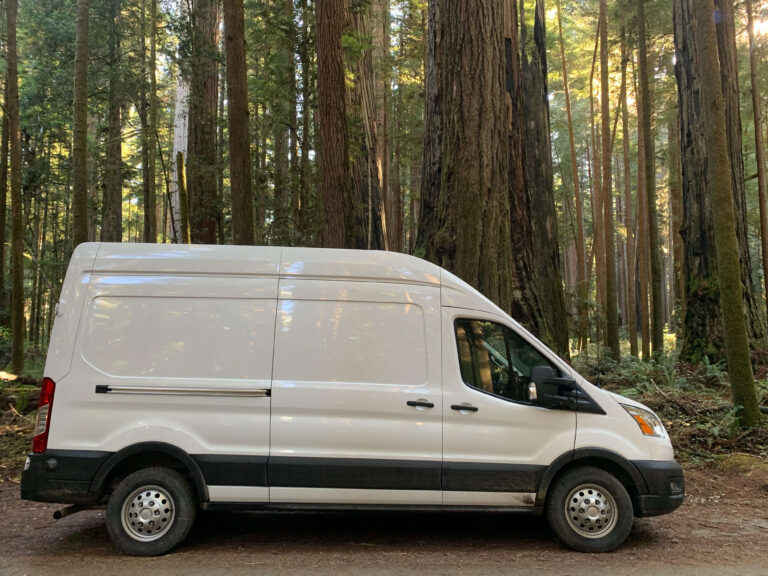
Prime Design Alurack: How to Install a Ford Transit Roof Rack
If you don’t like the idea of drilling straight into your van’s roof for your solar panels, you should consider a roof rack! The Prime Design Alurack is easy to install and adjustable, so you can change what’s on your roof later.
My partner and I spent 8 months building our dream van. Because technology can change fast, we wanted the option to switch our solar panels if needed, so we did not want to attach the panels directly to the roof.
A cargo van roof rack does just that—the Prime Design Alurack fits into the pre-existing roof rack holes and has adjustable crossbars. We even called the company and ordered an extra bar to give our deck extra stability.
A roof rack can be added to your Ford Transit van, which is amazingly versatile. You can add solar panels, a deck, a cargo box, Starlink, or more.
Below, I’ll answer all the questions I had before getting a roof rack and give you step-by-step instructions for installing your own Prime Design Alurack!
List of Contents
Why Put a Roof Rack on a Ford Transit Van Build? (+FAQ)

There are advantages and disadvantages to adding a cargo van roof rack.
We installed our Prime Design Alurack on our Ford Transit van build 3 years ago, and it’s still holding strong with no leaks. *Knocks on wood*
Before you pick a roof rack, you should get a solid idea of what you want to put on your roof and list out the weight of each item. Think like a thru-hiker here, and aim for lightweight options!
Then, make sure you research your van’s specs. Each van has a slightly different weight rating for what the roof can hold.
Advantages of a Roof Rack
We saw several main advantages to a cargo van roof rack for our van build. We knew some of the advantages before adding it, and we discovered one after the fact.
Major Advantages:
- The Ford Transit already has the specific infrastructure for adding a roof rack. Thus, you’re using the holes Ford suggests (less drilling of extra holes).
- We did not want to fix our solar panels directly on the roof in case one broke or if we wanted to upgrade later. *If we bolted them directly to the sheet metal, we’d need to take apart the ceiling to change or fix them.*
- A roof rack allowed us to make a small deck around the fan.
- Airflow between the solar panels/deck and the roof keeps the inside cooler by absorbing the heat.
In summary, if you foresee changing your solar setup or van roof real estate at all, a roof rack allows you to do so without taking apart your ceiling.
The Prime Design Alurack offered a (relatively) affordable option to gain these advantages.
Disadvantages of a Roof Rack
Two of the advantages can also become disadvantages, depending on how you drive and how you install items to the van roof rack.
Major Disadvantages:
- A roof rack adds another potentially expensive cost to your van build. The amount depends on the specific cargo van roof rack you choose.
- Your solar panels could be stolen more easily if you’re not always with your van. By bolting them to a roof rack, someone with the right tools could access them.
- That airflow that keeps the inside cooler also decreases the gas mileage and makes the van a little harder to drive on very windy days.
We have successfully negated the second disadvantage by using a telescoping ladder that we store inside our van instead of a mounted ladder for roof access.
As for the gas mileage, I have no solid data other than talking to other van lifers without roof racks or lower racks other than the Prime Design Alurack.
I also use the Open Snow app to view wind forecasts before driving. We plan our drives on less windy days whenever possible.
How Much Weight Can I Put on My Van Roof?
Each van has a different roof weight rating. For example, even the Ford Transits have different weight ratings on the low, mid, and high roof options.
Also, each van has a dynamic and a static roof weight rating. You’ll need to keep your roof rack and everything on it under your dynamic weight rating, which applies when you are driving.
The static weight rating is *usually* higher and applies when you’re parked. For example, the weight of my partner and myself on the deck is higher than the dynamic weight rating, but within the static weight rating. If you look around your vehicle manual, you will find the dynamic weight rating. Here are the ratings for the Ford Transits.
Roof Rack Options for Van Builds
Vans that came out in the last 10 years have many great options for cargo van roof racks. Prior models, especially those with fiberglass rooves, will have a harder time.
When picking which rack you want to buy, you should consider price, weight, and height.
Price is an important factor to consider when planning your van build. Consider how to balance the price of a roof rack with the other high-ticket items you want to install.
Weight can impact how your van drives and what else you can put on its roof. Make sure that the weight of the roof fits within the dynamic roof weight of your particular van.
Height can also impact how your van drives, what airflow goes between your solar panels (or doesn’t), and the height of the side rails for possible shading of the solar panels.
That being said, here are some cargo van roof rack options:
- Prime Design Alurack
- Flatline Van CO Low Profile Rack
- Aluminess Cruiser, Weekender, or Touring Racks
Those 3 companies are the main options you’ll find on van builds. You’ll notice they get progressively more expensive as you go down the list.
Why We Chose the Prime Design Alurack for our Ford Transit

We chose the Prime Design Alurack for 2 reasons with one minor third reason.
First, we chose it as the lower-cost option. We still had several high-ticket items we wanted to build into our van, and the Prime Design Alurack saved us money.
Second, we built our van in early 2021, and many items weren’t available at all or had huge backorder times. If the Flatline Van Co had their low profile option available or backordered within a reasonable time, we would have chosen that roof rack. However, I couldn’t even backorder it when we planned our build.
Lastly, we thought the Prime Design Alurack might give us a little more blend-in-ability since it’s a construction roof rack. While the cat’s definitely out of the bag with many people living in vans, it does add a bit more stealth than the other options.
Installation Instructions for a Prime Design Alurack on a Ford Transit
Since there are never enough instructions for van build projects, here is how we installed the Prime Design Alurack on our Ford Transit.
We have the 2020 Transit with AWD, High Roof, and a 148” wheelbase for reference.
Preparation before Installing the Alurack
First, set aside half a day to a full day to install the Prime Design Alurack.
Then, make sure you have all the tools you need and a few handy that you might need.
Finally, we loosely laid our Alurack out in a room with the morning sun to see how much the side rails would shade our solar panels. We laid our solar panels on the cross bars and marked where we would add them later. (Shading decreases your solar output.)
Tools You Definitely Need
These are the tools you should need to install the Prime Design Alurack. Luckily, its’ not many and they’re fairly common tools.
- Pliers
- Plastic Scrapper
- Rubbing Alcohol/acetone
- Cotton swabs or a rag
- Allen wrench
Tools You Might Need
These are extra tools we needed during our installation, but you may or may not need them.
- Metal file
- Rustoleum
- Heat Gun
Installing the Prime Design Alurack Step-by-Step Instructions
These are the steps we followed to install the Prime Design Alurack.
Disclaimer: We are not experts, and the following instructions stem from our personal experience only. Follow at your own risk.
Final preliminary note: The direction packets that come with the Prime Design Alurack include instructions for every version of the rack they have per vehicle they make. For example, included in the directions for the Ford Transit Alurack are instructions for the 130, 148, and 148 extended wheelbases AND for the low, mid, and high roofs. Make sure to circle or highlight your instructions before beginning for easy reference throughout the installation.
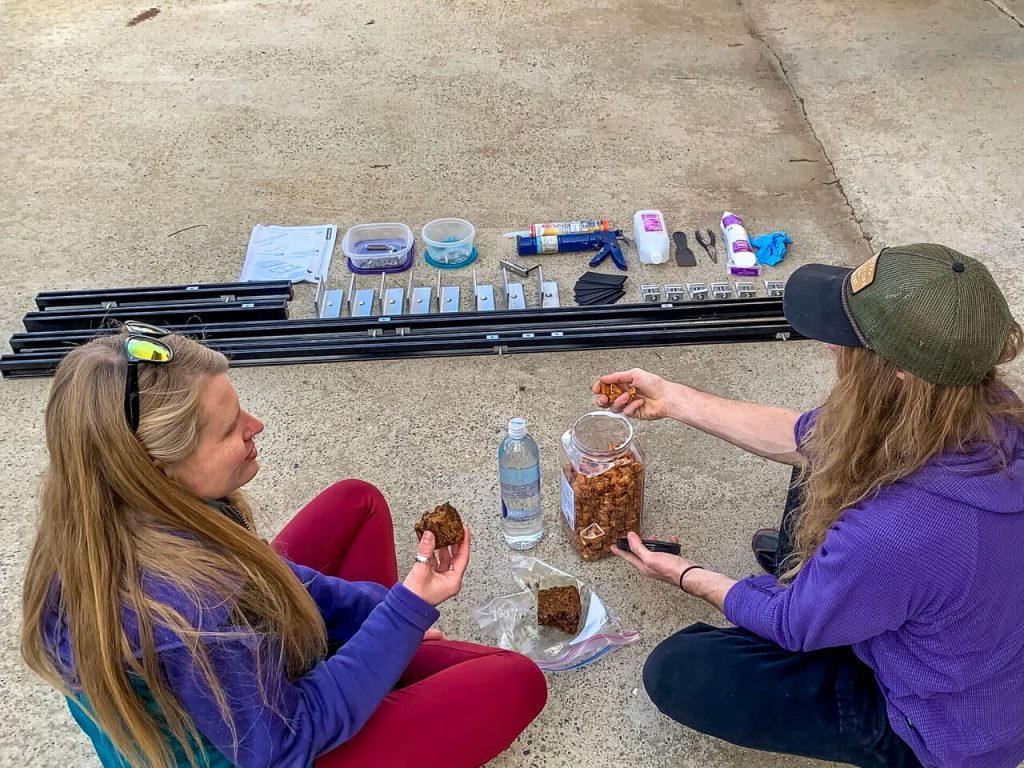
Step 1: Make Sure You Have All the Parts

Find a clean area and lay out all the parts for your Prime Design Alurack.
I know this sounds trivial, but we were missing a washer. It’s better to know you have all the pieces before you start a project than to find out you’re missing one halfway through.
There were 3 instruction booklets that came with the parts. If you haven’t already highlight or mark the instructions for your van type before starting. I also recommend having a snack before you start. Beginning a project hangry never works out well.
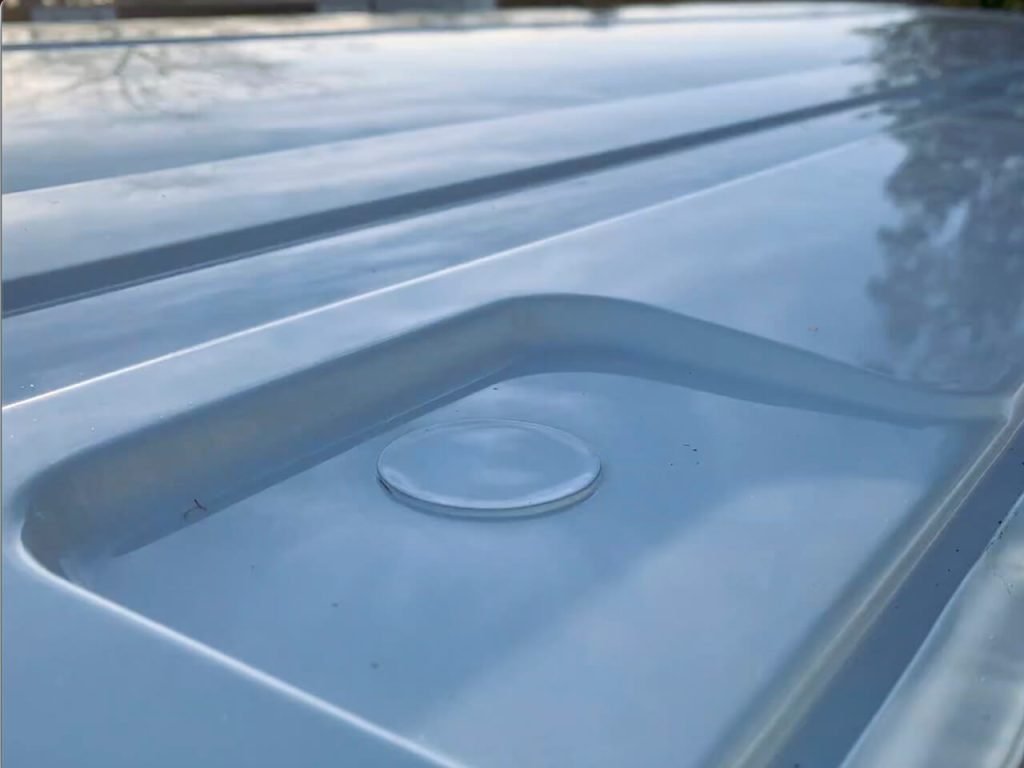
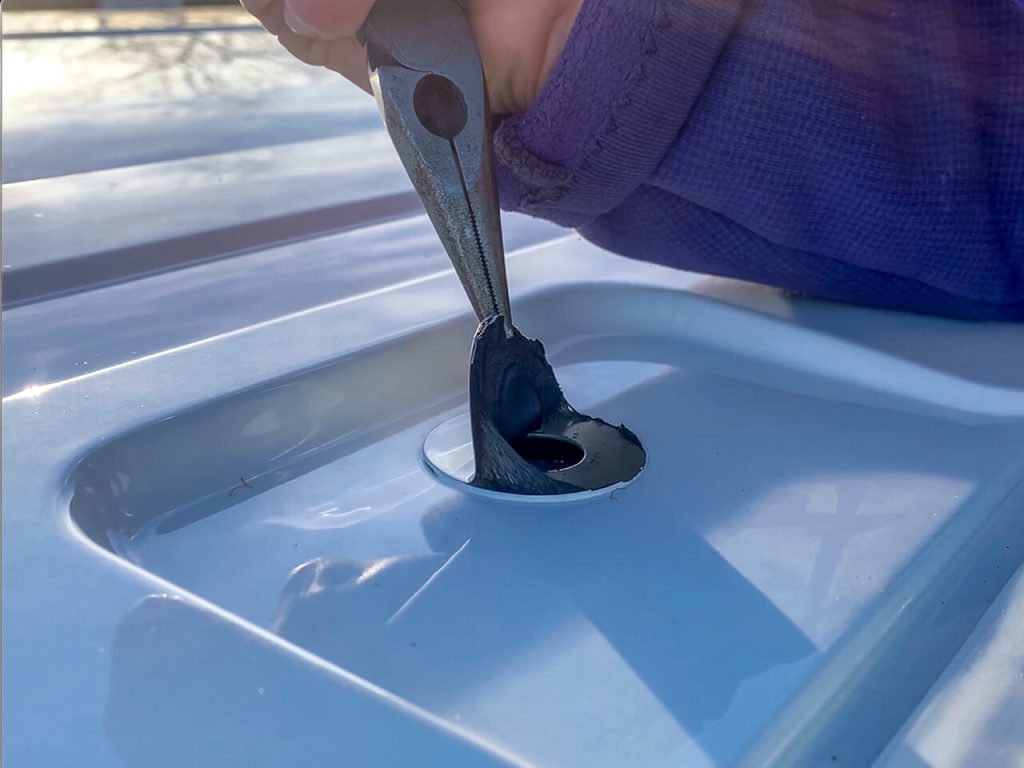
Step 2: Remove the Plastic Stickers on the Van’s Roof
Set up ladders and scaffolding if you have it on either side of the van.
Locate the 8 holes covered by stickers. These are intended to cover holes designed to hold a cargo van roof rack.
On the Ford Transit, the sticker-covered holes are located on the major support beams.
Remove the stickers with a plastic scrapper. I found I could lift the edge of the sticker with my fingernail and then peel the rest off with the pliers or the plastic scrapper.
Pro Tip: These stickers come off easier when they’ve warmed in the sun. If it’s colder out, you can lightly employ a heat gun to assist your efforts. Note: The second hole from the front of the van on the driver’s side had a slight alignment issue. We saw this occur on another van build on YouTube here. BASICALLY, the sticker hole did not line up with the screw hole underneath. Since the alignment was only slightly off, we used a metal file to shave off just enough that the bolt could screw in without interference from the roof sheet metal.
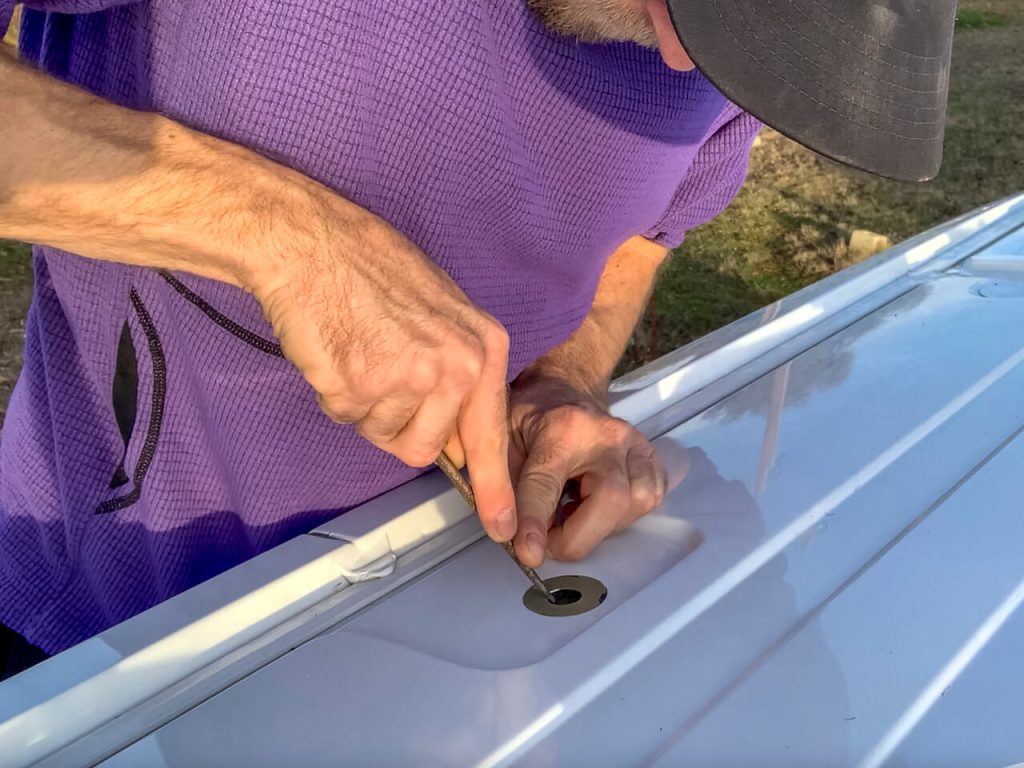
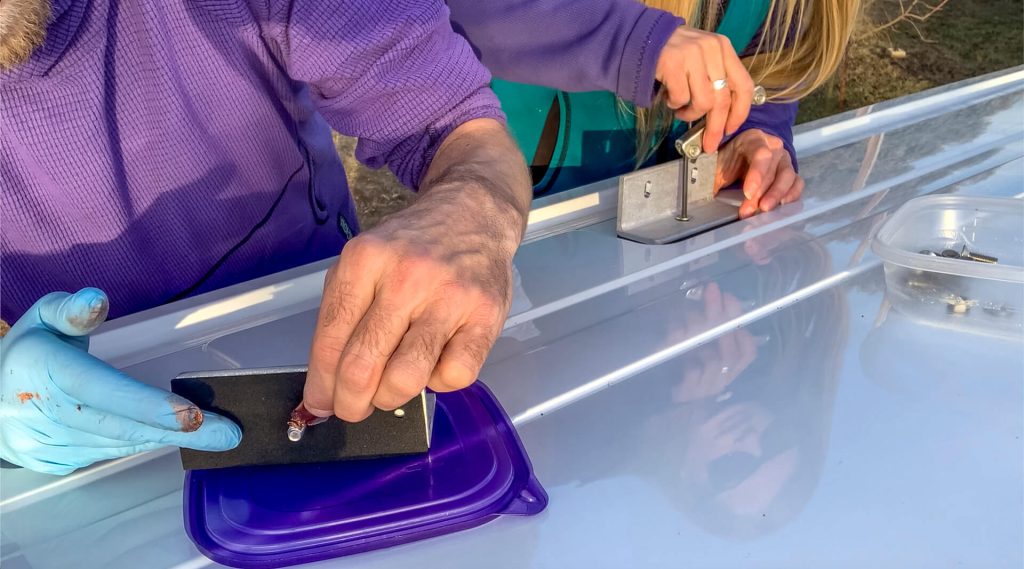
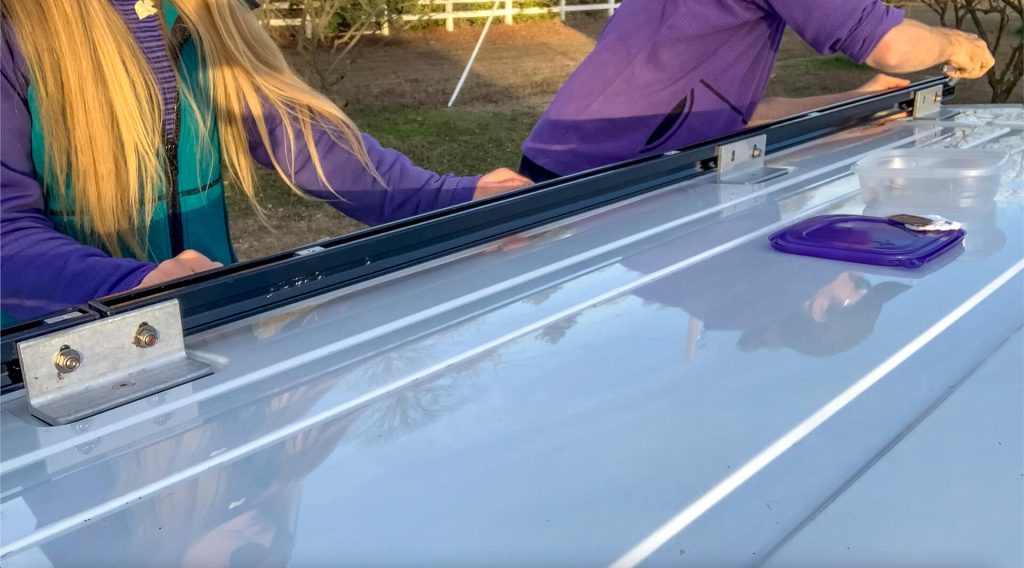
Step 3: Install the Channel Mounting Brackets
Grab the Prime Design Alurack “Mounting Kit” instruction packet and flip to the correct section for your van AND rack. This is the thickest of the three packets. For the Ford Transit with a high roof and 148” wheelbase, it’s page 16.
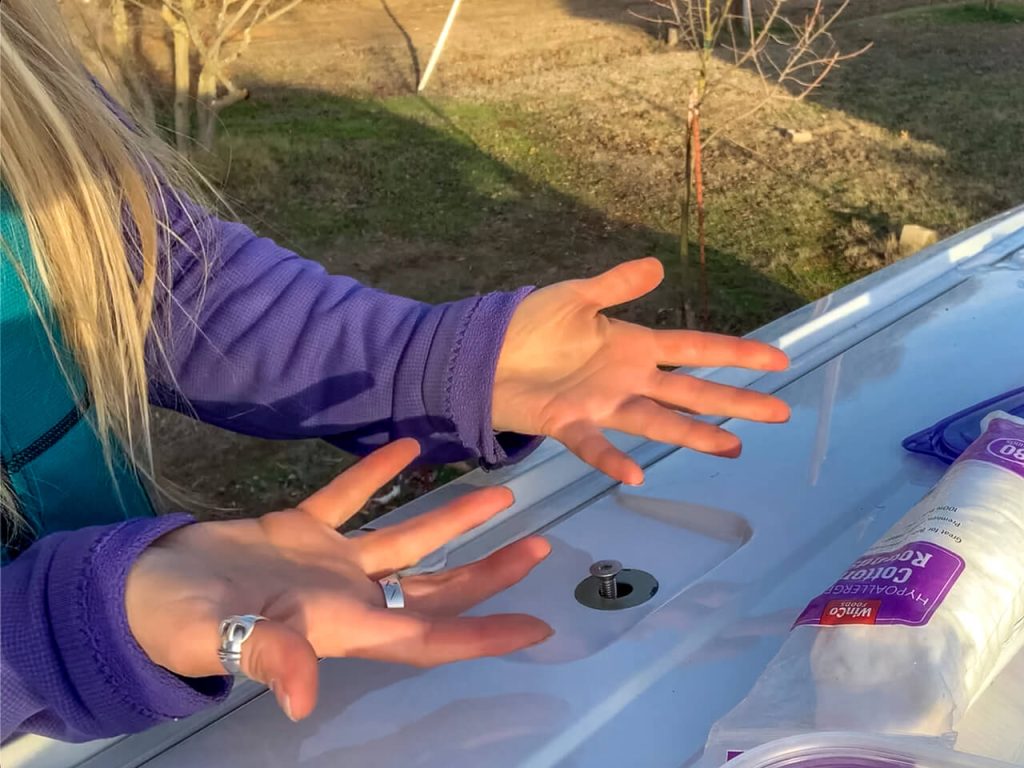
Next, grab the foam pads, channel mounting brackets, M8 bolts, and anti-seize goop.
Double-check that you’re placing the mounting brackets in the correct direction.
Then, wear gloves and work clothes to open the anti-seize goop. Apply it to each M8 bolt as you screw the mounting bracket and foam pad into the roof rack holes you uncovered in step 2.
Don’t ditch those gloves yet!
Step 4: Add the Channels to the Channel Mounting Brackets
Add the channels to the channel mounting brackets with more M8 bolts, flat washers, and anti-seize goop.
To do this, grab the set of four channels. One big and one small go on each side for your Prime Design Alurack.
You’ll want to line them up according to the photo in the instructions and use anti-seize goop on each M8 bolt as you go.
Add the goopy bolt to the flat washer and screw the channels into the mounting brackets.
Before fully tightening, make sure that the big and small channels butt up to one another AND are even on both sides of the van.
Then, tighten those bolts up.
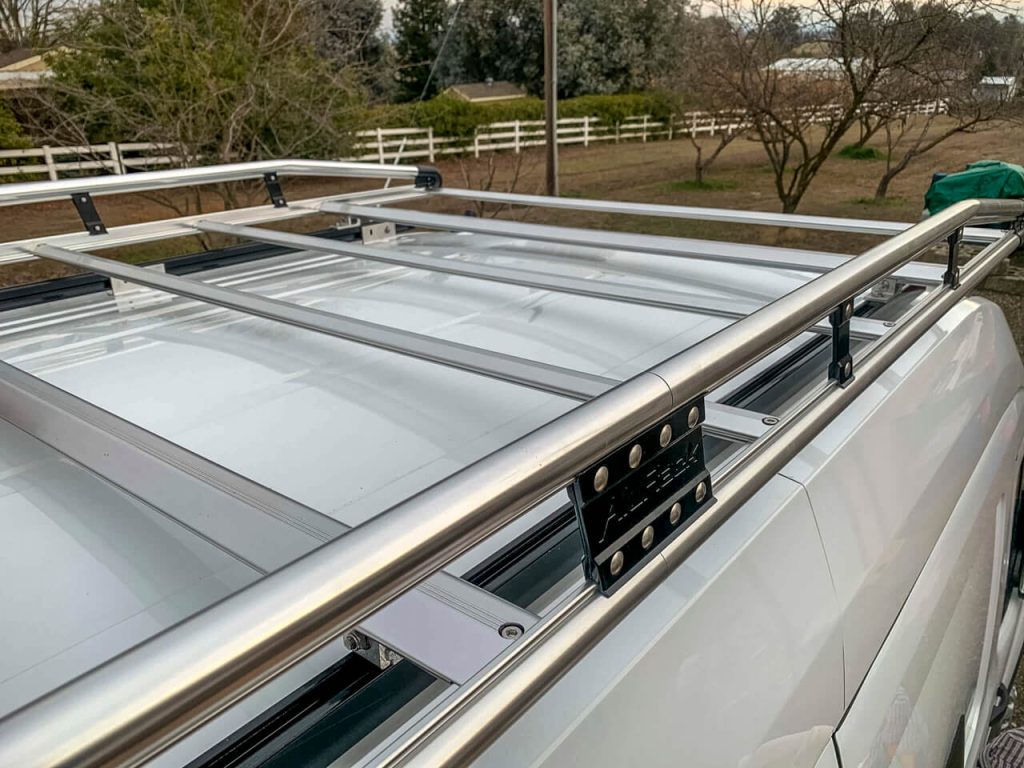
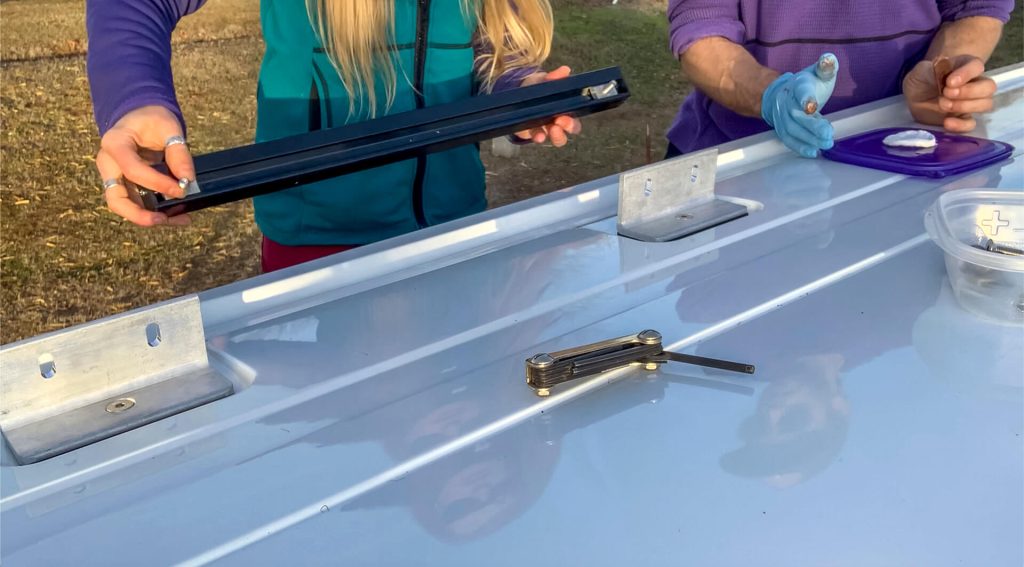
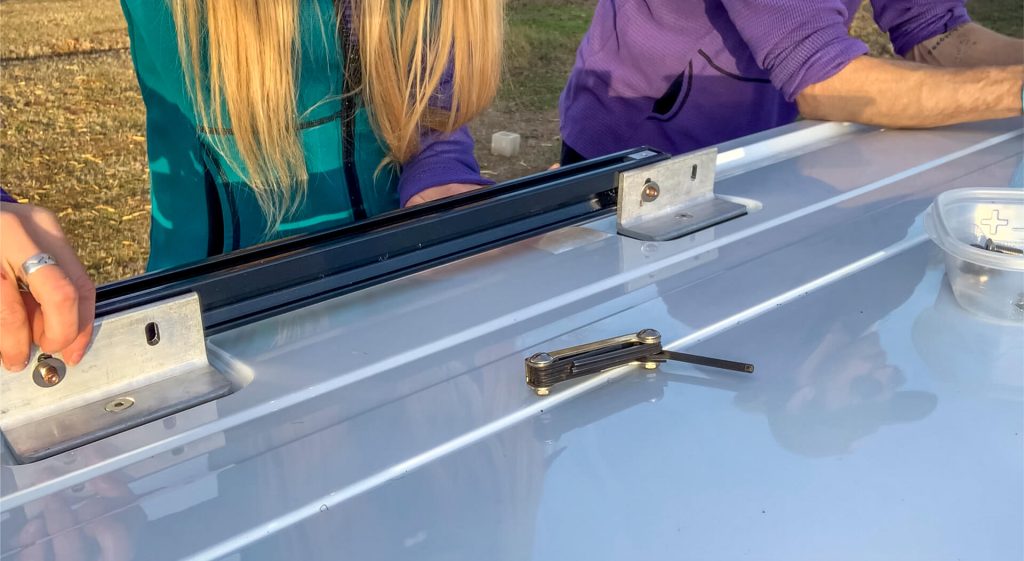
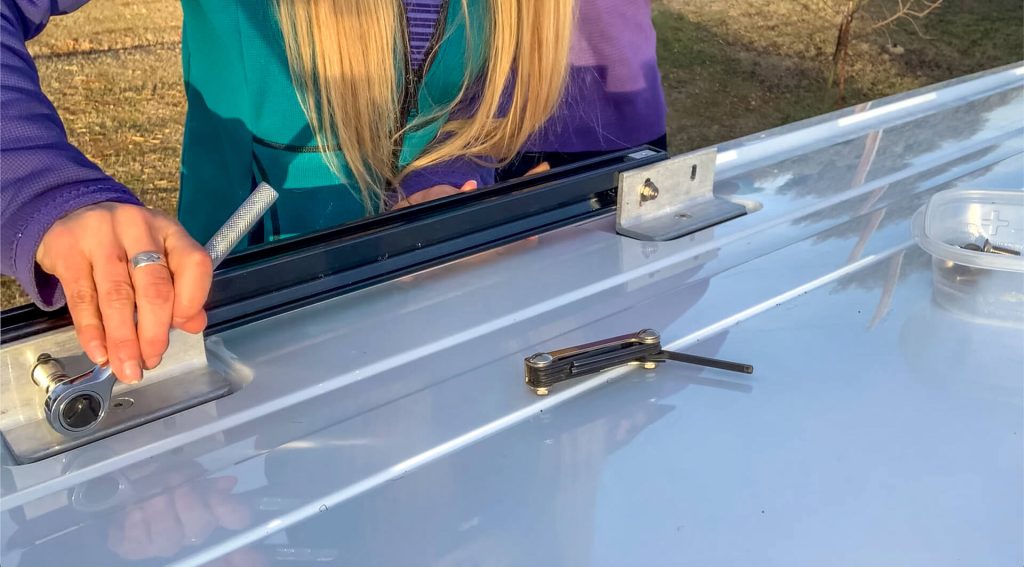
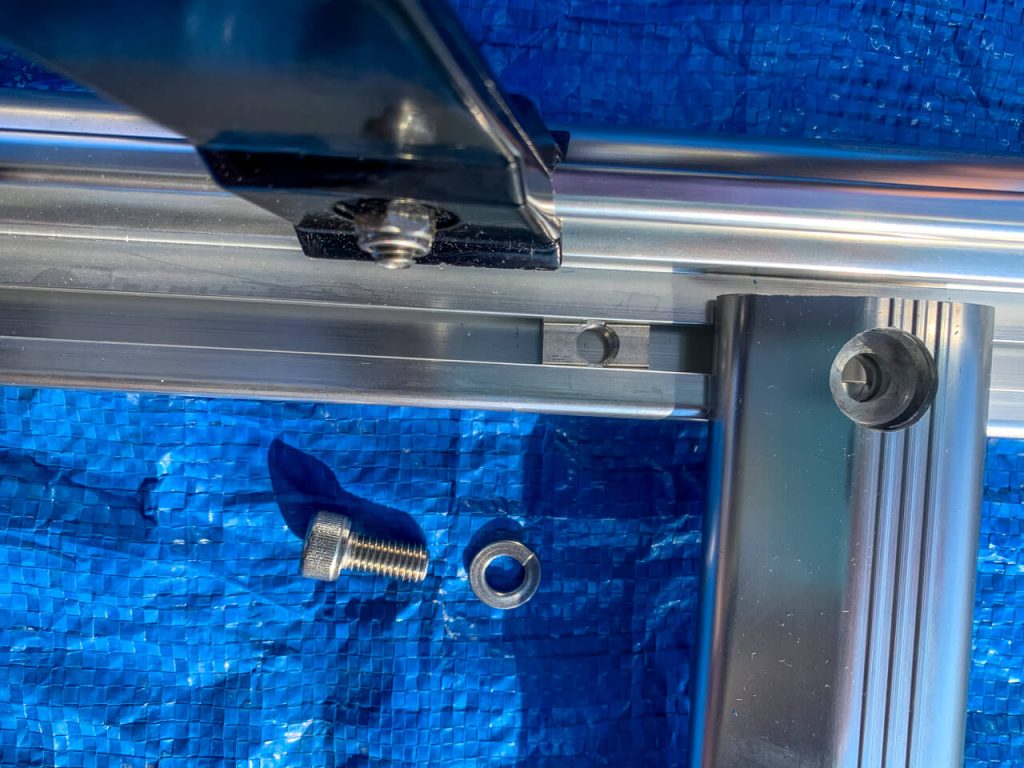
Step 5: Add the Rack Mounting Brackets to the Channels
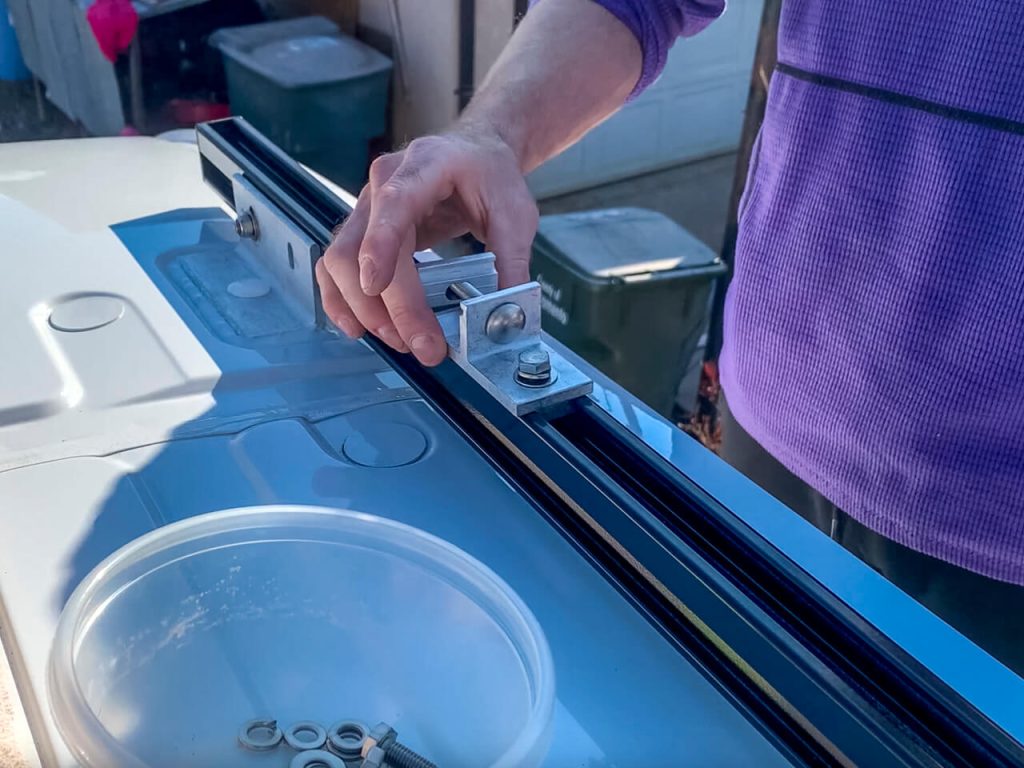

Now, you’re going to grab the six mounting brackets. These are the ones shaped like an F.
These do attach in a specific way, so make sure you look at your directions here.
An M8 bolt will go through the bottom part of the F into the channel.
On the FRONT of the van, the bottom of the F points backward. On the MIDDLE and BACK of the van, the bottom of the F points forward.
Attach these 6 mounting brackets loosely with a locking washer and a flat washer. I say loosely because you’ll likely need to adjust them based on where you put the heavy-duty crossbars later.
To start, you can follow the diagram and the suggested measurements between each bracket. The Prime Design Alurack allows for wiggle room on bar placement to a point.
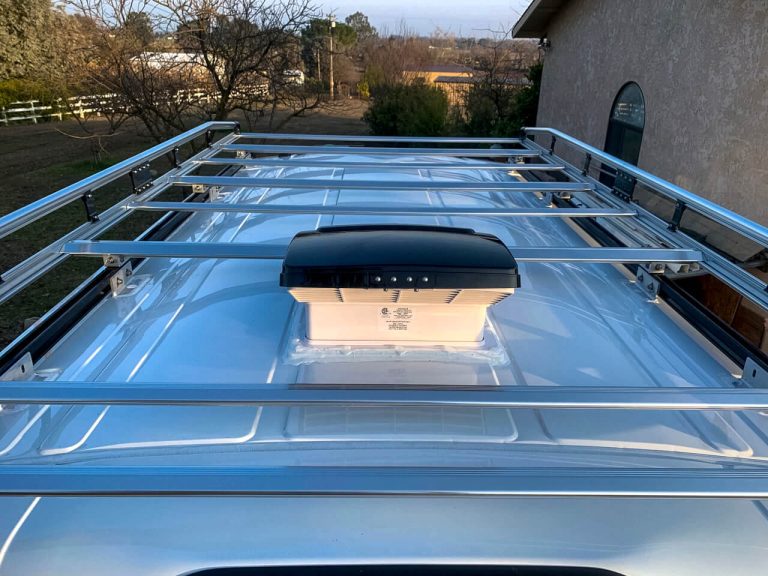
When we installed our MaxxAir Fan, we had to move some of the crossbars to accommodate it.
Step 6: Assemble the Alurack Side Rails on the Ground
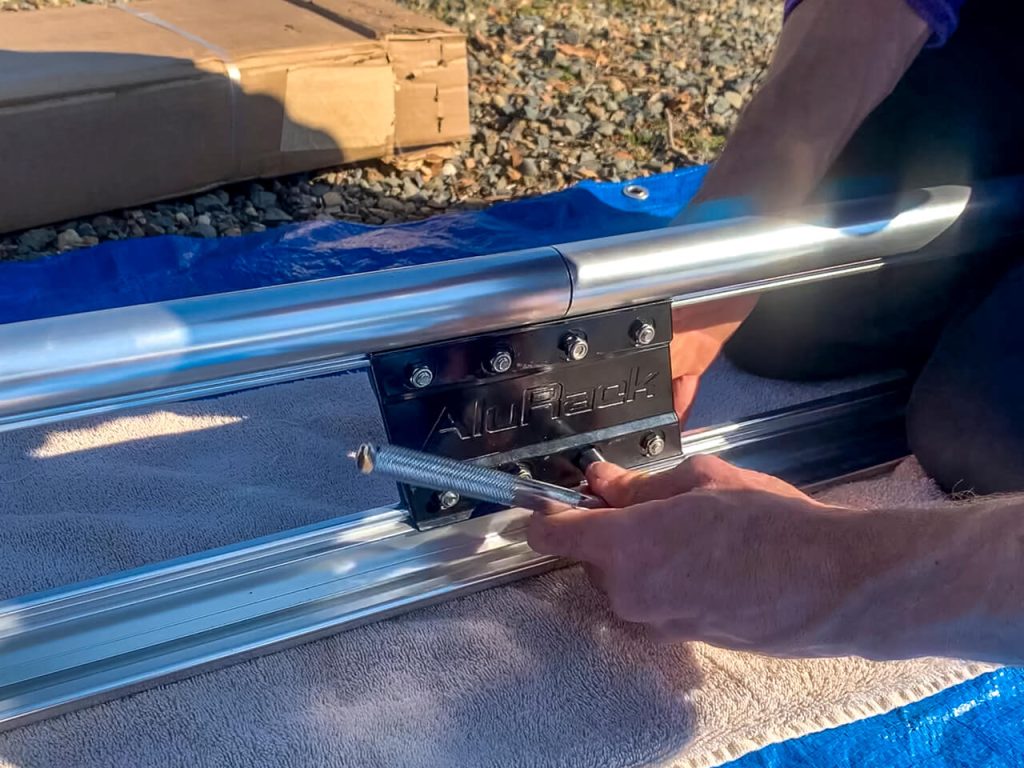
Next, we’ll get off the van roof and onto the ground or a workbench if you have one.
This step in your Prime Design Alurack installation is fairly straightforward.
You’ll want to start by assembling the side rails.
Honestly, I’m not sure why this needed an entire instructions packet. The key here is to make sure you align the trapezoid correctly and use all the bolts.
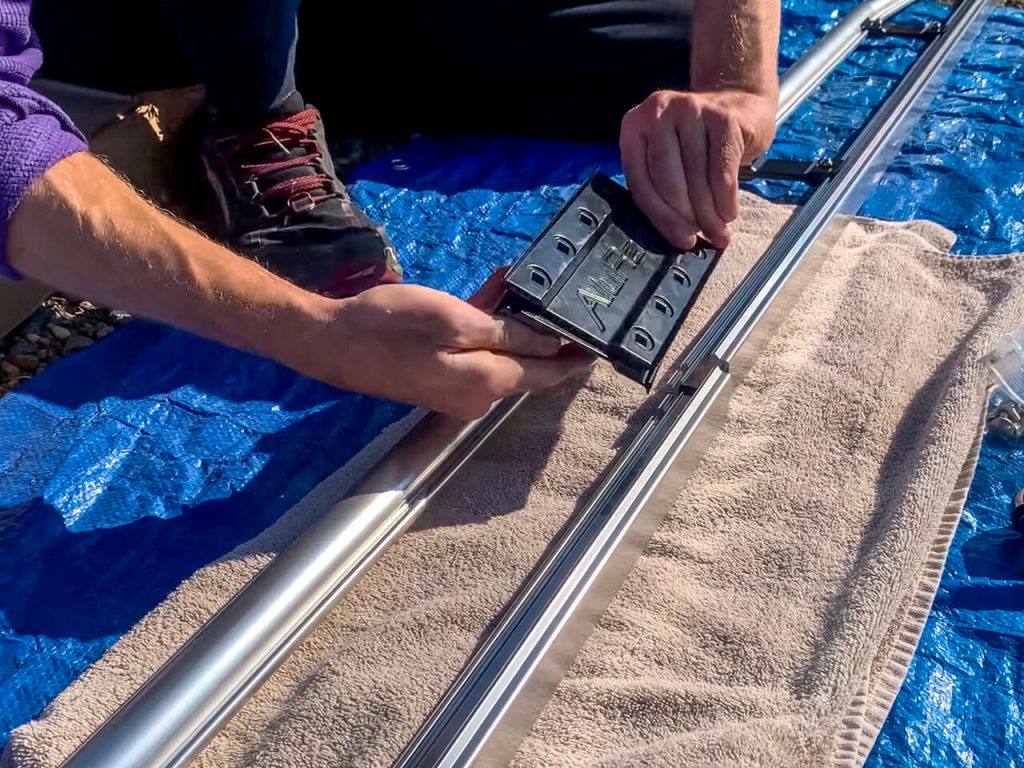
Step 7: Assemble the Cross Bars to the Side Rails on the Ground
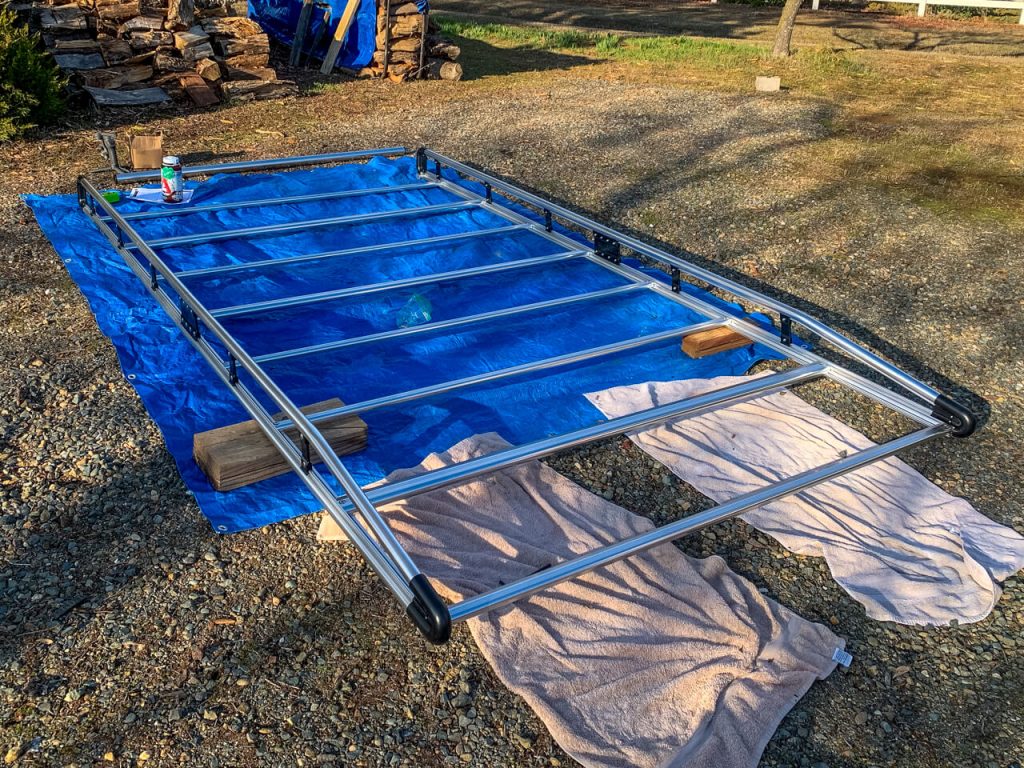
Before we add the cross bars, we’ll grab the strip nuts and slide them into the side rails.
You’ll need as many strip nuts as you have crossbars, plus the roller bar if you want it.
Add the same number of strip nuts to both side rails.
Next, you’ll add the roller brackets using a cap head bolt and a locking washer. We found it helpful to use the long end of an Allen wrench to align the strip nut with the roller bracket (as well as for the crossbars).
Now, grab those crossbars finally and place them in order between the side rails.
Pages 4 and 5 of the “Crossbar Module” instructions include the best suggestions of where to place each crossbar and the distances between them. The Ford Transit 148” wheelbase with a high roof and NOT extended is “Ford Transit L3H3” here. (This doesn’t make sense, and it should be L2. However, the Prime Design Alurack decided to start at L2 and go to L4 in this diagram…why…I have no idea.)
We followed this pattern for the initial construction. You can make some adjustments later when you install solar panels and make room for a MaxxAir Fan.
Once you’ve placed the crossbars in, attach them using a cap-head bolt and a locking washer. I found an Allen wrench helpful for aligning the strip nut hole with the crossbar hole.
If you want to add the roller bar, insert the roller tube pin into the roller ends and insert that into the roller bar brackets. We left it off because we didn’t want it.
Step 8: Hoist the Assembled Alurack onto the Top of Your Van & Align Heavy Duty Crossbars with the Rack Mounting Brackets
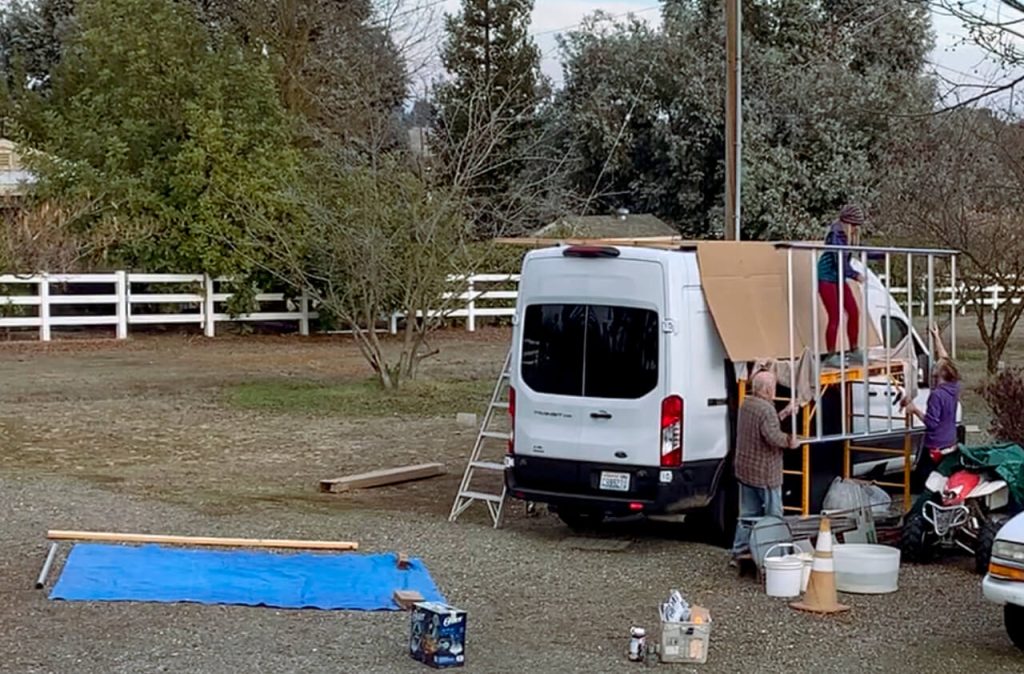
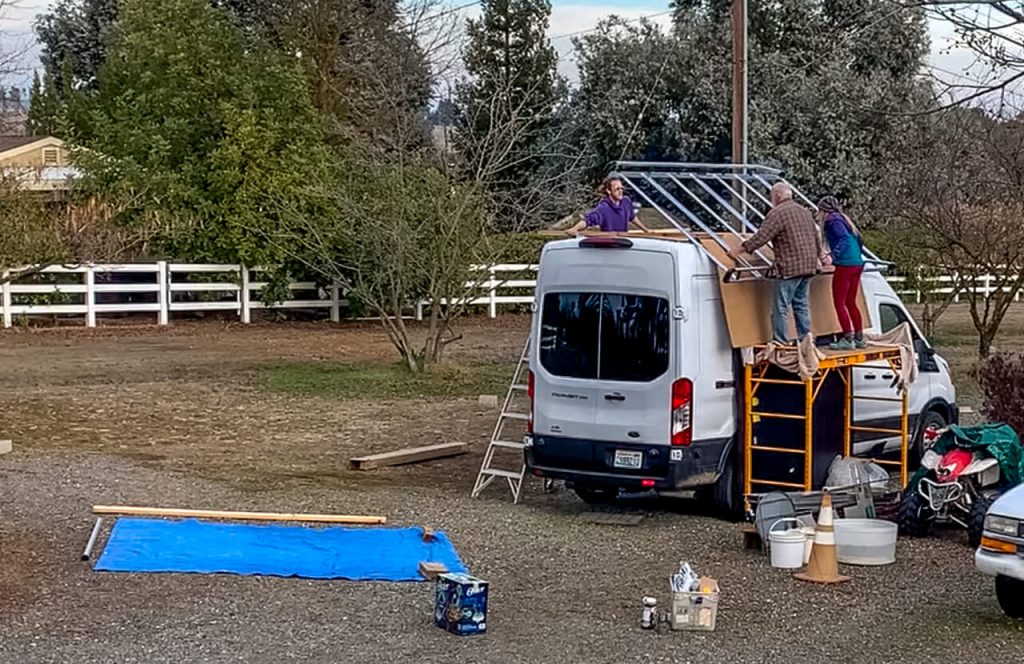
This part was a bit tricky, and I recommend having 4 people to hoist the Prime Design Alurack smoothly.
The good news is that you only need 4 people for 5-10 minutes and then you can do the rest with 1-2 people.
We found that using some spare 2x4s helped us shimmy it up and over better. We also stuck some cardboard on the hoisting side to protect the van’s paint.
Once you and your team have hoisted the assembled roof rack onto the roof, align the roof rack’s heavy-duty crossbars with the F-shaped mounting brackets.
You may need to loosen the side bolts so that they heavy-duty cross bars can slip into the bracket clamp.
Before tightening, double-check the suggested distances. Once you have them correct, tighten the F-shaped mounting brackets around your heavy-duty crossbars.
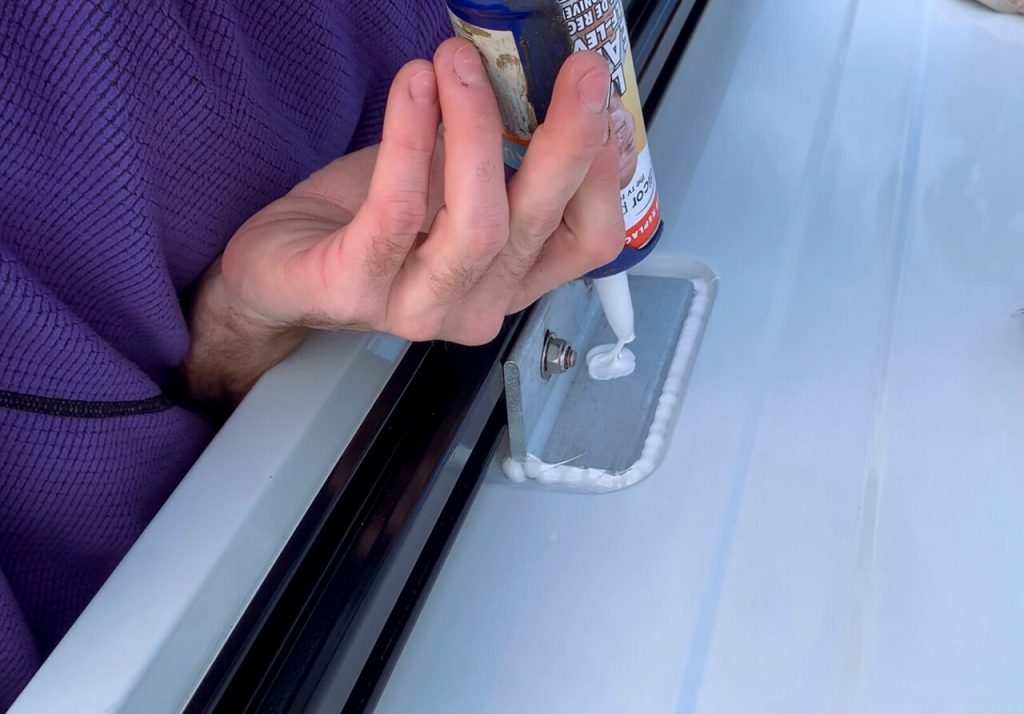
Step 9: Wait Overnight & Apply Lap Sealant After Tightening Channel Mounting Brackets
While waiting overnight is not stipulated specifically in the directions, I recommend it based on our experience.
We placed a tarp over the whole rack and clamped it down to prevent the morning dew from covering everything.
In the morning, we uncovered the Prime Design Alurack and tightened all the bolts holding the channel mounting brackets to the van.
Surprisingly, a third of them needed to be tightened an extra quarter turn. We suspect this has something to do with the foam pads compressing under the weight of the roof rack.
After tightening the bolts, apply Dicor Lap Sealant around every channel mounting bracket AND on top of the attached bolts.
Because Dicor Lap Sealant is self-leveling, after a full day of drying, we went back on day 3 for a second coat.
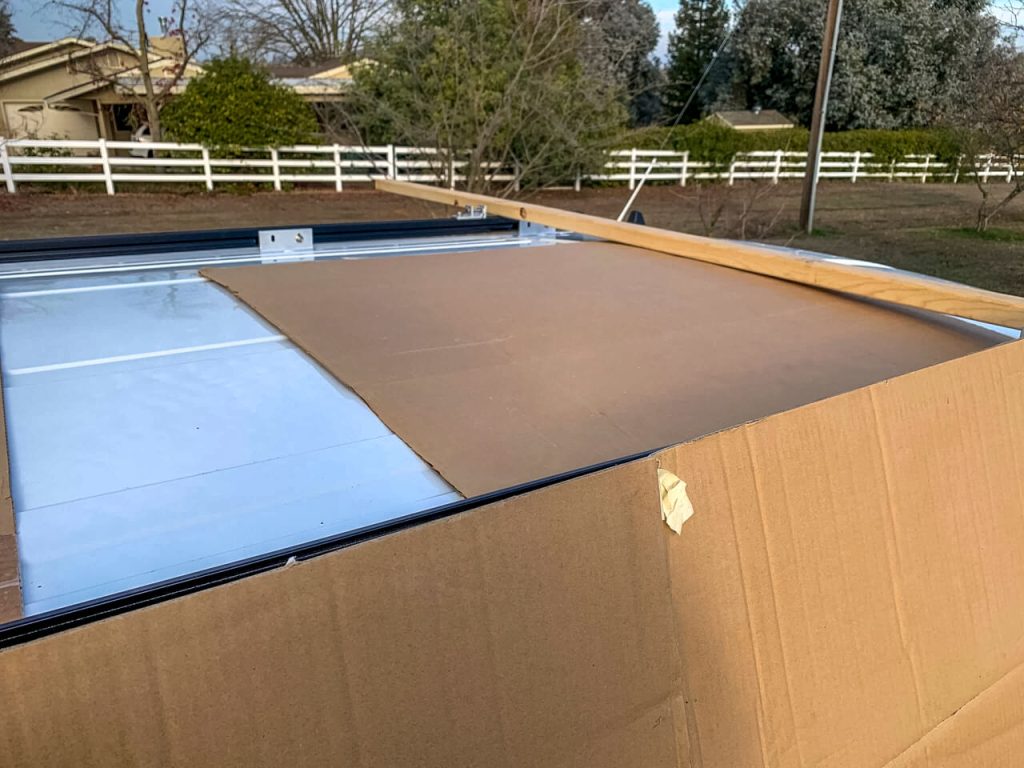
Step 10: Adjust Crossbars as Needed When You Add Solar Panels, Fan, or Deck.

As you continue your van build, adjust the cross bars as needed. We found this process fairly easy as we adjusted it around our MaxxAir Fan and our Solar Panels.
Hidden in the directions, Prime Design does NOT recommend more than 24 inches between the crossbars and the roller bar. Other than that, they say to adjust as needed.
You can even contact the company for extra crossbars if you need more support in one area. We added an extra heavy-duty crossbar to support in the back to hold our van deck!
3-Year Review: Prime Design Alurack for Ford Transit

We have lived in our Ford Transit van for 3 years now with the Prime Design Alurack installed.
Toward the end of our van build, we not only added an extra heavy-duty crossbar across the back, but we also ditched the small channels in the back for longer ones. To do this, we ordered a set of larger channels and cut them to the size we wanted. Modifying the rack allowed us to properly support a deck in the back of our van.
The Prime Design Alurack has met all of our needs in a cargo van roof rack over the 3 years we’ve used it.
However, we do use a weather app to predict high winds and avoid driving on those days. We believe it does not help us out in 30+ mph winds. In this case, a lower-profile van roof rack would do better.
While driving, it does not rattle or whistle in the wind. It’s more of a feel, per se, of extra drag.
Would we trade up? Possibly. But, it’s not a priority.
Final Thoughts
If you’re looking for a solid cargo van roof rack, the Prime Design Alurack is a good deal for those on a tighter budget.
It’s built to withstand the abuse of construction ladders day in and day out, and it has proved durable over the three years we’ve used it.
We think it will add a little element of stealth depending on what you do with the rest of your van build (windows, bikes, etc).
If you’ve had an experience with this rack, drop a comment below if you have something to add!