How to Use the Seek App for Nature Journaling
In this post, I will outline how to use the Seek App by iNaturalist in your Nature Journal. First, I will describe what the Seek App is. Second, I will walk you through how to use the app to help you identify plants, birds, mammals, amphibians, fungi, and more. Third, I will explain how to use the Seek App in conjunction with your nature journal. Lastly, I will help you find the app. Let’s get started!
List of Contents
What is the Seek App?
Seek is an app by iNaturalist. Using crowd sourced data and image recognition technology, Seek assists users in learning more about their natural environment. To accomplish this, iNaturalist created the Seek App as a tool for users to properly identify a host of natural creatures.
The App is a fantastic tool to learn more about the natural world around you by combining new technologies.
*I am not sponsored by the Seek App, but I am an Amazon Affiliate. This means that if you purchase something from Amazon after clicking an outbound link to them, I may earn a small commission on qualifying purchases at no cost to you.
What can I identify with the Seek App?
The App can identify a wide variety of natural creatures. For example, the categories include: plants, birds, insects, mollusks, arachnids, fungi, amphibians, fish, reptiles, mammals, and “other species.” Thus far, the only “other species” that I have found is the common earthworm.
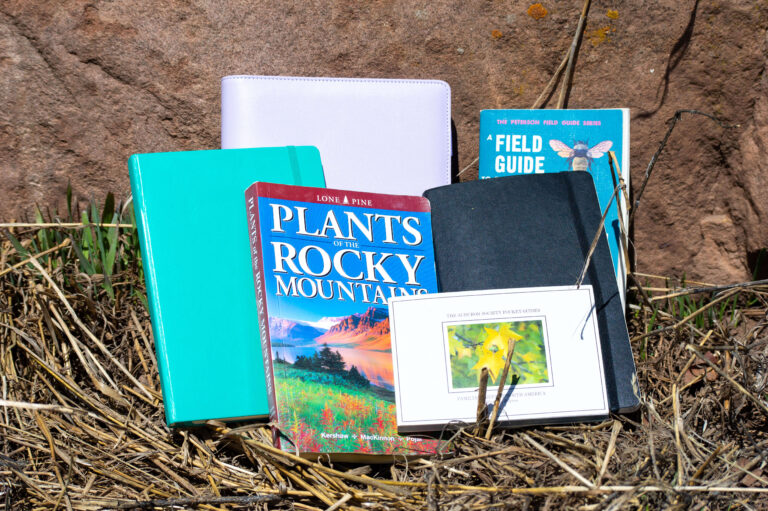
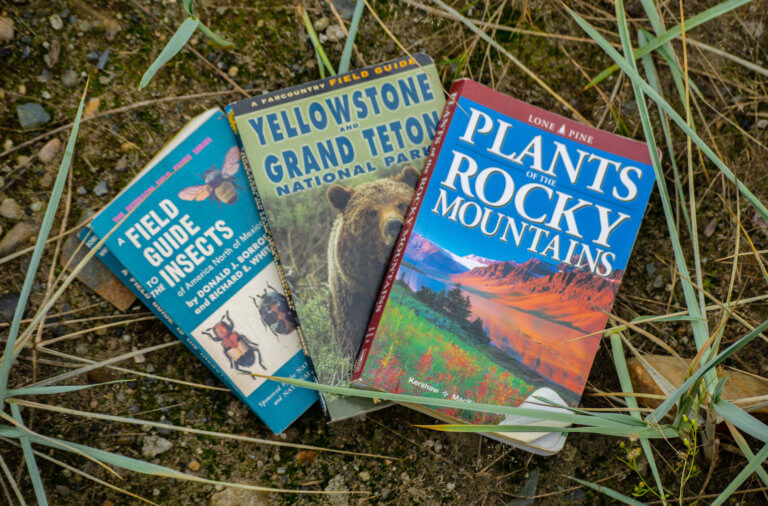
Sometimes, the app will only identify to the class, order, family, or genus, but not all the way to the species. However, this is still valuable information to help you on your identification quest. This information makes looking through a field guide significantly less intimidating. With even the information to order or family, you can use a field guide to further your search. Yes, physical field guides are still useful! Here are four of my favorites that I use to accompany this app!
Step-by-Step Instructions to Use the Seek App
Step 1: Open the Seek App
So, I’ve convinced you to download the App. Maybe you already downloaded it and then you found this post. Either way, let’s start by opening the app. I recommend linking Seek to an iNaturalist account because then you can tap into a network of nearby people who also like to naturalize.

Seek App Opening Screen 
Seek Home Screen
Step 2: Allow Seek to view your location
You can do this during the set-up or from the setting section of your phone. I allow it my location “while using the app only.” If I am not using the app, it won’t track my location. However, while I am seeking information about a species, this helps immensely.
Once you begin observing species, the location helps properly identify the species. Because the app understands the region in which species usually occur, it will be better able to help you.
Moreover, if you have linked your Seek App to an account with iNaturalist, it will post across. Without the location, iNaturalist cannot add an observation for others to verify.
Step 3: Click the Menu to Explore
The menu button has three horizontal lines. On the iPhone version, the menu is located at the bottom left of the screen.

My Observations
First, let’s click the “My Observations” to start. At the very top, a search bar exists to help you locate a past observation. I use this section the most. This becomes more handy with more observations as a method to find what you have observed faster. Below that, you will see categories for “plants,” “birds,” insects,” “mollusks,” and more. All of your past observations will show up in these categories for easy retrieval. You can tap these categories to show all or hide at the right hand side of each category. This helps if you want to examine a few insects you observed, but have 30 plants in the way.

Challenges
Second, let’s click the “Challenges” section. Each month, the Seek App creates a new challenge for its users to test their skills. For example, the challenge for the month of November is: “Adaptation Challenge.” If you click on the challenge, it will explain the parameters. This challenge looks for species who have adapted to human environments. If you click, “start challenge,” you can use the imbedded camera feature (explained in the next section) to add observations. Completing the challenge will give you a boost of self-confidence and a badge. You can also complete any past challenges you’d like to try as well.

Achievements
Third, let’s click the menu again and select “Achievements.” This section of the Seek App makes it a little more fun. It creates “badges” for you to earn based on criteria like number of species observed, when you observe your first species in a new category, or challenges you have completed. You’ll see two sections: one section is for badges based on species, and one section is based on challenge badges.

Step 4: Go Back to “Home” and Click the Camera
This is where I spend the bulk of my time on the Seek App. When you go for a walk, this is the section you will use on the go.
Once you click the camera, the Seek App will prompt you with three important reminders. Yes, this will come up every time you pull up the camera. It is important to remember to understand your surroundings. For example, you will want to watch for cars before crossing a road to identify a plant. The second reminder tells you to not eat anything you find. While you may find edible plants, it is important to do further research before eating them — especially when it comes to mushrooms. Lastly, it reminds you to respect the wildlife that you’re observing. If we want wildlife to stay wild, we cannot bait them with food, destroy their habitat, or habituate them to humans. This will all hurt wildlife in the long run.

Once you click, “continue,” it brings you to the camera which you have allowed the Seek App to access. It tells to you to “keep scanning the environment for organisms to identify.” Now, all you have to do is find the nearest organism and point the camera toward it. I recommend trying this on a plant first because it won’t move. Frequently, you will need to get a different angle for the Seek App to come up with a species identification. Sometimes, it can easily identify an organism down to the order or family, but has trouble identifying down to the genus and species.
Most times, if the Seek App cannot identify an organism from your first angle it can from a second, third, or forth angle. For example, I have noted that when identifying ferns, it often cannot identify to the species until you position the camera underneath for a view of the spores. If I position the camera on top, it identifies it as a fern, but cannot go further.
Once it recognizes a species, the identification blinks for you to take a photo. Take the photo, then examine the resources it provides. It will take you to the wikipedia article for more information, which is a good start, but going to your trusted field guide is better. At this point, you can also scroll to the bottom where you can “post to iNaturalist” and contribute to the image recognition technology. Basically, the more images added for a given species help the App identify them in the future!
It is important to note that sometimes, especially on mosses for some reason, the Seek App can only get so far. I find that when that happens, it get it to go as far as possible, take a photo there, and go to my four most helpful field guides.

Using Seek App for your Nature Journal
Now to how the Seek App can help you in your nature journaling adventure. This part depends on your journaling style. Do you nature journal outside as you see organisms? Do you keep a species list outside while you naturalize? Or do you scribble quick notes, then work on your journal inside?
Using Seek to Journal Outside
If you set out for a saunter with all of your journaling supplies, the Seek App can help you on the spot. Once you’ve found an organism, let’s say a plant, and a good spot to sit, you’re ready to go. Use the Seek App to identify your plant, then go to your journal. Then, in your journal with the identification, start a spread on your species.
While sitting in front of your plant, you can note if the leaves are opposite or parallel, what other plants grow nearby, does it like the shade better, etc.
Using the Seek App to Create a Species List
While the app does hold all of your observations in categories, you can also have a small notebook which has a list of species seen per day. I find this option works best for when you want to go for a walk and your primary goal is exercise with some species identification sprinkled on top. Keeping a species list is a great entry into nature journaling.
I like to keep a species list in my nature journal. However, on my walk, I usually just have a small notebook or use my phone notes to write down what species I observed.
Using the Seek App and Nature Journaling Inside
This is my preferred method and I usually use this in conjunction with a species list. For instance, while out hiking, I often see a lot of trees. During my hike last week, I saw a lot of conifers. I felt particularly drawn to the cedars that I saw, but I had no idea what type of cedar stood in front of me.
I pulled out my phone and clicked on the Seek App. Using the camera, I angled the phone in a few directions until Seek identified the tree as a Red Cedar. From there, I switched to my Notes App where I had a species list for the day going and added Red Cedar to it.
After my hike, I sat down with a warm cup of apple cinnamon tea and pulled out a field guide for Trees and Shrubs of the Pacific Northwest. From the comfort of a table, I began a spread for the Red Cedar from the photos I took on the hike and from the information in the field guide. For my sketches, I often sketch from a photo that I have taken. It may not be the ideal method, but my brain understands the shapes better using a photo usually.
Where to Find the Seek App
You can find it in the Apple App Store or Google Play.