Bed Frame: For Once, An Inexpensive Project!
Fixed Bed Frame
The one thing we knew was that we wanted a fixed bed. We did not want a convertible dinette. That meant that we had to come up with how to make a solid bed frame.
We had a fixed bed frame in our last van Glen. But, we did it very basically with a few 2x4s, a piece of plywood, and a some hinges. From that, we learned a few lessons. First, treat all the wood with waterproofing, stain, or paint. Second, provide ventilation in the platform. A solid piece of plywood sounds like a great idea, but whatever mattress you get needs air. This was one of the only plans we wanted to keep when we discussed the van layout.
A lot of people enjoy the dinette option. We rented a van with that set-up in Iceland last year with my Mom and our friend Crosby. Having to only convert it back and forth for 10 days, it wasn’t bad. However, for the long term we did not want the prospect of doing that every day.
Finally, we wanted to hide all of our “systems” under the bed and have more storage space. We wanted to be off the grid for longer, so we needed two batteries and a larger water tank. We will house the electrical system around one wheel well and the water system around another. That will leave the space in the middle for adventure gear like paddle boards!
The Research
As easy as it sounds to just decide on a fixed bed, the research always continues. Many options exist to create the same outcome. YouTube University and various blogs helped us decide on a method.
We explored many options. First, the 80/20 aluminum set-ups are becoming increasingly popular, especially on YouTube. While this idea is light and strong, it requires lots of connectors and something wholly different to learn. Plus, once you start using 80/20 metal to frame the bed, then switching to wood for benches and the kitchen galley gets interesting. Moreover, it was a pricy option.
Some people had floating bed frames custom welded. This also could get quite pricy depending on the design.
Others built all sorts of wooden frames. These varied drastically in workmanship, design, and price. Honestly, it was a mountain to dig through. Eventually, we came across a newer idea floating around YouTube using pieces from Ikea.
Materials We Used for Our Bed Frame
- 2 x 10 x 12 Douglas Fir Board
- 13 M6 Riv Nuts*
- 13 M6 2.5 in Bolts
- 18 Wood screws
- 18 Washers
- 3 Ikea Skorva center support beams
- 6 Ikea metal holders for Skorva beams**
- Luröy Double Bed Slats from Ikea
*We bought a specific tool for this online for M3-M10 riv nut holes. You want long handles to get enough leverage. Ours is 14 inches.
**Go to the “as is” section near the checkout and say you’re making your own bed frame and ask for them. Otherwise, they are in the bed kits, not with the beams.
How We Put Part 1 of the Bed Frame Together
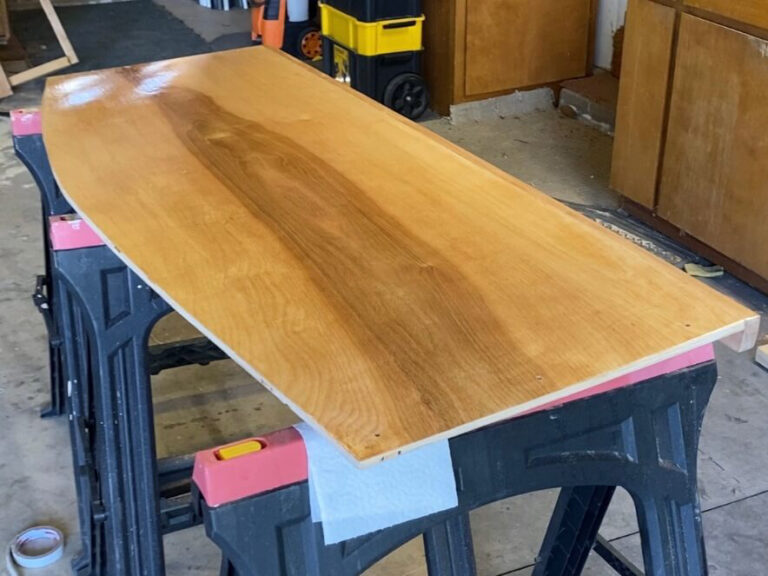
First, we measured and cut the 2x10x12 into two 54” sections with a little leftover. We bought an Avocado Green Full Mattress for the van to sleep sideways. The 54” is based on the width of that standard size mattress.

We needed the 2×10 because of the structure of the van. The existing holes for bolts rested far lower than we wanted the base of the bed to sit. The 2×10 raised that up considerably.
Second, we marked where we would need to predrill holes for the bolts. This is important because you don’t want to push the wood through the riv nut. Once we marked them, we drilled the holes. Karma also sunk them in a little bit to make the bolt head flush with the wood.

Third, we treated the wood with Vermont Natural Coatings. This is to protect the wood for the long run.

Forth, we got to use our new riv nut tool! Most of the holes already in the Ford Transit are M6 (unlike the Promaster with more M8s). Basically, the riv nut goes onto the top of the tool with the wings out. Then, you place the riv nut into the hole and close the tool’s wings. The difficulty of that task surprised us.
We added these riv nuts in a line of holes that already existed in the van. On the 148-inch wheelbase long length, this meant it held 7 on one side and 6 on the other.
Fifth, we held the board in line with the riv nuts and added the bolts in place. We used washers to widen the support.
Part 2 of the Bed Frame
Once we had bolted in the 2x10x54” sides, we measured out the distance for the crossbeam hardware. This hardware consisted of a metal plate on which the crossbeams would rest. We measured and screwed them in with three wood screws each.


The Skorva beams then just extended to fit between the two sides of the van. This makes them ideal for any size of van width because they can stretch. We placed them in and could easy sit on them each individually.
Next, we purchased the Ikea bed slats for a double bed. We will attach those to the Skorva beams with wood-to-metal screws at a later date.

Unexpected Part 3 of the Bed Frame
Classic! A van project that needs a modification! Ha! We’ve heard this before, right?!
When we saw this done on a Promaster online, they used M8 bolts to fit into the existing holes. However, the Promaster had M6 holes. This gave the boards just a slight amount more wiggle. Wiggling is not the best in vans because it creates noise.
While we knew it would have very sturdy support in the front when we built the kitchen galley and bench, we needed something in the back. Conveniently, another M6 hole existed right above the 2×10 in on the back pillars. Inconveniently, it did not sit where any average bracket would have a hole.
Perplexed, we looked around the garage. Karma’s brother-in-law had an old piece of angle iron in a pile. Conveniently, it was 1.5 x 1.5 inches (the same width as a 2×10). When we asked if we could make two brackets from it, he agreed.

Karma clamped the angle iron down and used a Sawzall to cut two brackets. Once cut, he had to use a Dremel tool to sand off the rust since it was left outside. If the rust had become thicker, he may have had to grind it off.
After measuring where the M6 hole was, Karma drilled a hole for it and two for screws into the wood. We painted it with Rustoleum to prevent rust and screwed the bracket into place. We did add an extra foam pad that came with the roof rack. No wiggling. Perfect.


Why the Bed Slats Are Not Currently in the Van
We really wanted the bed frame in place without the bed platform for now. Since we still need to run electrical wire and insulate, the center beams and slats would get in the way. However, we needed to decide on the height of the bed in order to properly organize our electrical system underneath the bed. Knowing the bed frame base height will help us efficiently use the space underneath for electrical.
While the center beams and slats are not in the van, it will not take us long to add them when the time comes. For the meantime, it was a great project that really helped us plan the big systems of the van: electrical and water.
So How Expensive Was It?
As far as van projects, not too bad!
- Skorva beams – $15 each ($45 for all three)
- Ikea Double Bed Slats – $30
- 2x10x12 – $20
- Assorted Riv Nuts – $20.83
- Bolts – $12
- Riv Nut Tool – $40 (To be used throughout the van build process)
Total: $167.83 with the riv nut tool. If you already had that $127.83. Not too shabby!
If you have any questions, drop a comment below 🙂